1. Produk verbyview
The NEJE JZ-5 is a compact and efficient 500mW USB engraving machine designed for various carving and cutting tasks. It features a unique frame and weak light automatic positioning system for precise and easy image alignment. Capable of 512x512 high-resolution prints, it can produce 3D and gradient effects on soft materials. This engraver offers fast performance, being up to 10 times faster than some alternatives, and can operate offline when connected to a 5V 1A power source via its two USB ports.
The machine is constructed from durable Acrylic, Aluminum, and Stainless Steel, ensuring stability and precision. It supports Windows 7, Windows 8, Windows 10, and Windows XP operating systems.
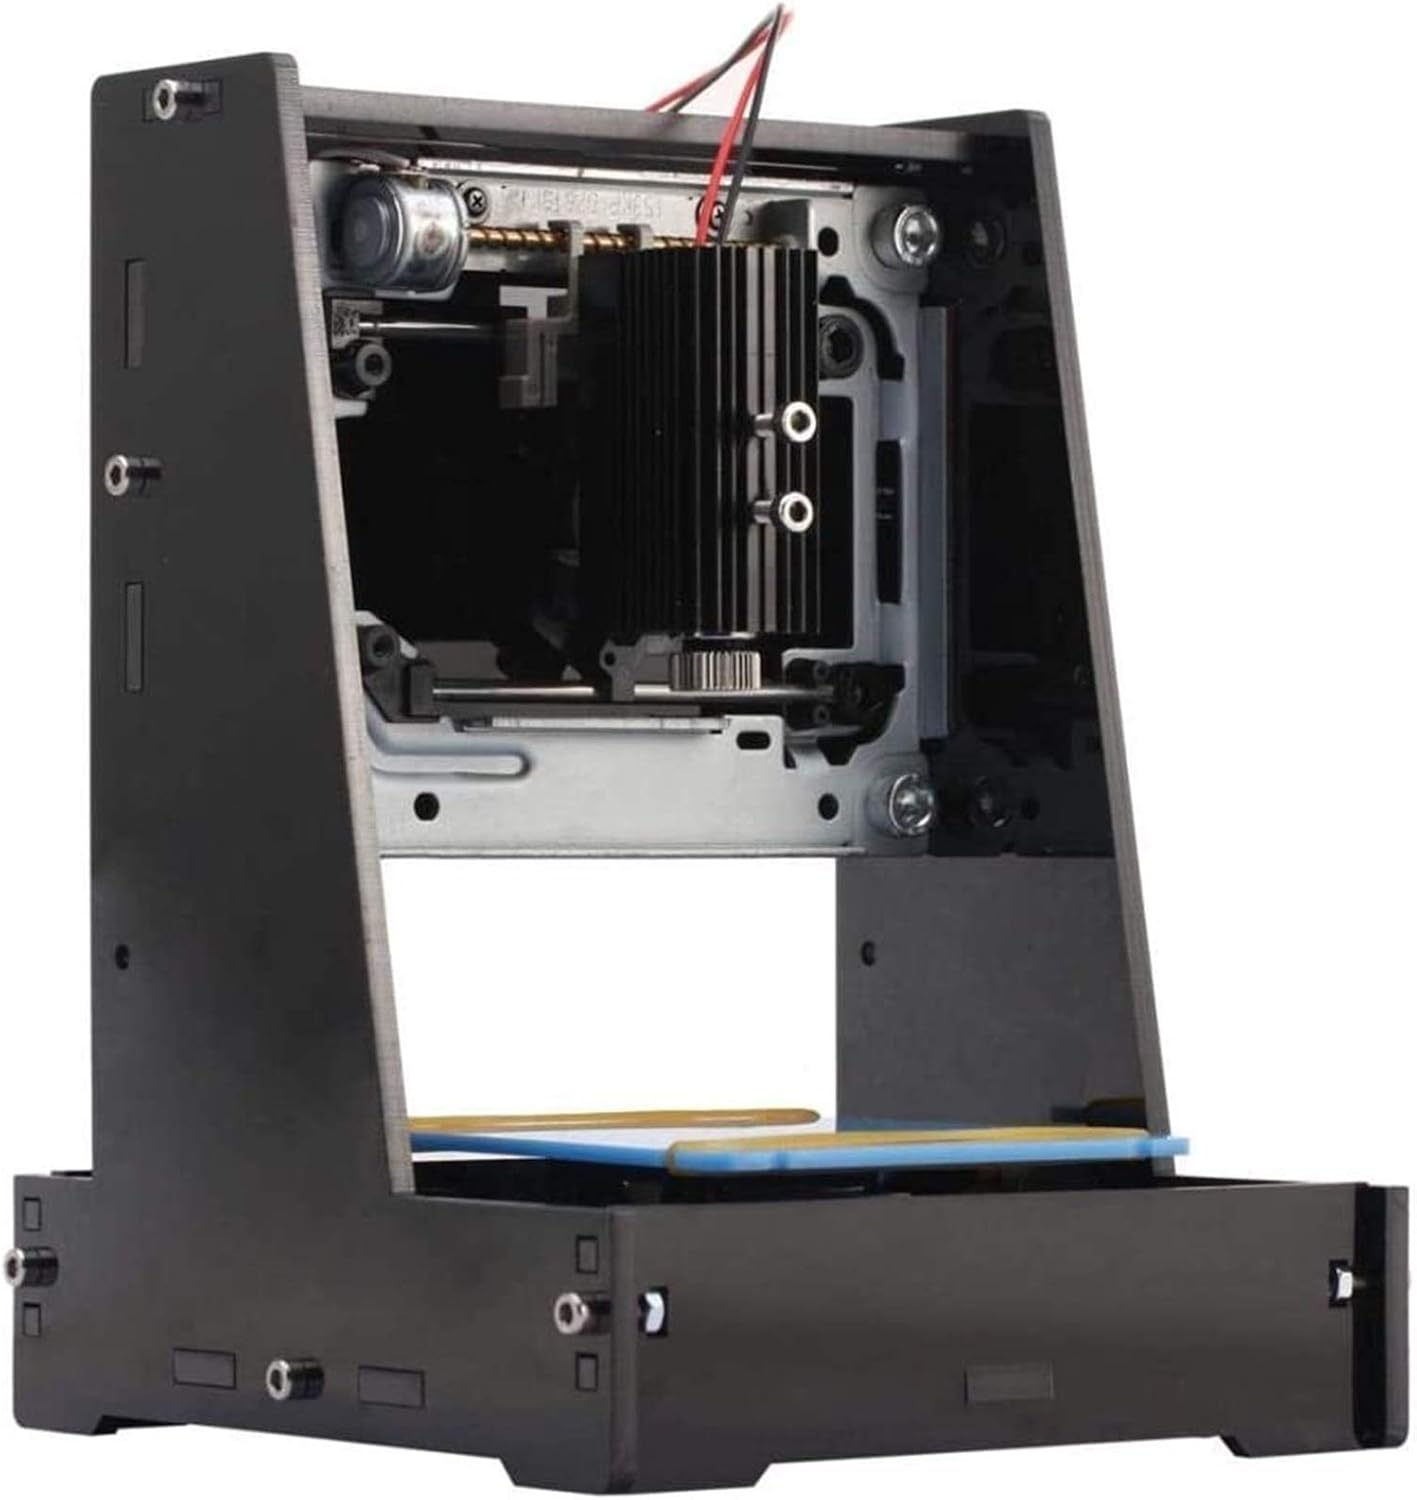
Figuur 1: Voorkant view of the NEJE JZ-5 500mW USB Engraver.
2. Pakketinhoud
Verifieer asseblief dat al die items wat hieronder gelys word, in u pakket ingesluit is:
- 1 x NEJE JZ-5 Engraving Machine
- 1 x Protective Glasses
- 1 x Allen moersleutel
- 2 x USB-kabels
- 1 x 1Gb TF Card (includes User's Manual and installation software)

Figure 2: NEJE JZ-5 Engraver and its accompanying accessories.
3. Opstelinstruksies
Follow these steps to set up your NEJE JZ-5 engraver:
- Prepare Your Computer: Ensure you have a computer running Windows 7, Windows 8, Windows 10, or Windows XP.
- Connect the Engraver: Connect the engraver to your computer using the two provided USB cables. Alternatively, for offline use, connect the two USB ports to a 5V 1A charger or power bank.
- Installeer sagteware: Insert the 1Gb TF card into your computer. Locate and install the engraving software from the card.
- Begin sagteware: Start the engraving software. It should automatically detect and connect to the engraver via the USB port. If not, manually select the connection within the software settings.

Figuur 3: Kant view of the engraver, illustrating its compact design.
4. Bedryfsinstruksies
Once the engraver is set up and connected, you can begin your engraving projects:
- Select or Import Image: Within the engraving software, choose an existing image or import your desired image for engraving.
- Edit and Position: Edit the image as needed. Ensure the image is positioned correctly within the print area displayed in the software. The unique frame positioning feature helps in precise alignment.
- Adjust Focal Length: For optimal engraving quality, adjust the focal length of the laser. This is typically done by rotating a knob on the laser module until the laser dot is at its smallest point on the material surface. Always wear the protective glasses when adjusting the focal length or operating the engraver.
- Begin graveer: Once the image is prepared and the focal length is set, initiate the engraving process from the software.

Figure 4: Adjusting the focal length for precise engraving. Protective glasses must be worn.

Figure 5: The engraving platform where materials are placed for processing.
5. Onderhoud
To ensure the longevity and optimal performance of your NEJE JZ-5 engraver, regular maintenance is recommended:
- Skoonmaak: Periodically clean the engraving area and the laser lens to remove dust and debris that may accumulate during operation. Use a soft, dry cloth.
- Laser Module: Avoid touching the laser lens directly. If cleaning is necessary, use a specialized lens cleaning solution and cloth.
- Berging: When not in use, store the engraver in a clean, dry environment away from direct sunlight and extreme temperatures.
6. Probleemoplossing
If you encounter issues with your NEJE JZ-5 engraver, consider the following common solutions:
- Engraver Not Connecting:
- Ensure both USB cables are securely connected to your computer or power source.
- Verify that the software is running and attempting to connect. Try restarting the software or your computer.
- Check your computer's Device Manager to ensure the engraver is recognized and drivers are installed correctly.
- Swak Gravure Kwaliteit:
- Adjust the laser's focal length (refer to Section 4).
- Ensure the material is flat and securely placed on the engraving platform.
- Check the image resolution and settings within the software.
- Clean the laser lens if it appears dirty.
- Sagteware kwessies:
- Ensure your operating system is compatible (Windows 7/8/10/XP).
- Try reinstalling the software from the provided TF card.
7. Tegniese spesifikasies
| Kenmerk | Spesifikasie |
|---|---|
| Handelsmerk | NEJE |
| Model | JZ-5 |
| Laser krag | 500mW |
| Materiaal | Acrylic + Aluminum + Stainless Steel |
| Graveerarea | 38 x 38 mm |
| Resolusie | 512x512 piksels |
| Afmetings (ongeveer) | 18 x 13.5 x 13 cm (7 x 5 x 5 duim) |
| Ondersteuning van bedryfstelsels | Windows 7 / Windows 8 / Windows 10 / XP |
| Versoenbare toestelle | Laptop, Smartphone (for power bank use) |
| Item gewig | 1 Grams (product specification) / 0.035 ounces (shipping weight) |
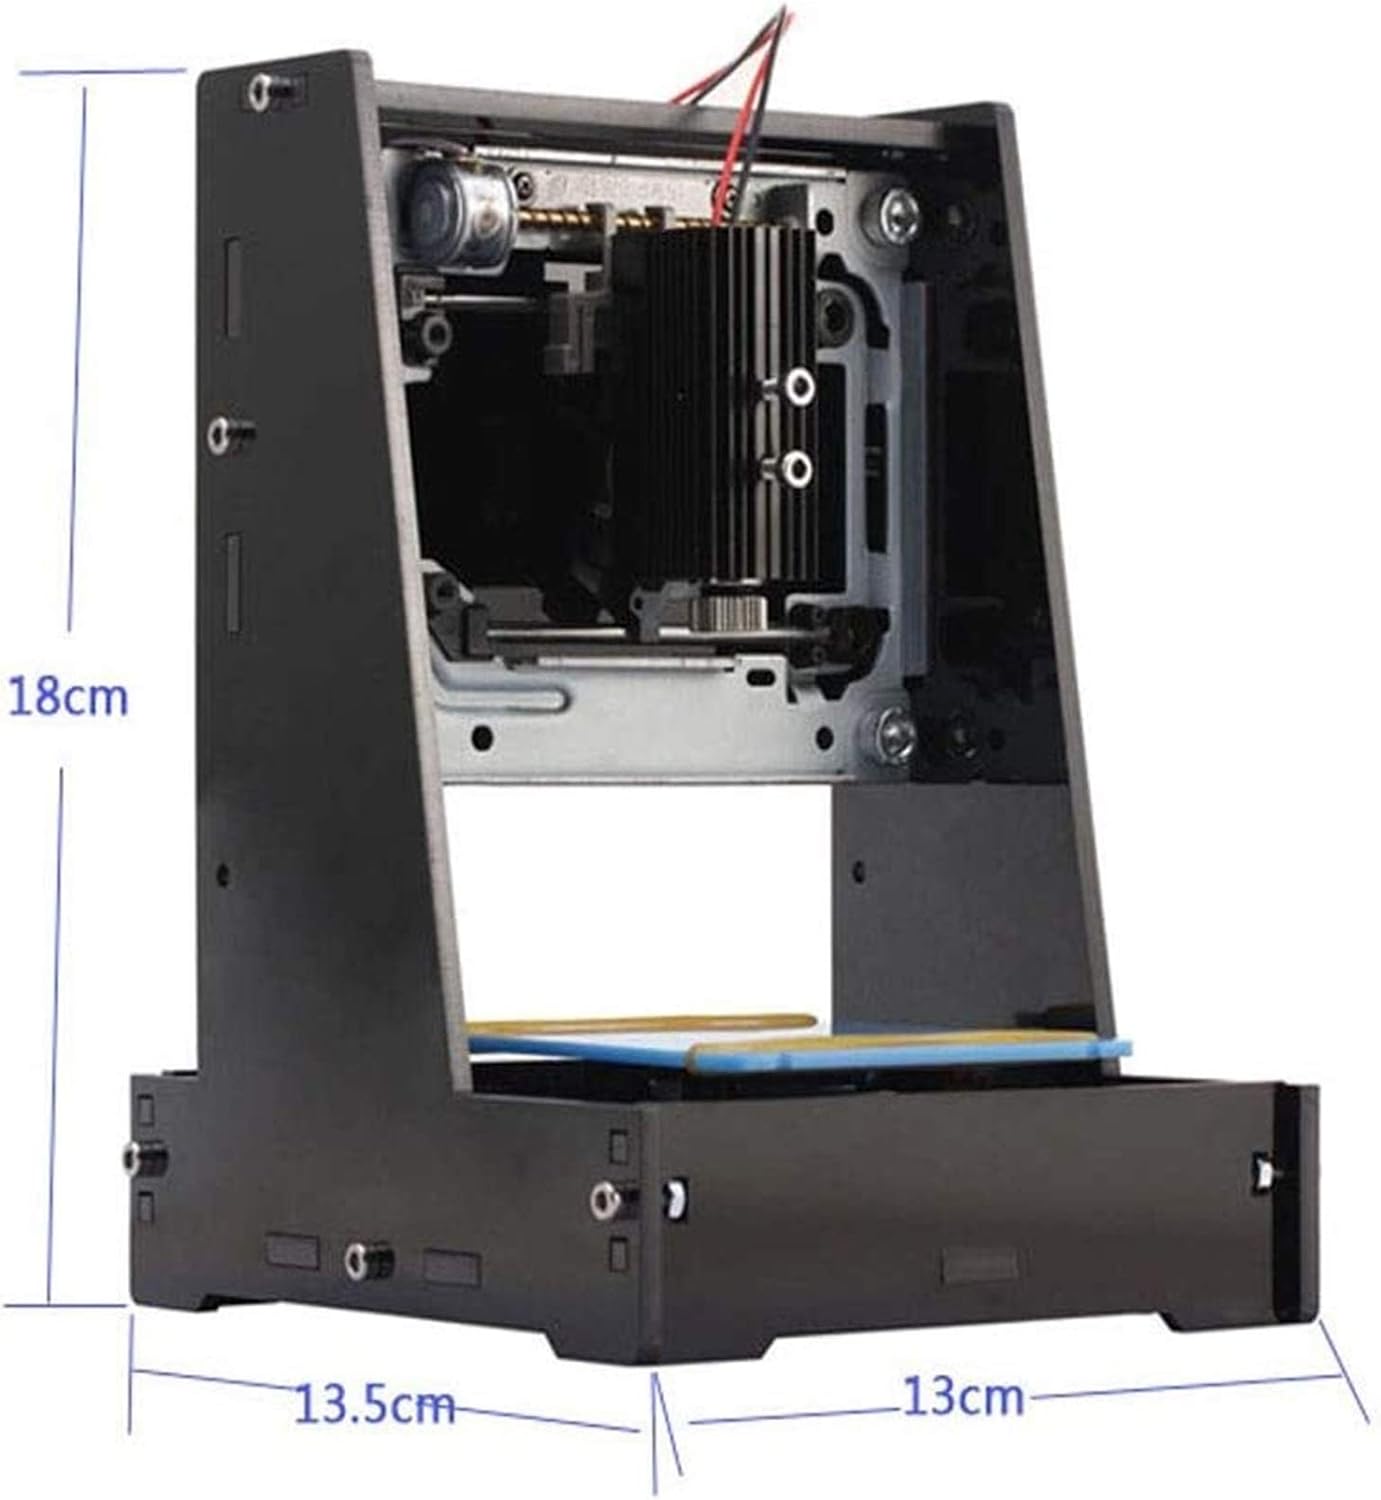
Figure 6: Approximate dimensions of the NEJE JZ-5 Engraver.
8. Veiligheidsinligting
Operating a laser engraving machine requires adherence to safety precautions to prevent injury:
- Always wear the provided protective glasses when the engraver is in operation or when adjusting the laser. The laser light can cause eye damage.
- Moenie direk in die laserstraal kyk nie.
- Ensure the engraving area is well-ventilated, as some materials may produce fumes during engraving.
- Hou die masjien weg van vlambare materiale.
- Do not leave the engraver unattended during operation.
- Hou buite bereik van kinders en troeteldiere.

Figure 7: Protective glasses are essential for safe operation.