Inleiding
The Keychron Q2 is a fully customizable wired mechanical keyboard featuring a compact 65% layout. Constructed with a solid full aluminum frame, the Q2 is designed for easy assembly and offers a premium typing experience. It supports full QMK and VIA programming for extensive customization and features hot-swappable switches for personalized tactile feedback.

Image: The Keychron Q2 Wired Custom Mechanical Keyboard, showcasing its compact 65% layout and blue color scheme.
Opstelgids
1. Pakketinhoud
Voordat u begin, maak seker dat alle komponente teenwoordig is:
- Keychron Q2 Keyboard Kit (Aluminum Case, PCB, Steel Plate, Sound Absorbing Foam, Case Foam, Gaskets)
- USB Type-C na Type-C kabel
- USB Tipe-A na Tipe-C Adapter
- Skakeltrekker
- Sleutelkap trekker
- Skroewedraaier
- Hex-sleutel
- Stabilizers (4 sets)
Note: All tools are typically located at the bottom of the packaging.

Image: Diagram illustrating the contents of the Keychron Q2 package, including the keyboard, cables, and tools.
2. Koppel die sleutelbord
- Locate the USB Type-C port on the back of the Keychron Q2 keyboard.
- Connect one end of the provided USB Type-C to Type-C cable to the keyboard.
- Connect the other end of the cable to your computer's USB Type-C port. If your computer only has USB Type-A ports, use the included USB Type-A to Type-C adapter.
- Ensure the operating system switch (located on the back edge of the keyboard) is set to the correct position for your system (Mac or Windows).
- Die sleutelbord sal outomaties deur jou bedryfstelsel herken word.

Beeld: 'n Nabyskoot view of the Keychron Q2 keyboard with a USB-C cable connected, showing the Mac/Win switch.
Bedryfsinstruksies
1. QMK/VIA-aanpassing
The Keychron Q2 supports full QMK and VIA programming, allowing you to remap keys, create macros, and customize lighting effects. To use VIA software:
- Laai die VIA-sagteware af vanaf die amptelike Keychron-webwerf. webwerf (keychron.com/pages/qmk-via).
- Connect your Q2 keyboard to your computer via the USB cable.
- Launch the VIA software. The software should automatically detect your Q2 keyboard. If not, you may need to import the Q2 keymap JSON file, also available on the Keychron webwebwerf.
- Use the graphical interface to drag and drop functions, assign macros, and configure lighting for each key. Changes are applied in real-time.

Image: Screenshot of the VIA software interface, demonstrating how to remap keys on the Keychron Q2 keyboard.
2. Warm-omruilbare skakelaars
The Q2's PCB supports both 3-pin and 5-pin MX style mechanical switches, allowing for easy switch replacement without soldering.
- Gebruik die meegeleverde sleutelhouer om die sleutelhouer versigtig van die skakelaar wat jy wil vervang, te verwyder.
- Use the provided switch puller to gently grip the top and bottom clips of the switch. Pull the switch straight up to remove it from the PCB.
- Rig die penne van die nuwe skakelaar met die gate op die PCB. Maak seker dat die penne reguit is om buiging te voorkom.
- Druk die nuwe skakelaar stewig in plek totdat dit klik.
- Sit die sleuteldop weer vas.

Beeld: 'n Nabyskoot view of the Keychron Q2's PCB with several switches removed, demonstrating the hot-swappable feature.
3. Keycaps and RGB Lighting
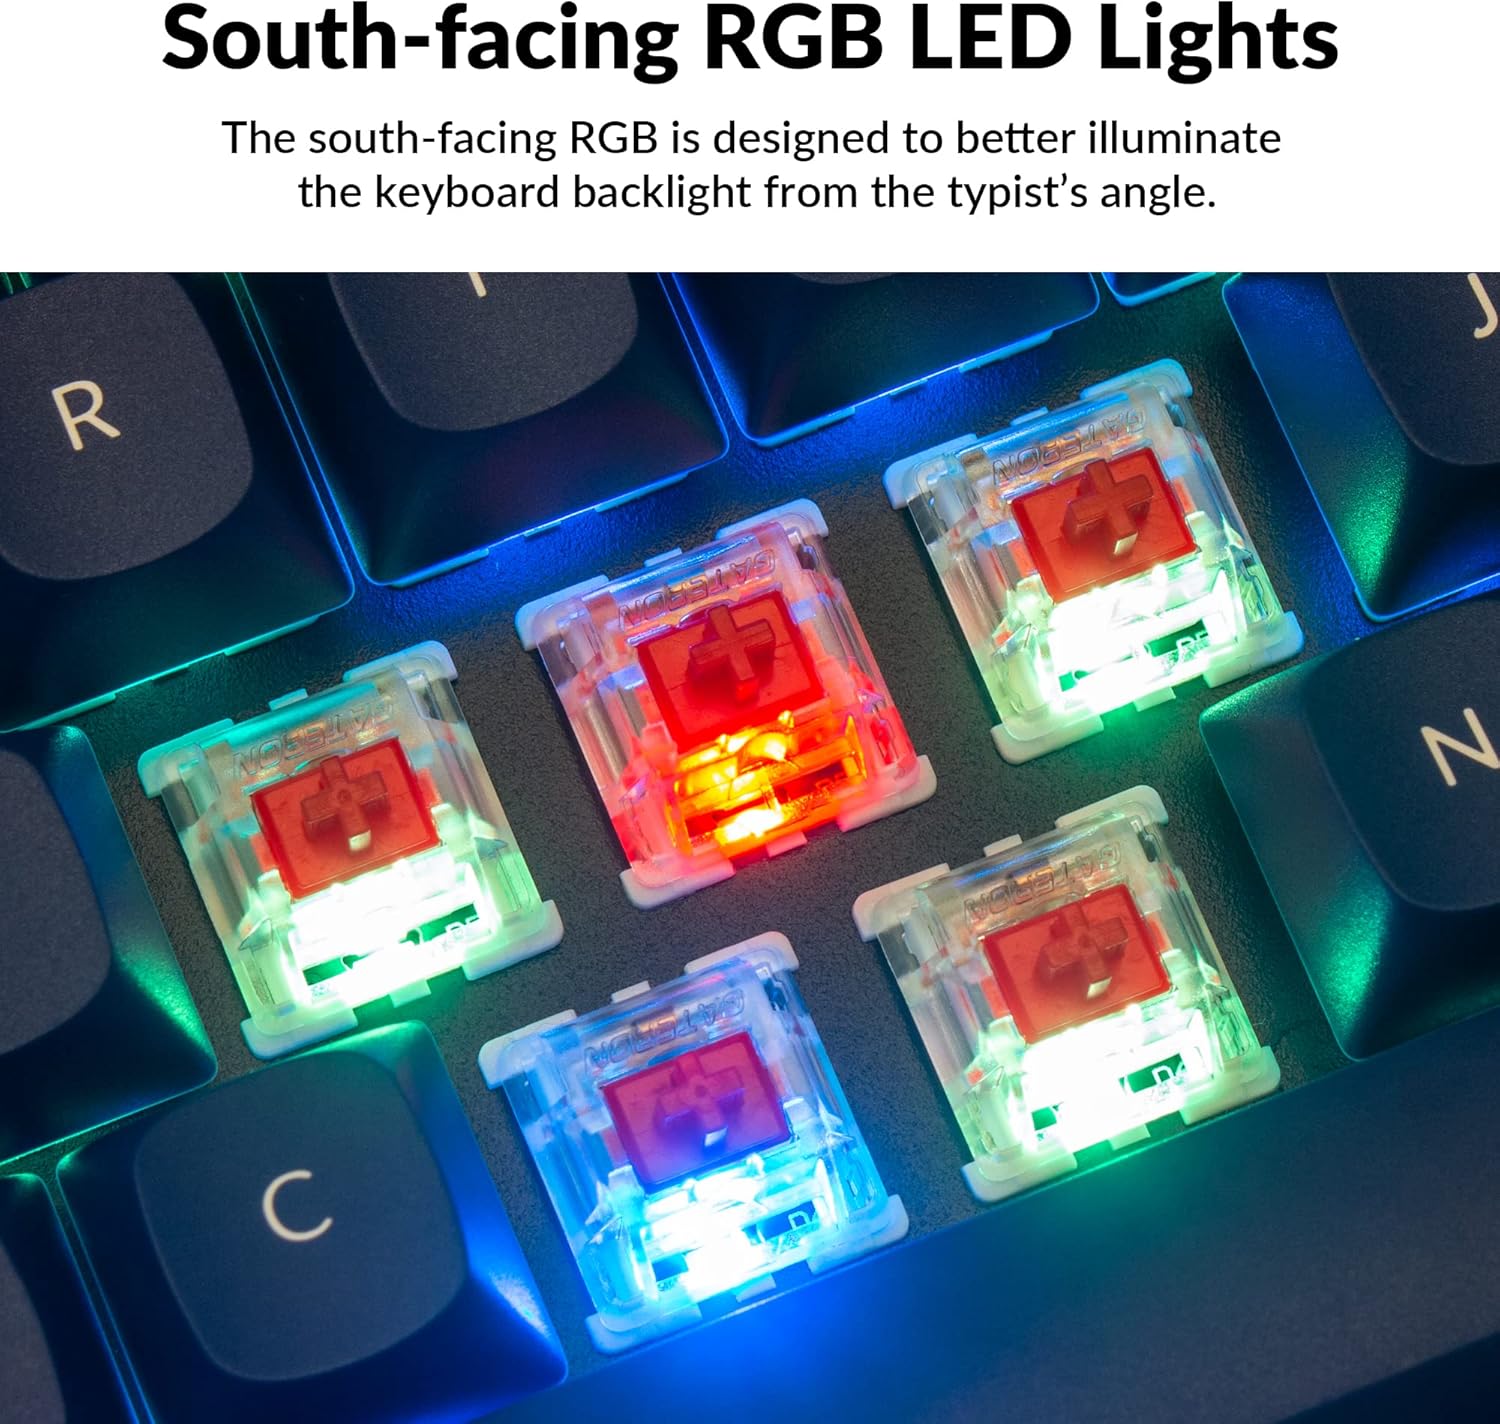
The Q2 comes with premium non-shine-through PBT keycaps, known for their durability and oil resistance. The keyboard features south-facing RGB LEDs, designed to provide better illumination of the backlight from the typist's perspective.
Beeld: 'n Gedetailleerde view of the Keychron Q2's double-shot PBT keycaps, highlighting their texture and legends.

Image: A close-up of the Keychron Q2's south-facing RGB LEDs illuminating the switches from below.
Onderhoud
1. Skoonmaak van die sleutelbord
Gereelde skoonmaak help om die sleutelbord se werkverrigting en voorkoms te handhaaf.
- Stofverwydering: Gebruik 'n blikkie saamgeperste lug om stof en puin tussen die sleutelborde weg te blaas.
- Skoonmaak van sleuteldop: For deeper cleaning, remove the keycaps using the provided keycap puller. Wash them with mild soap and water, then ensure they are completely dry before reattaching.
- Dose skoonmaak: Vee die aluminiumkas af met 'n sagte, damp lap. Vermy harde chemikalieë wat die afwerking kan beskadig.
2. Switch and Stabilizer Maintenance
The hot-swappable design allows for easy maintenance of switches and stabilizers.
- Skakelaarvervanging: If a switch becomes faulty, replace it using the hot-swapping procedure described in the Operating Instructions.
- Stabilizer Lubrication: For optimal performance and reduced wobbliness on larger keys (space bar, shift, enter), the PCB-mounted screw-in stabilizers can be lubricated. This typically involves disassembling the keyboard to access the stabilizers.

Image: An exploded diagram of the Keychron Q2, showing its various components like keycaps, switches, top case, gaskets, plate, PCB, sound absorbing foam, case foam, bottom case, and silicone gaskets, illustrating ease of disassembly.
Probleemoplossing
Algemene kwessies en oplossings:
- Sleutelbord reageer nie:
- Maak seker dat die USB-kabel stewig aan beide die sleutelbord en die rekenaar gekoppel is.
- Verify the Mac/Windows switch on the back of the keyboard is set to the correct operating system.
- Try connecting the keyboard to a different USB port or a different computer to rule out port issues.
- Herbegin jou rekenaar.
- Spesifieke sleutels werk nie:
- Remove the keycap and switch for the non-functional key. Inspect the switch pins for bends or damage. Straighten bent pins carefully or replace the switch if damaged.
- Maak seker dat die skakelaar volledig in die PCB geplaas is.
- Check VIA software to ensure the key has not been accidentally remapped or disabled.
- RGB-beligtingsprobleme:
- Maak seker dat die sleutelbord behoorlik gekoppel is.
- Use the VIA software to check and adjust lighting settings.
- Perform a factory reset if lighting issues persist (refer to Keychron's official support for specific reset procedures).
- Keyboard Disconnecting Randomly:
- Probeer 'n ander USB-kabel.
- Ensure the USB port on your computer is stable and providing sufficient power.
- Dateer jou rekenaar se USB-drywers op.
If you encounter issues not covered here, please refer to the official Keychron support resources.
Spesifikasies
| Kenmerk | Detail |
|---|---|
| Handelsmerk | Keychron |
| Model Naam | Q2 |
| Modelnommer | Q2-J1 |
| Sleutelborduitleg | 65% (68 Keys), QWERTY |
| Verbindingstegnologie | Wired (USB-A, USB-C) |
| Versoenbare toestelle | PC (Linux, MacOS, Windows) |
| Skakel Tipe | Gateron G Pro Red (Linear), Hot-swappable |
| Agterlig | RGB (Suid-gerig) |
| Materiaal | Full Aluminum Frame, PBT Keycaps |
| Produk afmetings | 4.76 cm L x 12.89 cm B x 1.33 cm H |
| Spesiale kenmerke | QMK/VIA Programmable, Double Gasket Design |
Waarborg inligting
Keychron products typically come with a standard manufacturer's warranty. For detailed information regarding the warranty period, coverage, and terms and conditions for your Keychron Q2 keyboard, please refer to the official Keychron webwebwerf of die waarborgkaart wat by u produk ingesluit is. Bewaar u bewys van aankoop vir waarborgeise.
Ondersteuning en Hulpbronne
For further assistance, software downloads (VIA), firmware updates, and frequently asked questions, please visit the official Keychron support page:
- Sleutelwoord Amptelik Webwebwerf: www.keychron.com
- QMK/VIA Software & Firmware: www.keychron.com/pages/qmk-via
- Keychron Store: Besoek die Keychron Winkel op Amazon
You can also find community forums and additional user guides online for advanced customization and troubleshooting tips.