
1. Produk verbyview
The 01 Straight Thermostatic Radiator Valve is designed to precisely control the outlet temperature of heating equipment. It achieves this by regulating the inlet flow to heat exchangers, air conditioning units, or other hot and cold equipment, making it suitable for water heating and geothermal control systems.
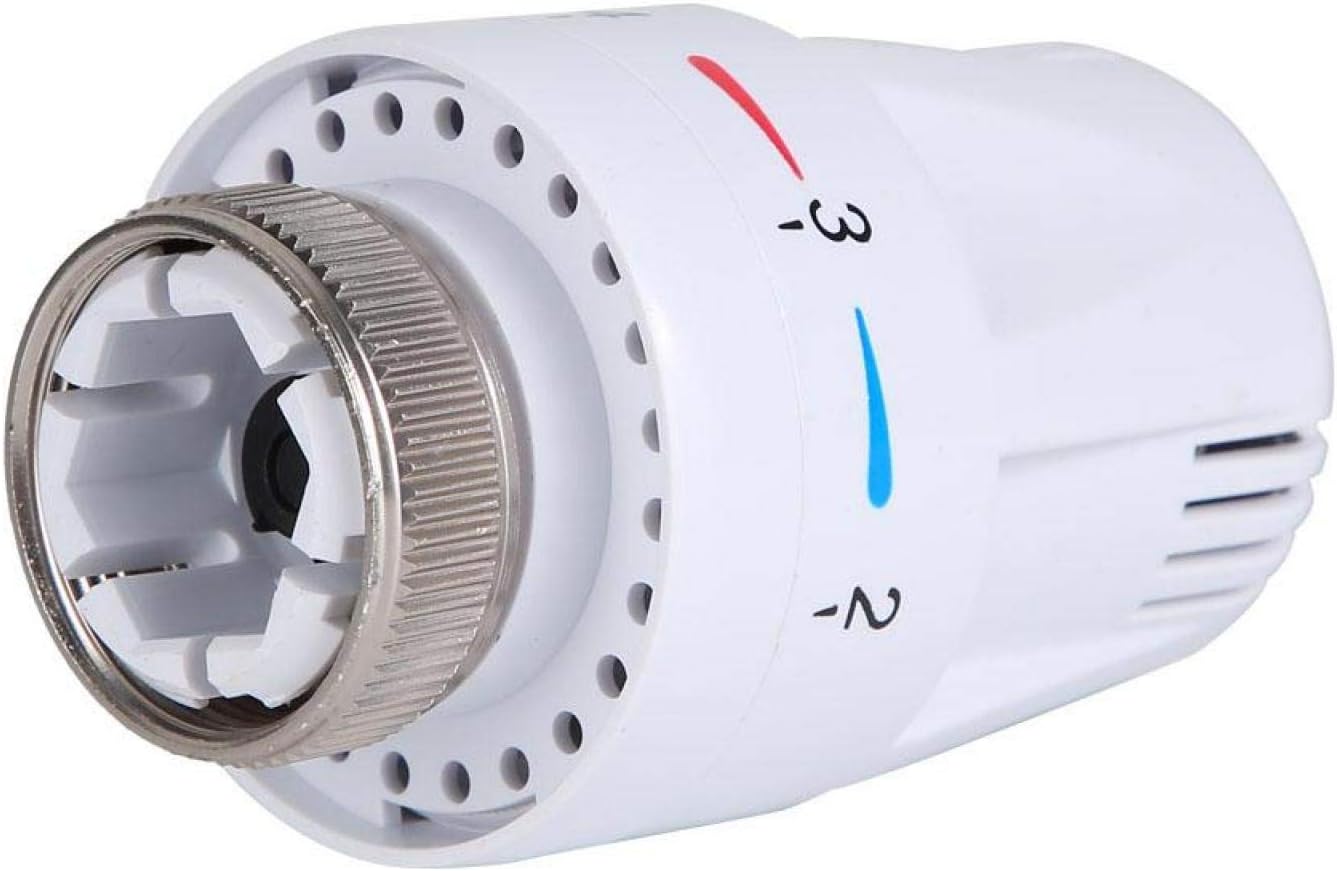
Beeld 1.1: Voorkant view of the 01 Straight Thermostatic Radiator Valve, showing the adjustment dial and connection point.
2. Sleutel kenmerke
- Presiese temperatuurbeheer: Designed to regulate equipment outlet temperature by controlling the inlet of heat exchangers or other heating/cooling units.
- Duursame konstruksie: Features a brass valve body, offering high temperature resistance and anti-corrosion properties for extended longevity.
- Eenvoudige installasie: Utilizes a thread installation connection for straightforward setup.
- Doeltreffende prestasie: Provides good heat dissipation, stable performance, and reliable operation.
- Veilige ontwerp: Manufactured with exactness to ensure good airtightness, minimizing the risk of leaks.
3. Installasie-instruksies
Proper installation is crucial for the optimal performance of your thermostatic radiator valve. Please follow these steps carefully:
- Valve Body Placement: Install the valve body at the inlet of the radiator or heating equipment. Ensure the arrow on the valve body points in the direction of water flow.
- Thermostat Preparation: Before attaching the thermostat head, set the handle to the maximum open position (typically indicated by the number '5' or highest setting). This facilitates easier installation.
- Attach Thermostat Head: Screw the locking screw of the thermostat head onto the valve body until it is securely fastened. Do not overtighten.

Beeld 3.1: Hoekig view of the valve, highlighting the threaded connection for installation.
4. Operasie
The thermostatic radiator valve allows for level adjustment to control the heat output. The numbered dial corresponds to different temperature settings.
- Verstel temperatuur: Rotate the dial to select your desired heat level. Higher numbers typically correspond to warmer settings.
- Rypbeskerming: The snowflake symbol (❄) indicates a frost protection setting, which maintains a minimum temperature to prevent pipes from freezing.

Beeld 4.1: Bo view of the valve, illustrating the numbered adjustment dial and the frost protection setting.
Video 4.1: A short demonstration of the thermostatic radiator valve, showing its design and potential application.
5. Onderhoud
To ensure the longevity and efficient operation of your thermostatic radiator valve, periodic maintenance is recommended:
- Gereelde skoonmaak: Wipe the exterior of the valve with a soft, damp lap om stof en puin te verwyder. Vermy skuurmiddels.
- Kyk vir lekkasies: Periodically inspect the valve and its connections for any signs of water leakage. Address any leaks promptly.
- Seisoenaanpassing: If the valve is not used for extended periods, it is advisable to cycle the adjustment dial through its full range a few times to prevent internal components from sticking.
6. Probleemoplossing
If you encounter issues with your thermostatic radiator valve, consider the following common problems and solutions:
- Radiator nie verhit nie:
- Ensure the valve is set to a sufficiently high temperature.
- Check if the valve pin is stuck. Gently press the pin on the valve body (after removing the thermostat head) to ensure it moves freely.
- Verify that the heating system is operational and water is circulating.
- Radiator Too Hot/Cold:
- Adjust the dial to a different setting. Allow time for the room temperature to stabilize.
- Ensure the valve is not obstructed by curtains or furniture, which can affect its ability to sense room temperature accurately.
- Waterlekkasie:
- Tighten connections if loose.
- If leakage persists, the valve may require professional inspection or replacement.
7. Spesifikasies
| Eienskap | Detail |
|---|---|
| Modelnommer | 9130969528244 |
| Materiaal | Geelkoper |
| Item gewig | 3.67 onse |
| Produkafmetings (L x B x H) | 0.39 x 0.39 x 0.39 duim |
| Buitenafwerking | Geelkoper |
| Tipe inlaatverbinding | Threaded (Tunnel) |
| Aantal poorte | 1 |
8. Waarborg en Ondersteuning
For specific warranty information or technical support, please refer to the documentation included with your purchase or contact the manufacturer directly. Keep your proof of purchase for warranty claims.