1. Inleiding
This manual provides detailed instructions for the installation, operation, and maintenance of the Vivotek ND9425P 16-Channel 4K UHD Network Video Recorder (NVR). This NVR is designed to manage and record video streams from up to 16 IP cameras, offering 4K UHD resolution support for high-quality surveillance. It is an integral component of a comprehensive security system, suitable for various applications requiring reliable video monitoring and recording.
Key features of the Vivotek ND9425P NVR include:
- Multimedia SoC CPU for efficient processing.
- Support for H.265, H.264, and MJPEG video codecs for flexible compression.
- Seamless recording capabilities.
- Smart Stream III optimization for bandwidth efficiency.
- Integrated PoE technology for simplified camera connectivity (when used with compatible PoE cameras).
2. Veiligheidsinligting
Lees asseblief alle veiligheidsinstruksies sorgvuldig deur voordat u die toestel gebruik. Versuim om hierdie instruksies te volg, kan lei tot besering of skade aan die produk.
- Kragbron: Use only the power adapter supplied with the NVR. Ensure the power outlet provides the correct voltage.
- Ventilasie: Do not block any ventilation openings. Install the NVR in a well-ventilated area to prevent overheating.
- Omgewing: Avoid exposing the NVR to water, moisture, extreme temperatures, or direct sunlight.
- Skoonmaak: Disconnect power before cleaning. Use a dry, soft cloth. Do not use liquid or aerosol cleaners.
- Diens: Moenie probeer om hierdie produk self te onderhou nie. Verwys alle diens na gekwalifiseerde dienspersoneel.
- kabels: Ensure all cables are properly connected and secured to prevent tripping hazards or accidental disconnections.
3. Pakketinhoud
Verifieer dat alle items in die pakket teenwoordig is voordat u met die installasie voortgaan:
- Vivotek ND9425P 16-Channel 4K UHD NVR Unit
- Kragadapter
- USB-muis
- Vinnige installasiegids
- Resource CD (containing full manual and software)
- Skroewe vir HDD-installasie (indien van toepassing)
- Ethernet kabel
Note: The package contents may vary slightly depending on the specific kit purchased. For example, some kits may include 8 x 2 MP Night Vision Dome Cameras and 8 x Ethernet Patch Cables.
4. Produk verbyview
Hierdie afdeling bied 'n oorview of the Vivotek ND9425P NVR's physical components and interfaces.
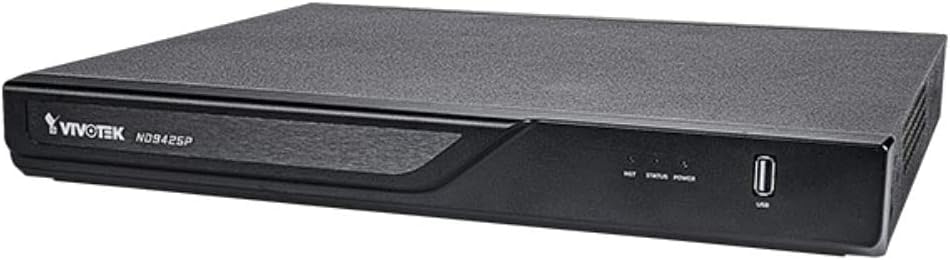
Figuur 4.1: Vivotek ND9425P NVR Front Panel
The image displays the Vivotek ND9425P NVR unit, a compact black rectangular device. The front panel features the "VIVOTEK ND9425P" logo on the left, followed by three small indicator lights labeled "NET", "STATUS", and "POWER". On the far right of the front panel, there is a USB port, labeled "USB" below it. The top surface of the NVR has a textured finish.
4.1 Front Panel Indicators and Ports
- NET LED: Dui netwerkaktiwiteit aan.
- STATUS LED: Indicates system status (e.g., recording, error).
- KRAG-LED: Dui kragstatus aan.
- USB-poort: For connecting a USB mouse, keyboard, or external storage devices for backup.
4.2 Agterpaneelpoorte
The rear panel typically includes ports for power input, Ethernet (LAN), HDMI/VGA video output, audio input/output, and additional USB ports for peripheral connections.
5. Opstelling
5.1 Hardeware installasie
- Hardeskyfinstallasie (indien nie vooraf geïnstalleer nie):
Unscrew the NVR cover. Carefully slide the hard drive into the bay and secure it with the provided screws. Reattach the cover.
- Koppel kameras:
Connect your IP cameras to the NVR's PoE ports (if available) or to your network switch. Ensure all cameras are powered on and accessible on the network.
- Koppel aan netwerk:
Koppel 'n Ethernet-kabel vanaf die NVR se LAN-poort aan jou router of netwerkskakelaar.
- Verbind skerm:
Koppel 'n monitor aan die NVR se HDMI- of VGA-uitvoerpoort.
- Koppel randapparatuur:
Koppel die USB-muis aan 'n USB-poort op die NVR.
- Krag aan:
Koppel die kragadapter aan die NVR se kragtoevoer en prop dit dan in 'n kragaansluiting. Die NVR sal outomaties aanskakel.
5.2 Initial Configuration Wizard
Upon the first boot, the NVR will typically launch an initial configuration wizard. Follow the on-screen prompts to:
- Stel administrateurwagwoord op.
- Configure network settings (DHCP or Static IP).
- Soek vir en voeg gekoppelde IP-kameras by.
- Stel datum en tyd in.
- Initialiseer die hardeskyf vir opname.
6. Bediening van die NVR
6.1 Lewendig View
After initial setup, the NVR will display the live view van gekoppelde kameras. Jy kan wissel tussen enkelkamera- view en multi-kamera rooster views.
6.2 Opname-konfigurasie
Access the recording settings through the main menu to configure recording schedules and modes:
- Deurlopende opname: Rekords 24/7.
- Bewegingsopsporing opname: Records only when motion is detected by the camera.
- Geskeduleerde opname: Rekords gedurende spesifieke tye van die dag of week.
- Gebeurtenisopname: Records based on specific events (e.g., alarm input).
6.3 Playback and Backup
Om weerview opgeneem footage:
- Navigate to the "Playback" section from the main menu.
- Kies die verlangde kamera(s) en datum-/tydreeks.
- Use the timeline to navigate through recordings.
- To back up footage, insert a USB drive into the NVR's USB port and follow the on-screen instructions for export.
6.4 Afstandtoegang
The Vivotek ND9425P NVR supports remote access via a web browser or dedicated mobile applications (e.g., VIVOCloud). Refer to the full user manual on the Resource CD for detailed instructions on setting up remote access, including port forwarding or P2P cloud services.
7. Onderhoud
7.1 Firmware-opdaterings
Regularly check for and install firmware updates to ensure optimal performance, security, and access to new features. Firmware updates can typically be performed via the NVR's web interface or through a USB drive.
7.2 Hardeskyfbestuur
The NVR will automatically overwrite the oldest recordings when the hard drive is full. You can configure storage settings, check HDD health, and format the drive through the system settings.
7.3 Skoonmaak
Keep the NVR unit clean by gently wiping its exterior with a dry, soft cloth. Ensure ventilation openings are free from dust and obstructions.
8. Probleemoplossing
| Probleem | Moontlike oorsaak | Oplossing |
|---|---|---|
| Geen krag | Power cable disconnected; faulty power adapter; power outlet issue. | Check power cable connection; try a different power outlet; contact support if adapter is faulty. |
| Geen video-uitvoer nie | HDMI/VGA cable loose; incorrect display input selected; NVR not booted. | Ensure display cable is secure; select correct input on monitor; wait for NVR to boot up. |
| Cameras Not Displaying | Network issue; camera not powered; incorrect camera IP address; camera not added to NVR. | Check network cables; ensure cameras are powered; verify camera IP settings; add cameras via NVR interface. |
| Geen opname | Hard drive not initialized; recording schedule not set; HDD full. | Initialize HDD in settings; configure recording schedule; check HDD status. |
| Remote Access Fails | Network configuration issue; port forwarding not set up; firewall blocking. | Verify network settings; configure port forwarding on router; check firewall rules. |
For more detailed troubleshooting, refer to the comprehensive user manual provided on the Resource CD or visit the VIVOTEK support webwebwerf.
9. Spesifikasies
| Kenmerk | Detail |
|---|---|
| Modelnommer | ND9425P |
| Vervaardiger | Vivotek USA |
| Produk afmetings | 19.69 x 19.69 x 11.02 duim |
| Item gewig | 8.62 pond |
| Verbindingstegnologie | Ethernet |
| Versoenbare toestelle | Kamera |
| Geheue berging kapasiteit | 64 GB (referring to internal flash/RAM, not HDD capacity) |
| Aantal kanale | 16 |
| Videokodeks | H.265, H.264, MJPEG |
| Maksimum Resolusie Ondersteuning | 4K UHD (as per product title) |
10. Waarborg en Ondersteuning
For warranty information, please refer to the warranty card included with your product or visit the official VIVOTEK website. VIVOTEK provides technical support for its products. If you encounter issues that cannot be resolved using this manual or the troubleshooting section, please contact VIVOTEK customer support through their official webwebwerf of aangewese ondersteuningskanale.
Official VIVOTEK Webwebwerf: www.vivotek.com