1. Belangrike veiligheidsinstruksies
Please read all instructions carefully before using your Krups OPIO XP320830 Espresso Machine. Keep this manual for future reference.
- Elektriese veiligheid: Verseker die voltage rating on the appliance matches your local power supply. Do not immerse the appliance, power cord, or plug in water or any other liquid.
- Warm oppervlaktes: The espresso machine generates heat and steam during operation. Avoid contact with hot surfaces, especially the steam wand and portafilter. Use handles or knobs.
- Kinders en Kwesbare Persone: This appliance is not intended for use by persons with reduced physical, sensory, or mental capabilities, or lack of experience and knowledge, unless they have been given supervision or instruction concerning use of the appliance by a person responsible for their safety. Children should be supervised to ensure they do not play with the appliance.
- Plasing: Place the appliance on a stable, heat-resistant, and level surface, away from edges and heat sources.
- Onderhoud: Unplug the appliance from the power outlet before cleaning and when not in use. Allow it to cool completely before cleaning or storing.
- Skade: Do not operate any appliance with a damaged cord or plug, or after the appliance malfunctions or has been damaged in any manner. Contact customer service for repair.
2. Produk verbyview
Familiarize yourself with the components of your Krups OPIO XP320830 Espresso Machine.
2.1 Hoofkomponente
- Watertenk (verwyderbaar)
- Control Dial (for espresso and steam functions)
- Steam Wand with Nozzle
- Portafilter-handvatsel
- Filtermandjies (enkel- en dubbelskote)
- Drupbak en Rooster
- Cup Warming Plate (on top)
2.2 Produk Views
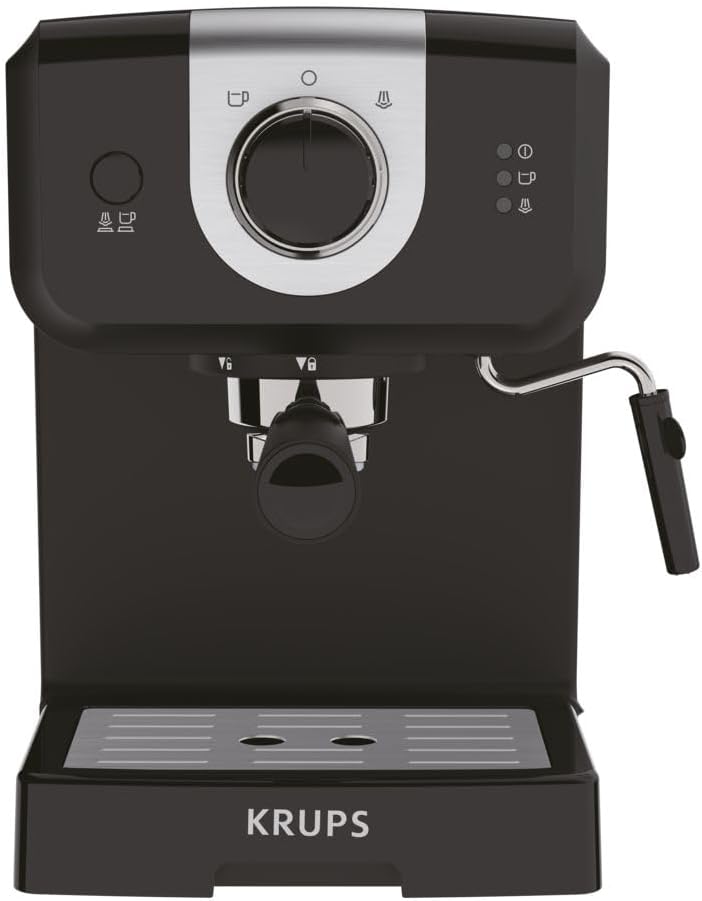
Figuur 1: Voorkant view of the espresso machine, showing the control dial, portafilter attachment point, steam wand, and drip tray.

Figuur 2: Kant view of the espresso machine, highlighting the transparent, removable water tank on the left side.
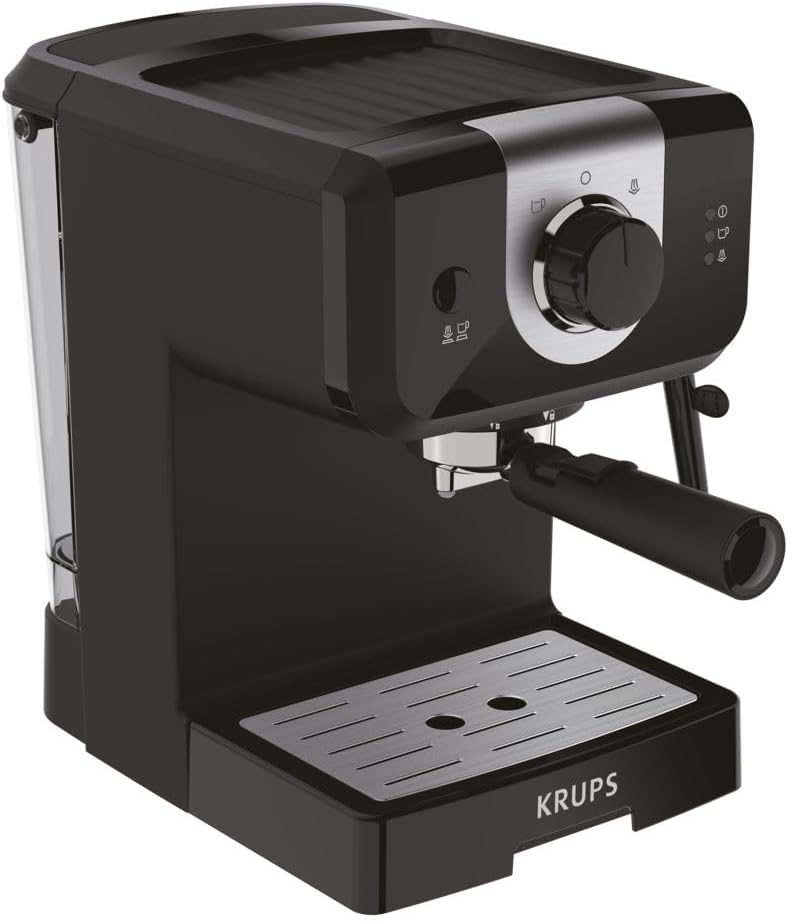
Figuur 3: Gehoekte voorkant view of the espresso machine, providing a comprehensive look at its design and main operational parts.

Figuur 4: Top view of the espresso machine, showing the cup warming plate and overall compact design.
3. Opstelling
3.1 Uitpak
- Verwyder alle verpakkingsmateriaal en beskermende films versigtig van die toestel.
- Kontroleer of alle onderdele teenwoordig en onbeskadig is.
- Clean the water tank, portafilter, and filter baskets with warm soapy water, then rinse thoroughly.
3.2 Eerste gebruik en voorbereiding
- Fill the water tank with fresh, cold water up to the 'MAX' level. Ensure the tank is properly seated.
- Place a large cup or container under the portafilter spout (without coffee).
- Prop die masjien in 'n geskikte kragaansluiting.
- Turn the control dial to the 'Espresso' position and allow water to flow through until the tank is nearly empty. This primes the pump and cleans the internal system.
- Repeat this process once or twice with fresh water.
- Die masjien is nou gereed vir gebruik.
4. Bediening van die Espressomasjien
4.1 Maak Espresso
- Maak seker dat die watertenk met vars, koue water gevul is.
- Kies die toepaslike filtermandjie (enkel- of dubbelskoot) en plaas dit in die portafilter.
- Maal vars koffiebone tot 'n fyn konsekwentheid wat geskik is vir espresso.
- Fill the filter basket with ground coffee. Do not overfill.
- Tamp die koffie egalig en stewig gebruikamper (not included). Wipe any excess coffee from the rim of the portafilter.
- Attach the portafilter to the group head by aligning it and twisting firmly to the right until it is secure.
- Plaas een of twee espressokoppies op die drupbak direk onder die portafilter se tuite.
- Turn the control dial to the 'Espresso' position. The machine will begin to dispense espresso.
- Once the desired amount of espresso is brewed, turn the control dial back to the 'Off' or 'Standby' position to stop the flow.
- Verwyder die portafilter versigtig en gooi die gebruikte koffiegronde weg.

Figuur 5: The portafilter handle with a filter basket inserted, alongside two additional filter baskets for different serving sizes.

Figuur 6: Two glass cups filled with freshly brewed espresso, positioned on the machine's drip tray.
4.2 Using the Steam Wand (Milk Frothing)
- Vul 'n vlekvrye staal skuimkruik met koue melk (suiwel of nie-suiwel) tot een derde vol.
- Turn the control dial to the 'Steam' position. Wait for the steam indicator light to illuminate, indicating the machine has reached steaming temperature.
- Purge the steam wand by briefly opening the steam valve to release any condensed water. Close the valve.
- Immerse the steam wand nozzle just below the surface of the milk. Open the steam valve.
- Angle the pitcher to create a swirling motion in the milk. Move the wand slightly up and down to incorporate air for froth.
- Once the milk has reached the desired temperature and froth, close the steam valve and remove the pitcher.
- Vee die stoompyp onmiddellik met advertensie afamp lap om te verhoed dat melkreste uitdroog.
5. Onderhoud
5.1 Daaglikse skoonmaak
- Portafilter en Filtermandjies: After each use, remove the portafilter, discard coffee grounds, and rinse the portafilter and filter basket under warm water.
- Lekbak: Empty and clean the drip tray and grid regularly. Wash with warm soapy water and rinse thoroughly.
- Stoomstaaf: Always wipe the steam wand immediately after frothing milk. Periodically, remove the nozzle and clean any milk residue with a small brush or pin.
- Buitekant: Vee die buitekant van die masjien af met 'n sagte, damp lap. Moenie skuurskoonmakers of skuursponsies gebruik nie.
5.2 Ontkalking
Regular descaling is essential to maintain the performance and longevity of your espresso machine, especially in areas with hard water. The frequency depends on water hardness and usage.
- Use a descaling solution specifically designed for espresso machines. Follow the instructions provided with the descaling product.
- Fill the water tank with the descaling solution and water mixture as per the descaler's instructions.
- Plaas 'n groot houer onder die portafilter en stoompyp.
- Run half of the solution through the espresso function, then run the other half through the steam wand function.
- After descaling, rinse the water tank thoroughly and fill it with fresh water. Run several full tanks of fresh water through both the espresso and steam functions to flush out any remaining descaling solution.
6. Probleemoplossing
Verwys na hierdie tabel vir algemene probleme en hul oplossings.
| Probleem | Moontlike oorsaak | Oplossing |
|---|---|---|
| Geen koffie word uitgedeel nie | No water in tank; machine not primed; clogged filter; pump issue. | Fill water tank; prime the machine; clean filter; contact support. |
| Koffie vloei te stadig | Koffie gemaal te fyn; te veel koffie in filter; masjien moet ontkalk. | Gebruik growwer maal; verminder die hoeveelheid koffie; ontkalk die masjien. |
| Koffie vloei te vinnig | Koffie gemaal te grof; nie genoeg koffie nie; tampte lig. | Gebruik fyner maal; verhoog die hoeveelheid koffie;amp stewiger. |
| Geen stoom van die spuitstok af nie | Wand clogged; machine not at steaming temperature; water tank empty. | Clean steam wand nozzle; wait for steam indicator; fill water tank. |
| Masjien lek water | Water tank not seated correctly; seals damaged; drip tray full. | Reseat water tank; check seals (contact support if damaged); empty drip tray. |
7. Tegniese spesifikasies
| Spesifikasie | Detail |
|---|---|
| Modelnommer | XP320830 |
| Handelsmerk | Krups |
| Produkafmetings (L x B x H) | 29.7 x 20.1 x 29 cm |
| Gewig | 3 kilogram |
| Kapasiteit | 1.2 liter |
| Koffiemaker Tipe | Espressomasjien |
| Materiaal | Vlekvrye staal |
| Aanbevole produkgebruike | Tuisgebruik |
| Buitenafwerking | Metallic and Matte |
| Bedryfsmodus | Manual Control (Dial) |
| Krag | 1140 Watt |
| Voltage | 220 Volt (AC) |
| Human-Machine Interface Input | Skakel |
| Koffietipe | Gemaalde Koffie |
| Filter tipe | Herbruikbaar |
| UPC | 010942225393 |
| GTIN | 010942225393 |
8. Waarborg en Ondersteuning
For information regarding warranty coverage, product registration, or technical support, please refer to the warranty card included with your product or visit the official KRUPS webwebwerf. Bewaar u bewys van aankoop vir waarborgeise.
U kan ook die KRUPS Brand Store vir meer produkinligting en ondersteuningsbronne.