1. Inleiding
This manual provides essential information for the safe and efficient operation of your iProda 2 in 1 Laptop, Model M1169YM. Please read this manual thoroughly before using the device and retain it for future reference. This convertible laptop features an 11.6-inch touchscreen, powered by an Intel N4100 processor, and runs on Windows 10 Pro.

Image: The iProda 2 in 1 Laptop can be used in multiple configurations, including traditional laptop, tent, stand, and tablet modes, showcasing sy veelsydigheid.
2. Veiligheidsinligting
Neem die volgende veiligheidsmaatreëls in ag om skade aan u toestel of besering aan uself te voorkom:
- Moenie die toestel blootstel aan uiterste temperature, direkte sonlig of hoë humiditeit nie.
- Vermy om die toestel te laat val of aan ernstige impakte bloot te stel.
- Use only the provided or approved power adapter for charging.
- Hou die toestel weg van water en ander vloeistowwe.
- Moenie probeer om die toestel self uitmekaar te haal of te herstel nie. Raadpleeg gekwalifiseerde dienspersoneel.
3. Pakketinhoud
Verifieer dat alle items in jou pakket teenwoordig is:
- iProda 2 in 1 Laptop (Model M1169YM)
- Kragadapter
- Gebruikershandleiding (hierdie dokument)
4. Produk verbyview
The iProda 2 in 1 Laptop is designed for versatility, offering multiple usage modes and essential connectivity options.
4.1. Sleutel kenmerke
- 11.6-inch IPS Touchscreen: A responsive 10-point precision touchscreen with 1920x1080 resolution for interactive use.
- Omskepbare ontwerp: 360-degree hinge allows seamless transition between laptop, tablet, tent, and stand modes.
- Intel N4100-verwerker: Provides efficient performance for daily tasks.
- Windows 10 Pro: Pre-installed operating system for productivity and security.
- Uitbreidbare berging: Supports M.2 2242 SSD for additional storage capacity.

Image: Key features of the iProda laptop, including its touchscreen, operating system, display specifications, and camera resolution.

Image: The laptop's 360-degree hinge allows it to convert into a tablet, enabling direct interaction via its precision touchscreen.
4.2. Poorte en knoppies
Familiarize yourself with the various ports and buttons on your laptop:
- Tipe C-poort: Used for power supply and data transfer.
- Mikro HDMI: Vir die koppeling aan eksterne skerms.
- Mikro USB: Vir die koppeling van USB-toestelle.
- TF-kaartgleuf: For expanding storage with a TF (MicroSD) card.
- Kragknoppie: Om die toestel aan/af te skakel of dit in slaapmodus te plaas.
- Volume knoppies: To adjust audio output.
- Oortelefoonaansluiting: Vir die koppeling van oorfone of eksterne luidsprekers.

Beeld: 'n Gedetailleerde view of the laptop's side panels, indicating the location and function of each port and button for easy identification.
5. Opstelling
5.1. Laai die battery
Before first use, fully charge the laptop's battery. Connect the provided power adapter to the Type-C port on the laptop and plug it into a power outlet. The charging indicator light will illuminate.
5.2. Eerste opstart en Windows-opstelling
- Press and hold the Power Button until the screen turns on.
- Volg die instruksies op die skerm om die aanvanklike opstelling van Windows 10 Pro te voltooi, insluitend taalkeuse, netwerkverbinding en die skep van 'n gebruikersrekening.
6. Bediening van jou skootrekenaar
6.1. Gebruik die raakskerm
The 10-point precision touchscreen allows for intuitive interaction with Windows 10 Pro. Use gestures such as tapping, swiping, pinching, and stretching to navigate, zoom, and interact with applications.
6.2. Sleutelbord en raakvlak
The integrated keyboard and touchpad provide traditional input methods. The touchpad supports multi-touch gestures for scrolling, zooming, and switching applications.

Image: The laptop's full-size American keyboard and responsive touchpad, designed for comfortable typing and navigation.
6.3. Convertible Modes
The 360-degree hinge allows you to switch between various modes:
- Skootrekenaarmodus: Standaardkonfigurasie vir tik en produktiwiteit.
- Tabletmodus: Fold the screen back completely for a tablet experience, ideal for browsing or drawing.
- Tentmodus: Position the laptop like a tent for media consumption or presentations.
- Staanmodus: Flip the keyboard face down to use the screen as a display, suitable for watching videos.

Image: The laptop configured in tent mode, demonstrating its flexibility for viewinhoud sonder dat die sleutelbord in die pad is.
7. Berging Uitbreiding
The laptop comes with 64GB eMMC storage. You can expand the storage capacity by installing an M.2 2242 SSD (128GB/256GB/512GB, not included).
7.1. Installing an M.2 2242 SSD
To install an M.2 2242 SSD:
- Power off the laptop and disconnect the power adapter.
- Carefully open the back cover of the laptop.
- Locate the M.2 slot.
- Insert the M.2 2242 SSD into the slot and secure it with the appropriate screw (if provided).
- Plaas die agterblad terug.
- Upon booting, you may need to initialize and format the new SSD through Windows Disk Management.
Note: If you are unsure about this procedure, it is recommended to seek professional assistance.

Image: Visual representation of the M.2 SSD slot, illustrating how additional storage can be integrated into the laptop.
8. Konnektiwiteit
8.1. Wi-Fi-verbinding
The laptop supports dual-frequency 2.4GHz/5GHz Wi-Fi. To connect to a wireless network:
- Click the Wi-Fi icon in the system tray.
- Kies jou verlangde netwerk uit die lys.
- Voer die netwerkwagwoord in indien gevra en klik op 'Verbind'.
8.2. External Display (Micro HDMI)
Connect an external monitor or TV using a Micro HDMI to HDMI cable. Once connected, you can configure display settings (duplicate, extend, second screen only) through Windows display settings.
8.3. USB-toestelle
Use the Micro USB port or the Type-C port (with an appropriate adapter) to connect peripherals such as a mouse, keyboard, or external storage devices.
9. Onderhoud
9.1. Skoonmaak
To clean the laptop, power it off and disconnect the power adapter. Use a soft, lint-free cloth slightly dampened with water or a screen cleaner for the display. Avoid harsh chemicals or abrasive materials.
9.2. Batteryversorging
Om die batterylewe te verleng:
- Vermy om die battery gereeld heeltemal te ontlaai.
- Do not expose the laptop to high temperatures.
- Indien u die skootrekenaar vir 'n lang tydperk bêre, maak seker dat die battery tot ongeveer 50-70% gelaai is.
10. Probleemoplossing
Hier is oplossings vir algemene probleme wat jy mag teëkom:
| Probleem | Oplossing |
|---|---|
| Skootrekenaar skakel nie aan nie. | Ensure the battery is charged. Connect the power adapter and try again. If still unresponsive, perform a hard reset by holding the power button for 10-15 seconds. |
| Die skerm is leeg of flikker. | Restart the laptop. Check if an external display is connected and interfering. Update display drivers if possible. |
| Wi-Fi-verbindingsprobleme. | Ensure Wi-Fi is enabled. Restart your router and the laptop. Check network settings in Windows. |
| Die raakskerm reageer nie. | Restart the laptop. Ensure the screen is clean. Check for any pending Windows updates or driver updates for the touchscreen. |
11. Spesifikasies
Technical specifications for the iProda 2 in 1 Laptop (Model M1169YM):
| Kenmerk | Detail |
|---|---|
| Handelsmerk | iProda |
| Modelnommer | M1169YM |
| Bedryfstelsel | Windows 10 Pro |
| Skerm grootte | 11.6 duim |
| Skermresolusie | 1920 x 1080 piksels (1080p) |
| Verwerker | Intel N4100 (up to 2.4 GHz Burst Frequency) |
| RAM | 4 GB DDR4 |
| Hardeskyf | 64 GB eMMC |
| Grafiese kaart | Integrated (UHD 600 Graphics) |
| Draadlose tipe | 2.4 GHz / 5 GHz Dual-frequency Wi-Fi |
| Gemiddelde batterylewe | 8 Hours (3500mAh, 27Wh) |
| Item gewig | 3.63 pond |
| Produk afmetings | 11.99 x 11.6 x 0.5 duim |
| Verbindingstegnologie | HDMI, USB Type-C, Micro USB |
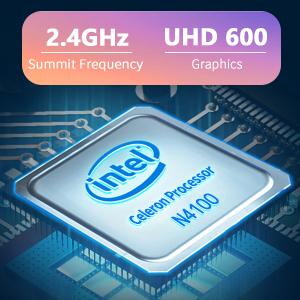
Image: The Intel Celeron N4100 processor, central to the laptop's performance, highlighting its clock speed and integrated graphics capabilities.

Image: The laptop's battery specifications, indicating its power capacity for extended use.
12. Waarborg en Ondersteuning
For warranty information and technical support, please refer to the documentation included with your purchase or visit the official iProda website. Contact information for customer service can typically be found on the manufacturer's support page.