1. Inleiding
Thank you for choosing the Lepro 20W LED Floodlight. This manual provides essential information for the safe installation, operation, and maintenance of your new floodlights. Please read these instructions carefully before use and retain them for future reference.

Image 1.1: Two Lepro 20W LED Floodlights with power cable. These floodlights are designed for outdoor use, providing bright and efficient illumination.
2. Veiligheidsinstruksies
Om veilige werking te verseker, volg altyd hierdie riglyne:
- Elektriese veiligheid: Ensure the power supply is disconnected before installation or maintenance. All electrical connections must comply with local wiring regulations. If unsure, consult a qualified electrician.
- Aarding: Die vloedlig moet behoorlik geaard wees om elektriese skok te voorkom.
- Voltage: Verifieer dat die toevoer voltage stem ooreen met die vloedlig se gegradeerde volumetage (240 Volt AC).
- Waterweerstand: The product is IP65 rated, meaning it is protected against dust ingress and low-pressure water jets from any direction. However, do not submerge the unit in water.
- Hitte: The floodlight generates heat during operation. Do not cover the unit or install it in an enclosed space without adequate ventilation.
- Montering: Maak seker dat die monteringsoppervlak sterk genoeg is om die gewig van die vloedlig te dra.
- Ligbron: Moenie direk in die LED-ligbron staar wanneer dit brand nie, aangesien dit oogspanning of skade kan veroorsaak.
3. Pakketinhoud
Jou pakkie moet die volgende items bevat:
- 2 x Lepro 20W LED Floodlights
- Instructiehandleiding (hierdie dokument)
4. Produkkenmerke
The Lepro 20W LED Floodlight offers the following key features:
- Ultra-Bright and Energy-Efficient: Utilizes SMD 2835 LEDs and an optimized reflector design to deliver 1700 lumens of daylight white light (5000K) with only 20W of power consumption, equivalent to a 140W halogen lamp.
- Duursaam en Weerbestand: Constructed from die-cast aluminum and tempered glass, with an IP65 rating for resistance against dust and water, suitable for all weather conditions.
- Doeltreffende hitte-afvoer: Features an ultra-thin housing and integrated heat sink design for effective heat management, extending the product's lifespan.
- Wye straalhoek: Provides a 110° beam angle for broad illumination coverage.
- 360° Rotatable Bracket: The mounting bracket allows for 360° rotation, enabling flexible adjustment of the light direction.
- Maklike installasie: Designed for straightforward installation on various surfaces.

Image 4.1: Key lighting specifications of the floodlight, including LED quantity, color temperature, brightness, and beam angle.

Image 4.2: Illustration of the floodlight's coverage, demonstrating that 20W provides 1700 lumens, effectively illuminating a 5-meter diameter area when mounted at 4 meters height.

Image 4.3: The rear of the floodlight, illustrating the heat dissipation fins designed to efficiently release heat and prolong the product's lifespan.

Image 4.4: The 360° rotatable bracket, allowing for flexible adjustment of the light direction to suit various illumination needs.

Image 4.5: Demonstrates the floodlight's durability and weather resistance, highlighting its IP65 waterproof rating, heat resistance, and frost resistance for reliable performance in diverse outdoor conditions.
5. Spesifikasies
| Eienskap | Waarde |
|---|---|
| Handelsmerk | Lepro |
| Modelnommer | PR340011-DW-EU-2 |
| Produkafmetings (L x B x H) | 10.82 x 2.6 x 9.6 cm |
| Gewig | 540 gram |
| IP-gradering | IP65 |
| Aantal items | 2 |
| Styl | Moderne |
| Kleur | Cool White/Black |
| Materiaal | Aluminium, Gehard Glas |
| Maksimum wattage | 20 Watt |
| Voltage | 240 Volt (AC) |
| Spesifieke gebruike | Outdoor and enclosed spaces |
| Spesiale kenmerke | Energiedoeltreffend |
| Ligvloed | 1700 lm |
| Kleurweergawe-indeks (CRI) | 80.00 |
| Kragbron | AC |
| Installasie tipe | Muurmontering |

Image 5.1: Detailed dimensions of the floodlight, including length, width, and height, along with cable length, provided in both millimeters and inches for precise planning.
6. Installasie
Volg hierdie stappe vir behoorlike installasie:
- Voorbereiding: Before starting, ensure the power supply is turned off at the main circuit breaker.
- Monteerplek: Choose a suitable location for the floodlight. The included bracket allows for mounting on walls, ceilings, or directly on the ground.
- Merk: Use the bracket as a template to mark the drilling points on the desired surface.
- Boor: Drill holes at the marked points. Insert appropriate wall plugs if mounting on masonry.
- Veilige hakie: Attach the bracket securely to the surface using screws (not included). The bracket features 2 self-locking screws for easy removal of the spot without tools.
- Pas hoek aan: The bracket is 360° rotatable. Adjust the floodlight to the desired angle before tightening the bracket screws.
- Bedrading: Connect the floodlight's 1-meter power cable to your electrical supply. Ensure correct wiring: brown wire for Live, blue wire for Neutral, and green/yellow wire for Ground. Use a waterproof junction box for outdoor connections (not included).
- Finale kontrole: Double-check all connections and ensure the floodlight is securely mounted.
- Krag aan: Herstel die kragtoevoer by die hoofstroombreker.
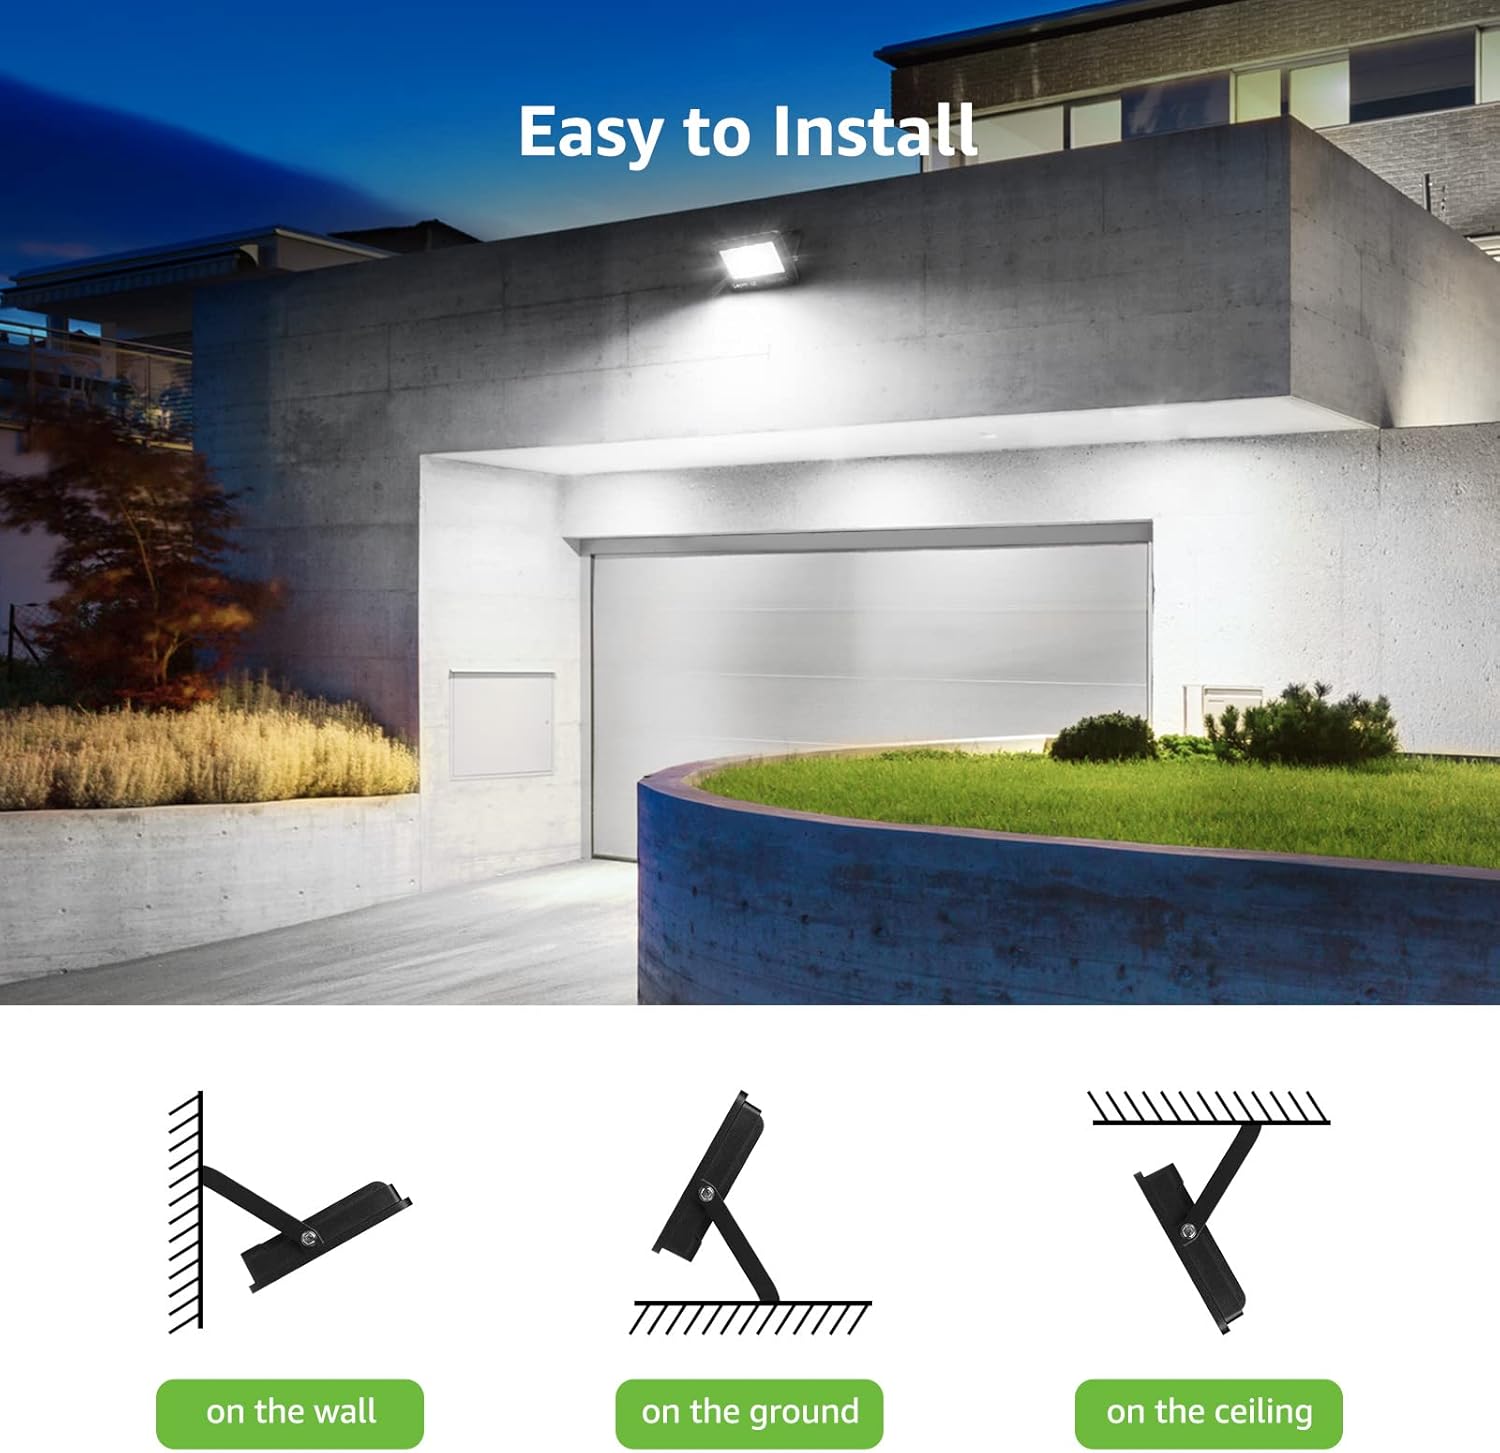
Image 6.1: Various installation methods for the floodlight, demonstrating its versatility for mounting on walls, ground, or ceilings.
7. Operasie
Once installed and connected to a power source, the Lepro 20W LED Floodlight will illuminate when power is supplied. There are no additional controls on the unit itself. Operation is typically controlled via an external switch or timer connected to the power circuit.

Beeld 7.1: Voorbeeldamples of the floodlight in various applications, including residential and commercial outdoor spaces, showcasing its effective illumination.
8. Onderhoud
The Lepro LED Floodlight requires minimal maintenance:
- Skoonmaak: Periodically clean the glass surface with a soft, damp cloth to ensure optimal light output. Do not use abrasive cleaners or solvents.
- Inspeksie: Regularly inspect the power cable and housing for any signs of damage. If damage is found, disconnect power immediately and have the unit inspected by a qualified professional.
- Geen gebruikerdiensbare onderdele nie: The LED light source is integrated and not replaceable by the user. Do not attempt to open the housing.
9. Probleemoplossing
Indien u probleme met u vloedlig ondervind, verwys na die volgende algemene probleme en oplossings:
| Probleem | Moontlike oorsaak | Oplossing |
|---|---|---|
| Lig gaan nie aan nie | Geen kragtoevoer Los bedrading konneksie Faulty external switch | Kontroleer die kragtoevoer en stroombreker. Verifieer dat alle bedradingsverbindings stewig is (maak seker dat die krag eers afgeskakel is). Test the external switch or bypass it temporarily. |
| Lig is dof of flikker | Onstabiele kragtoevoer Verkeerde voltage Beskadigde eenheid | Verseker stabiele kragtoevoer. Verifieer invoer voltage pas by spesifikasies. As probleme voortduur, kontak kliëntediens. |
| Water binne die eenheid | Onbehoorlike installasie Damage to housing/seal | Ensure all seals are intact and installation is correct. Disconnect power immediately. Contact customer support. |
If the problem persists after attempting these solutions, please contact Lepro customer support.
10. Waarborg en Ondersteuning
Lepro products are designed for reliability and performance. For warranty information or technical support, please refer to the official Lepro webwebwerf of kontak hul kliëntediens direk. Bewaar u aankoopbewys as bewys van aankoop.
Vir meer inligting, besoek die Lepro Store.