
1. Inleiding
This manual provides essential information for the proper installation, operation, and maintenance of your Apevia CAPTAIN550 ATX Power Supply. The CAPTAIN550 is a 550W ATX power supply featuring a 120mm auto-thermally controlled fan and all black cables for a neat system build.
Please read this manual thoroughly before installation to ensure safe and efficient use of the product.
2. Veiligheidsinligting
- Do not overload, abuse, or modify the power supply unit. Such actions can lead to damage, malfunction, or safety hazards.
- Ensure the power supply is disconnected from the main power outlet before performing any installation, maintenance, or troubleshooting.
- Hierdie eenheid bevat hoë volumetage components. Do not open the power supply casing. Verwys slegs na gekwalifiseerde personeel vir diens.
- Use of this unit for Bitcoin mining or similar intensive, continuous load applications is not suggested as it will shorten the life and may cause failures of the power supply. Use for mining purposes is not covered by warranty.
- Verseker behoorlike ventilasie rondom die kragtoevoer om oorverhitting te voorkom.
3. Pakketinhoud
Verifieer dat alle items in die pakket teenwoordig is:
- Apevia CAPTAIN550 ATX Power Supply Unit
- AC kragkabel
- Monteringsskroewe (4x)
- Dokumentasie (hierdie handleiding)

Figure 3.1: Apevia CAPTAIN550 retail packaging.
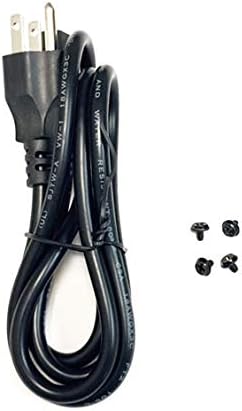
Figure 3.2: AC power cord and mounting screws included with the power supply.
4. Opstelling
4.1 Fisiese installasie
- Ensure your computer case has an ATX power supply mounting bay. The CAPTAIN550 has standard ATX dimensions of 5.9" (L) x 5.5" (W) x 3.4" (H).
- Carefully slide the power supply into the designated bay in your computer case.
- Secure the power supply to the case using the four provided mounting screws.

Figuur 4.1: Bo view of the Apevia CAPTAIN550 Power Supply, showing the 120mm cooling fan.

Figuur 4.2: Agter view of the power supply, including the AC input and 115/230V switch.
4.2 Vlugtage Keuring
The power supply features a 115/230V switch on the rear panel. Ensure this switch is set to the correct voltage for your region before connecting the power cord to a wall outlet. Incorrect voltage selection can damage the power supply and connected components.
4.3 Kabelverbindings
Connect the power supply cables to the corresponding components in your computer system. All cables are black for improved aesthetics.
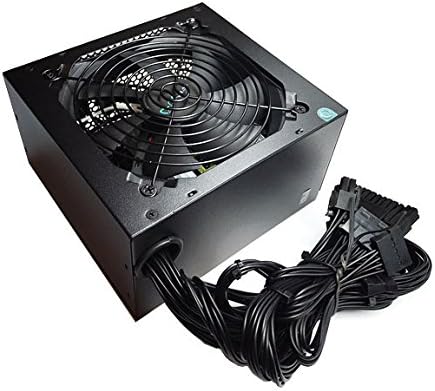
Figure 4.3: The Apevia CAPTAIN550 Power Supply with its attached black cables.
- 20/24pin Main Power Connector: Connect this to your motherboard. The 24pin connector can be split into a 20+4 configuration for motherboards requiring a 20pin connector.
- P8pin (P4+4pin) CPU Connector: Connect this to your motherboard's CPU power input. This 8pin connector can be split into a 4+4 configuration for motherboards requiring a 4pin power connector.
- 6/8pin PCI-express Connector: Connect this to your graphics card. This 8pin connector can be split into a 6+2 configuration for graphics cards requiring a 6pin power connector.
- SATA-verbindings: Connect these to SATA devices such as hard drives, solid-state drives, and optical drives.
- Randapparatuur (Molex) verbindings: Connect these to older devices or case fans that use Molex power.

Figuur 4.4: oorview of available connectors and their configurations.
5. Bedryfsinstruksies
After all components are securely connected and the voltage switch is correctly set:
- Koppel die AC-kragkabel aan die kragtoevoer en dan aan 'n muuraansluiting.
- Ensure the power switch on the rear of the power supply is in the 'ON' position.
- Power on your computer system using the case's power button.
Belangrike nota: The power supply will not power on simply by connecting the power cord to both the power supply and wall outlet. All power supply cables must be properly connected to the PC components for the system to power on.
6. Onderhoud
To ensure optimal performance and longevity of your Apevia CAPTAIN550 power supply:
- Regularly check for dust accumulation on the fan and ventilation grilles. Use compressed air to gently clean dust from these areas.
- Ensure adequate airflow within your computer case. Blocked vents can lead to overheating.
- Do not obstruct the power supply's fan or exhaust.
7. Probleemoplossing
7.1 Power Supply Does Not Turn On
- Verify that the AC power cord is securely connected to both the power supply and a functional wall outlet.
- Check that the 115/230V switch on the rear of the power supply is set to the correct voltage vir jou streek.
- Ensure the power switch on the rear of the power supply is in the 'ON' position.
- Confirm that all power supply cables (20/24pin Main, CPU, PCI-e, SATA, Peripheral) are properly and securely connected to their respective components within the PC. A loose connection can prevent the system from powering on.
- If possible, test the power supply with a power supply tester or in another known working system to rule out other component failures.
8. Spesifikasies

Figure 8.1: Side label displaying electrical specifications.
| DC -uitvoer Voltage | +3.3V | +5V | +12V | -12V | +5Vsb |
|---|---|---|---|---|---|
| Maksimum uitvoerstroom | 16A | 17A | 39A | 0.3A | 2.5A |
| Gekombineerde krag | 105 W | 468 W | 3.6 W | 12.5 W | |
| Totale krag | 550 W | ||||
Algemene spesifikasies
- Vormfaktor: ATX
- Uitset Wattage: 550 W
- Verkoelingsmetode: Air (1x 120mm Auto-Thermally Controlled Fan)
- Invoer Voltage: 115/230V Skakelbaar
- Beskermings: Circuit, Over-Current, Over-Voltage, Over-Power, Under-Voltage, Over-Temperature Protections
- Afmetings (LxBxH): 5.9 x 5.5 x 3.4 duim
- Gewig: Ongeveer 2.9 pond
9. Waarborg
The Apevia CAPTAIN550 Power Supply is covered by a manufacturer's warranty. Please refer to the warranty card included with your product or visit the official Apevia webwebwerf vir gedetailleerde waarborgbepalings en -voorwaardes.
Belangrik: Use of this power supply unit for Bitcoin mining or similar intensive, continuous load applications is not covered by the warranty, as such use can shorten the product's lifespan and cause failures.
10. Ondersteuning
For technical assistance, product inquiries, or warranty claims, please contact Apevia customer support. You can find contact information on the official Apevia webwebwerf of deur jou produk se dokumentasie.
Vervaardiger: Apevia Corp
Webwebwerf: www.apevia.com (Please check for the most current contact information)