1. Belangrike veiligheidsinstruksies
Please read these instructions carefully before using the appliance and keep them for future reference. Incorrect use can lead to electric shock, fire, or serious injury.
- Elektriese veiligheid: Verseker die voltagDie volume wat op die toestel aangedui word, stem ooreen met jou plaaslike netspanning.tage voordat u dit koppel. Moenie die toestel, koord of prop in water of enige ander vloeistof dompel nie.
- Warm oppervlaktes: Surfaces of the toaster become hot during use. Always use handles or knobs. Allow the appliance to cool down completely before cleaning or storing.
- Kinders: Hierdie toestel is nie bedoel vir gebruik deur persone (insluitend kinders) met verminderde fisiese, sensoriese of geestelike vermoëns, of 'n gebrek aan ervaring en kennis nie, tensy hulle toesig of instruksies oor die gebruik van die toestel gegee is deur 'n persoon wat verantwoordelik is vir hul veiligheid. Kinders moet onder toesig wees om te verseker dat hulle nie met die toestel speel nie.
- Buitelandse voorwerpe: Never insert metal objects, such as knives or forks, into the toaster slots as this may cause electric shock.
- Oorverhitting: Do not cover the toaster while it is operating. Do not place the toaster near or on heat sources.
- Kragkabel: Regularly inspect the power cord for damage. If the supply cord is damaged, it must be replaced by the manufacturer, its service agent, or similarly qualified persons in order to avoid a hazard.
- Ontkoppel: Always unplug the toaster from the power outlet when not in use, before cleaning, and before moving.
- Ventilasie: Ensure adequate ventilation around the toaster during operation.
2. Produk verbyview
The Girmi TP11 Electric Toaster is designed for efficient and convenient toasting of bread slices and stuffed toasts. It features multiple browning levels and functions for defrosting and reheating.

Figuur 1: Voorkant view of the Girmi TP11 Electric Toaster.
Sleutel kenmerke:
- Wide slots for cooking stuffed toasts.
- Timer with 6 adjustable browning levels.
- Three functions: Defrost, Reheat, and Cancel.
- Automatic shut-off mechanism.
- Includes 2 stainless steel tongs for safe food handling.
- Verwyderbare krummelbak vir maklike skoonmaak.
- 800W power for quick and even toasting.
3. Komponente
Familiarize yourself with the parts of your Girmi TP11 toaster:
- Roostergleuwe: Two wide slots for bread slices or stuffed toasts.
- Browning-beheerskakelaar: Adjusts the toasting level from 1 (lightest) to 6 (darkest).
- Ontdooi -knoppie: Vir die rooster van bevrore brood.
- Herverhit-knoppie: For warming up already toasted bread without further browning.
- Kanselleer-knoppie: Stops the toasting cycle immediately.
- Vervoerhefboom: Lowers and raises the bread into the toasting slots.
- Verwyderbare krummelbak: Located at the bottom for collecting crumbs.
- Stainless Steel Tongs: Two tongs for safely removing hot toast.

Figuur 2: Control panel with browning dial and function buttons.

Figuur 3: Included stainless steel tongs.
4. Opstelling
Voor die eerste gebruik, volg hierdie stappe:
- Uitpak: Carefully remove the toaster and all accessories from the packaging. Retain packaging for future storage or disposal.
- Plasing: Place the toaster on a stable, flat, heat-resistant surface, away from flammable materials and at least 10 cm from walls or cabinets. Ensure there is enough space above the toaster for heat to escape.
- Eerste gebruik (afbranding): Before toasting food for the first time, operate the toaster without bread for a few minutes on the highest browning setting (level 6). This will burn off any manufacturing residues and eliminate initial odors. Ensure the area is well-ventilated during this process.
- Kragverbinding: Plug the power cord into a suitable AC 230V 50Hz power outlet.
5. Bedryfsinstruksies
Follow these steps to operate your Girmi TP11 toaster:
Roosterbrood:
- Maak seker dat die broodrooster ingeprop is.
- Place one or two slices of bread or stuffed toasts into the toasting slots.
- Kies jou verlangde bruiningsvlak met die bruiningsbeheerskakelaar (1 vir lig, 6 vir donker).
- Druk die hefboom van die slede af totdat dit in plek klik. Die roostersiklus sal begin en die aanwyserliggie sal brand.
- Once the selected browning level is reached, the toast will automatically pop up, and the toaster will switch off.
- Carefully remove the toast using the provided stainless steel tongs.
Using Defrost Function:
Om gevriesde brood te rooster:
- Place frozen bread into the toasting slots.
- Kies jou verlangde bruiningsvlak.
- Druk die sleephefboom af.
- Druk die ontdooi button. The indicator light for Defrost will illuminate, and the toaster will automatically adjust the toasting time.
Using Reheat Function:
To warm up cold toast:
- Place the cold toast into the toasting slots.
- Druk die sleephefboom af.
- Druk die Herverhit button. The indicator light for Reheat will illuminate, and the toaster will warm the bread for a short period without further browning.
Using Cancel Function:
To stop the toasting cycle at any time, simply press the Kanselleer button. The toast will pop up, and the toaster will switch off.
6. Onderhoud en Skoonmaak
Gereelde skoonmaak verseker optimale werkverrigting en verleng die lewensduur van jou broodrooster.
- Ontkoppel altyd die broodrooster uit die kragtoevoer en laat dit heeltemal afkoel voor skoonmaak.
- Krummelbak: Pull out the removable crumb tray from the front of the toaster. Discard crumbs and wipe the tray clean with a damp lap. Maak seker dat dit droog is voordat jy dit weer insit.
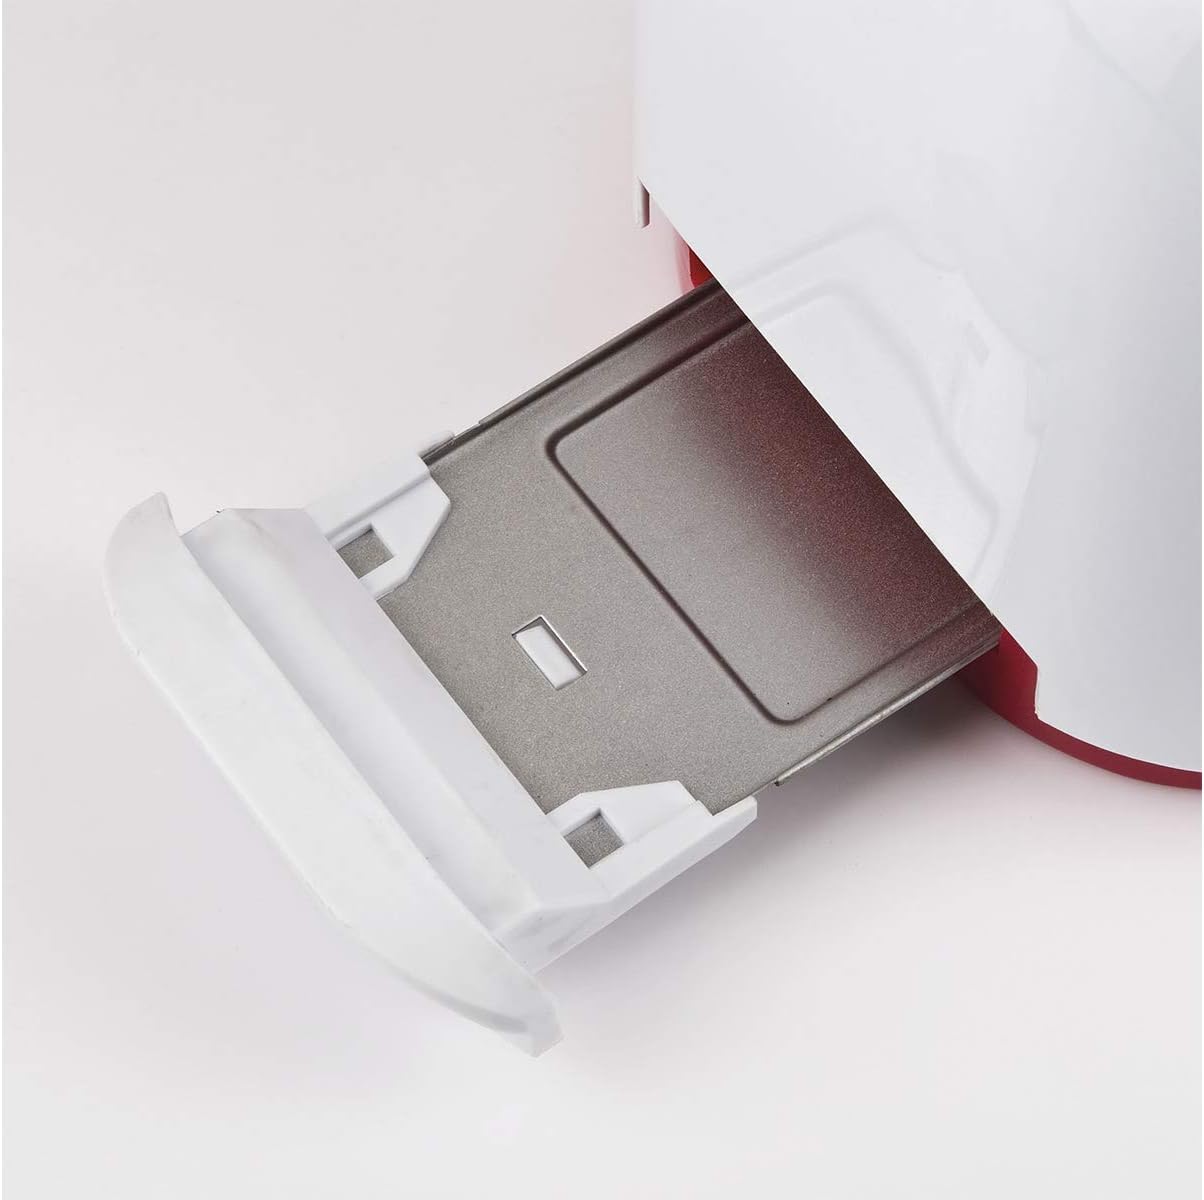
Figuur 4: Verwyderbare krummelbak vir maklike skoonmaak.
- Buitekant: Vee die buitekant van die broodrooster af met 'n sagte, damp lap. Moenie skuurmiddels of skuursponse gebruik nie, aangesien dit die oppervlak kan beskadig.
- Roostergleuwe: Never insert fingers or metal objects into the toasting slots. If bread becomes jammed, unplug the toaster and carefully remove the bread after it has cooled.
- Berging: Wanneer dit nie gebruik word nie, bêre die broodrooster op 'n skoon, droë plek.
7. Probleemoplossing
As jy probleme met jou broodrooster ondervind, raadpleeg die volgende algemene probleme en oplossings:
| Probleem | Moontlike oorsaak | Oplossing |
|---|---|---|
| Rooster skakel nie aan nie. | Nie ingeprop nie; krag aftage; foutiewe aansluiting. | Check power plug and outlet. Try a different outlet. |
| Brood spring nie op nie. | Bread is stuck; mechanism fault. | Unplug the toaster. Carefully remove the bread once cooled. If problem persists, contact support. |
| Ongelyke roostering. | Wisselvallige brooddikte; krummelopbou. | Maak seker dat broodsnye van eenvormige dikte is. Maak die krummelbak gereeld skoon. |
| Rook kom uit die broodrooster. | Food stuck inside; excessive crumbs; high browning setting. | Immediately press Cancel and unplug. Allow to cool, then clean crumb tray and check for stuck food. Reduce browning setting. |
If the problem persists after trying these solutions, please contact Girmi customer support.
8. Spesifikasies
Technical details for the Girmi TP11 Electric Toaster:
- Modelnommer: TP1101
- Handelsmerk: Girmi
- Krag: 800 W
- Kragtoevoer: AC 230V 50Hz
- Produkafmetings (L x B x H): Ongeveer 27 x 18 x 17 cm
- Produk gewig: Ongeveer 1.12 kg
- Materiaal: Plastic (body), Stainless Steel (tongs)
- Verbruining vlakke: 6
- Funksies: Toast, Defrost, Reheat, Cancel
- Skottelgoedwasser veilig: Nee
- Ingesluit komponente: Toaster, 2 stainless steel tongs, instruction manual, warranty information.

Figuur 5: Girmi TP11 Toaster dimensions.
9. Produkvideo
Kyk na hierdie amptelike produkvideo vir 'n visuele oorsigview of the Girmi TP11 toaster's features and operation.
Knip 1: Product Summary for Girmi TP11 Toaster. This video highlights the main features and design of the toaster.
10. Waarborg en Ondersteuning
The Girmi TP11 Electric Toaster comes with a 2 jaar waarborg vanaf die aankoopdatum, wat vervaardigingsdefekte onder normale huishoudelike gebruik dek. Bewaar asseblief u bewys van aankoop vir waarborgeise.
For technical assistance, warranty claims, or any questions regarding your product, please contact Girmi customer support through their official website or the retailer where the product was purchased. Refer to the contact information provided in your purchase documentation.