1. Inleiding
This manual provides essential instructions for the safe installation, operation, and maintenance of your Beghelli 1499L 11W Slim Emergency Lamp, Model 8106/11. This energy-efficient, battery-powered LED lamp is designed to provide reliable emergency lighting, particularly for outdoor ceiling-mounted applications. Please read this manual thoroughly before installation and use, and retain it for future reference.
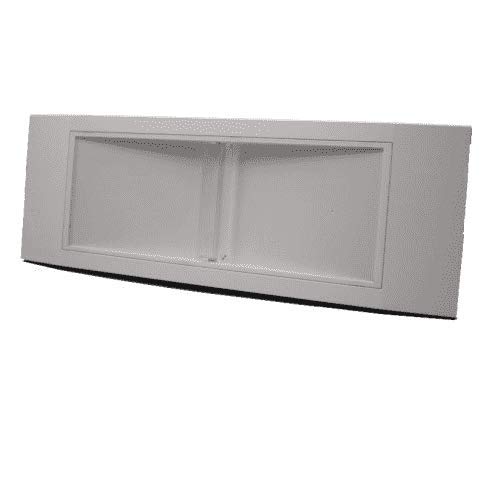
Figure 1: Beghelli 1499L 11W Slim Emergency Lamp. This image shows the white rectangular lamp unit with its black mounting base, designed for discreet installation.
2. Veiligheidsinligting
Neem altyd die volgende veiligheidsmaatreëls in ag om beserings of skade aan die produk te voorkom:
- Elektriese veiligheid: Installation must be performed by a qualified electrician in accordance with all local and national electrical codes. Ensure power is disconnected before any installation or maintenance.
- Produk Integriteit: Do not modify or disassemble the lamp. Any unauthorized modifications will void the warranty and may pose a safety risk.
- Omgewingstoestande: Hierdie lamp is designed for outdoor use. Ensure it is installed in a location protected from extreme weather conditions beyond its IP rating (if specified, otherwise assume standard outdoor protection).
- Battery hantering: Die lamp contains a battery. Do not expose the battery to excessive heat, fire, or puncture. Dispose of batteries according to local regulations.
- Montering: Ensure the mounting surface is structurally sound and can support the weight of the lamp.
3. Opstelling en installering
Volg hierdie stappe vir behoorlike installasie:
- Uitpak: Carefully remove the emergency lamp and all components from the packaging. Inspect for any signs of damage. If damaged, do not proceed with installation and contact your supplier.
- Gereedskap benodig: Gather necessary tools, which typically include a drill, screwdriver, wire strippers, and appropriate mounting hardware (not always included).
- Monteerplek: Select a suitable outdoor ceiling location for installation. Ensure the area is clear and provides adequate illumination coverage when the lamp is active. The lamp is designed for ceiling mounting.
- Kragontkoppeling: Before beginning any electrical work, ensure the main power supply to the installation area is completely disconnected at the circuit breaker.
- Monteer die basis: Heg die l veilig aanamp's mounting base to the chosen ceiling location using appropriate screws and anchors. Ensure the base is firmly fixed.
- Elektriese verbinding: Koppel die lamp's wiring to the building's electrical supply according to the wiring diagram provided with the product (if applicable) and local electrical codes. This lamp is battery-powered, but requires a constant power supply for charging and automatic operation.
- Lamp Aanhegsel: Once wiring is complete and secure, attach the main lamp unit to the mounted base. Ensure it clicks or locks into place firmly.
- Aanvanklike heffing: After installation, restore power to the circuit. The lamp will begin charging its internal battery. Allow at least 24 hours for the battery to achieve a full charge before conducting the first operational test.
4. Operasie
The Beghelli 1499L 11W Slim Emergency Lamp werk outomaties:
- Normale modus: When the main power supply is active, the lamp's battery charges, and the lamp remains off (or in standby, depending on configuration).
- Noodmodus: In die geval van 'n krag outage, die lamp will automatically switch on, utilizing its internal battery to provide emergency illumination. The lamp is designed to provide light for approximately 8 hours on a full charge.
- Toets funksie: Die lamp features a tactile switch, typically used for testing the battery and lamp functionality. Press and hold this switch to temporarily simulate a power outage and verify the lamp illuminates. Release the switch to return to normal operation. Perform this test monthly.
5. Onderhoud
Regular maintenance ensures optimal performance and longevity:
- Skoonmaak: Maak die l periodiek skoonampse buitekant met 'n sagte, damp cloth. Do not use abrasive cleaners or solvents. Ensure the lamp droog is voordat krag herstel word.
- Maandelikse toetsing: Conduct a monthly functional test using the tactile switch to ensure the lamp activates and provides light.
- Annual Discharge Test: Annually, disconnect the main power supply to the lamp for a full discharge test. Allow the lamp to operate on battery power until it fully discharges. Reconnect power and allow 24 hours for a full recharge. This helps maintain battery health.
- Battery vervanging: The internal battery has a limited lifespan. If the lamp fails to hold a charge or provides significantly reduced illumination time, the battery may need replacement. Due to the specialized nature, contact a qualified technician for battery replacement. Information on spare parts availability is not provided.
6. Probleemoplossing
Verwys na die tabel hieronder vir algemene probleme en hul oplossings:
| Probleem | Moontlike oorsaak | Oplossing |
|---|---|---|
| Lamp does not illuminate during power outage. |
|
|
| Lamp illuminates for a short duration only. |
|
|
| Lamp bly voortdurend aan. |
|
|
7. Spesifikasies
| Kenmerk | Detail |
|---|---|
| Handelsmerk | Beghelli |
| Modelnommer | 8106/11 |
| Afmetings (L x B x H) | 21 x 11 x 30 cm |
| Gewig | 570 gram |
| Materiaal | Aluminium |
| Kleur | Wit |
| Styl | Moderne |
| Voltooi Tipe | Gelak |
| Ligbrontipe | LED |
| Kragbron | Battery Powered (with mains charging) |
| Noodoperasie Duur | Ongeveer 8 uur |
| Skakel styl | Tactile (for testing) |
| Installasie tipe | Plafon Mount |
| Gebruiksomgewing | Buitelug |
| Energiedoeltreffendheid | Hoë energiedoeltreffendheid |
8. Waarborg en Ondersteuning
For warranty information, please refer to the documentation provided at the time of purchase or contact your retailer. Information regarding the availability of spare parts for this product is not explicitly provided. For technical support or service inquiries, please contact Beghelli customer service or your authorized dealer.