1. Inleiding
The Apitor Robot Panda Coding Robot Activity Set is a screen-free STEM learning toy designed to introduce children aged 4 and up to basic coding concepts, logical thinking, and problem-solving skills through interactive play. This manual provides detailed instructions for setting up, operating, and maintaining your Robot Panda.
2. Produk verbyview en komponente
Your Apitor Robot Panda Coding Robot Activity Set includes the following components:
- Robot Panda: The main interactive robot unit.
- Forest Map: A large, durable play mat for the robot to navigate.
- 36 Coding Cards: Physical cards with directional and action commands.
- 12 Activity Cards: Cards with varying difficulty levels for structured challenges.
- Activity Card Guide: A guide to understanding and utilizing the activity cards.
- Gebruikersgids: Hierdie handleiding.

Figure 2.1: All-in-One Coding Set Components. This image displays the Robot Panda, the forest map, coding cards, activity cards, and user guides, illustrating all included items.
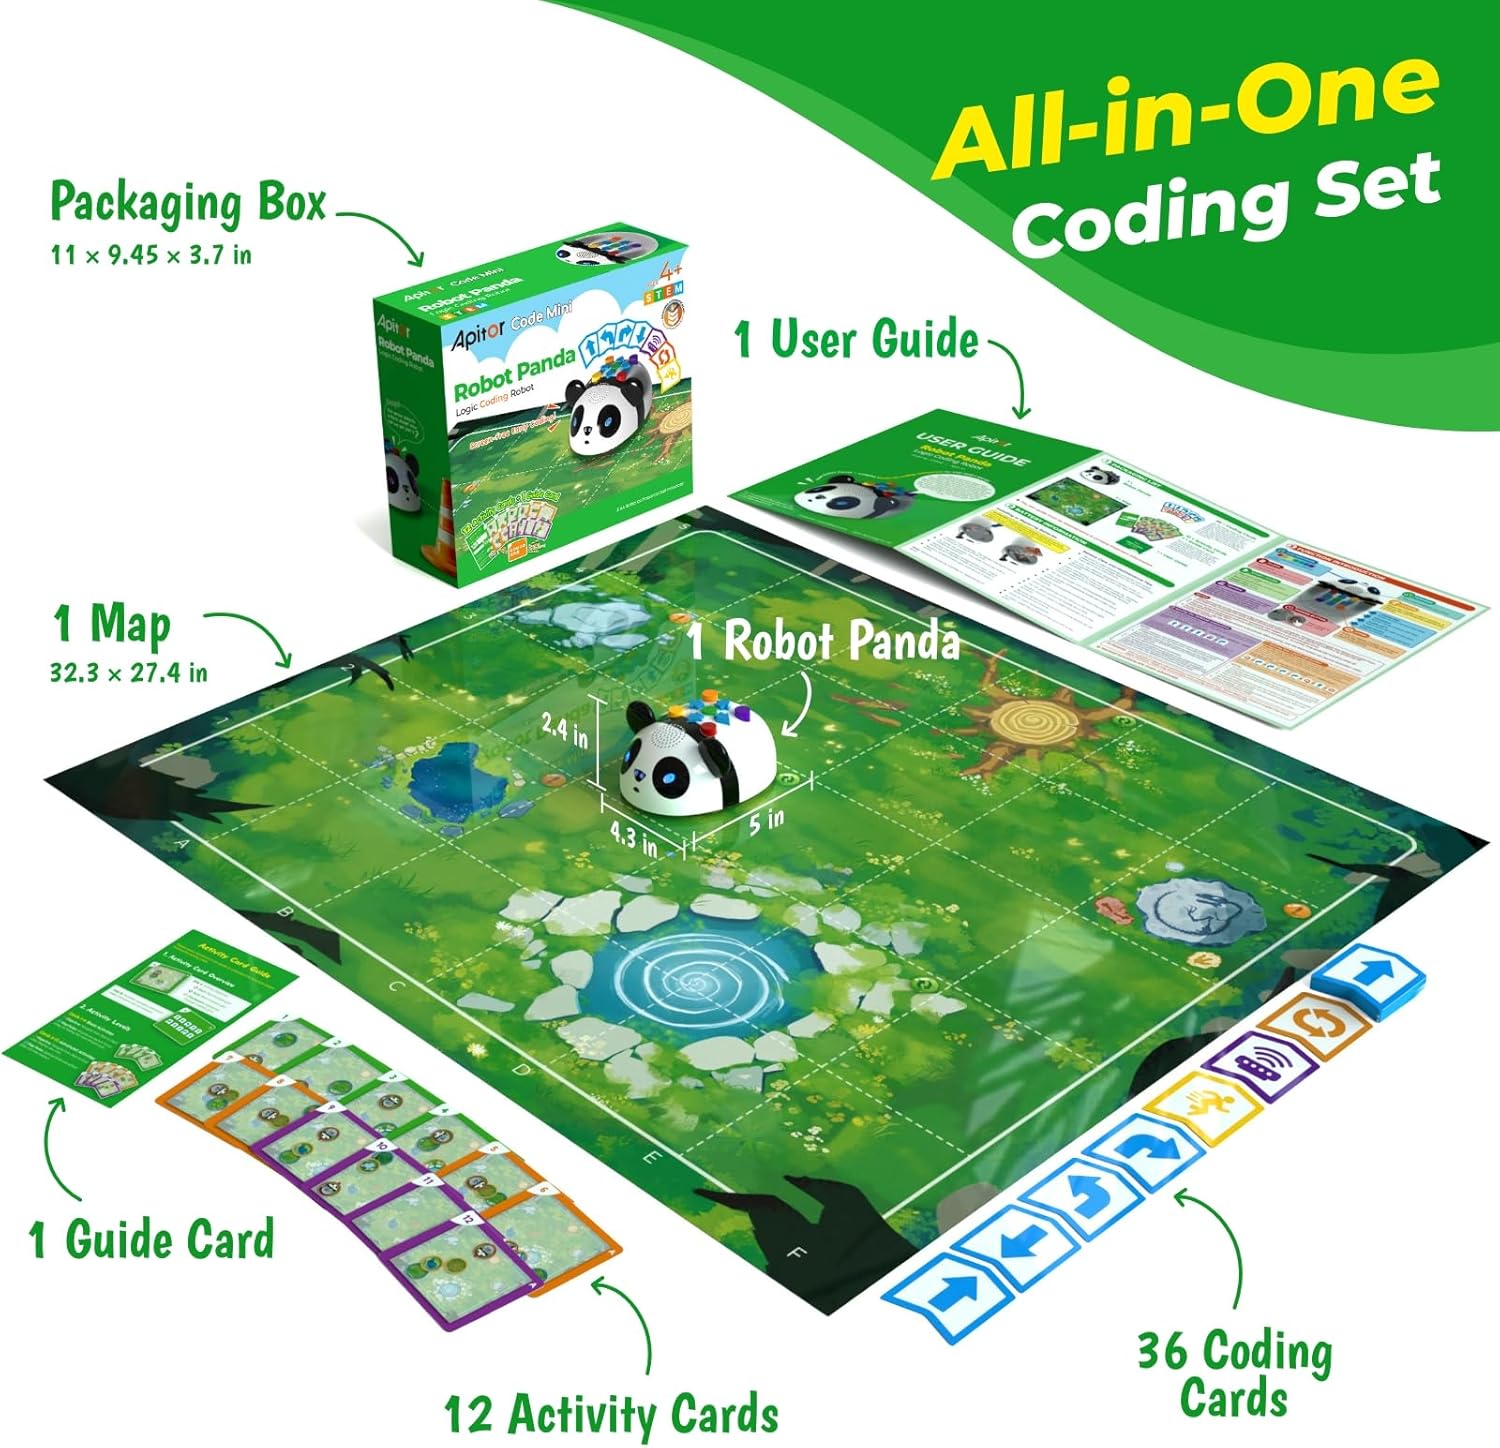
Figure 2.2: Robot Panda Packaging and Contents. The image shows the product box alongside the Robot Panda, map, and various cards, demonstrating how the items are organized within the packaging.
Video 2.1: Uitpak en Verbyview of Robot Panda. This video demonstrates the unboxing process and provides a detailed look at all the components included in the Apitor Robot Panda set, including the robot, map, and various cards.
3. Opstelling
3.1 Battery installasie
The Robot Panda requires 3 AA batteries (not included). Follow these steps for battery installation:
- Locate the battery compartment on the underside of the Robot Panda.
- Using a screwdriver, remove the screw securing the battery compartment door.
- Verwyder die batterykasdeur.
- Plaas 3 AA-batterye in en maak seker dat die polariteit (+/-) korrek is soos aangedui in die kompartement.
- Replace the battery compartment door and secure it with the screw.
Video 3.1: Battery Installation. This video segment demonstrates the correct procedure for installing AA batteries into the Robot Panda's battery compartment.
4. Bedryfsinstruksies
4.1 Robot Buttons and Functions
The Robot Panda features several buttons on its top surface for programming and control:
- Forward/Reverse Arrows (Blue): These two buttons control the robot's movement forward or backward. Each press moves the robot one grid on the map.
- Left/Right Arrows (Blue): These two buttons control the robot's turning. One press turns the robot 90 degrees on the spot.
- Green Button (Start/Pause): This button activates the programmed sequence. Press it to start the robot's movement. Press it again to pause the robot.
- Red Button (Clear): A quick tap on this button erases the last entered command. Holding it for three seconds clears all commands.
- Yellow Button (Preset Programs): This button activates one of three preset movement programs. The robot randomly picks one when pressed.
- Purple Button (Sensor): Activates the infrared sensor. When active, the robot can sense obstacles in front of it and react according to programmed sensor commands.
- Orange Button (Loop): Used to record and repeat sequences of commands.
Video 4.1: Robot Button Functions. This video segment provides a detailed explanation of each button on the Robot Panda and its corresponding function, including movement, start/pause, clear, preset programs, sensor, and loop.
4.2 Basic Movement
To make the Robot Panda move, simply press the desired directional buttons (Forward, Reverse, Left, Right) in sequence. After entering your commands, press the Groen knoppie to execute the sequence.
4.3 Using the Sensor Feature
The Robot Panda's infrared sensor allows it to detect obstacles. To program a sensor-based reaction:
- Enter the initial movement command (e.g., Forward).
- Druk die Purple Button (Sensor). The robot's lights will turn purple, indicating the sensor is active.
- Enter the desired reaction command (e.g., Reverse).
- Druk die Groen knoppie to start. The robot will move forward, and if it senses an obstacle, it will immediately reverse one step before continuing its main task.
Video 4.2: Sensor Feature Demonstration. This video segment illustrates how to program the Robot Panda to use its infrared sensor to detect and react to obstacles, demonstrating the robot's ability to reverse when an object is in its path.
4.4 Using the Loop Feature
The Loop feature allows the Robot Panda to repeat a sequence of commands. This is useful for repetitive movements or complex patterns.
- Record a Loop Sequence: Druk die Orange Button (Loop). The robot's lights will turn yellow. Enter the sequence of commands you want to loop (e.g., Turn Right, Turn Right). Press the Orange Button (Loop) again to finish recording. The number of times you press the Loop button during recording determines how many times the recorded sequence will repeat when the loop is activated.
- Use the Loop: After recording, you can incorporate the loop into a larger program. Press the Orange Button (Loop) once more, then press the Green Button (Start). The robot will execute the recorded loop sequence the specified number of times.
Video 4.3: Loop Feature Demonstration. This video segment explains how to record and execute looped command sequences, showing the robot repeating a series of turns based on the programmed loop.
5. Activity Cards and Gameplay Guide
The set includes 12 Activity Cards and a guide to help children progress through various coding challenges. These cards provide specific starting points, destinations, and sometimes checkpoints with special conditions.
5.1 Basic Activities (Cards 1-4)
These cards introduce fundamental movement and navigation. The goal is to program the Robot Panda to move from a red-marked starting grid to a blue-marked destination grid.
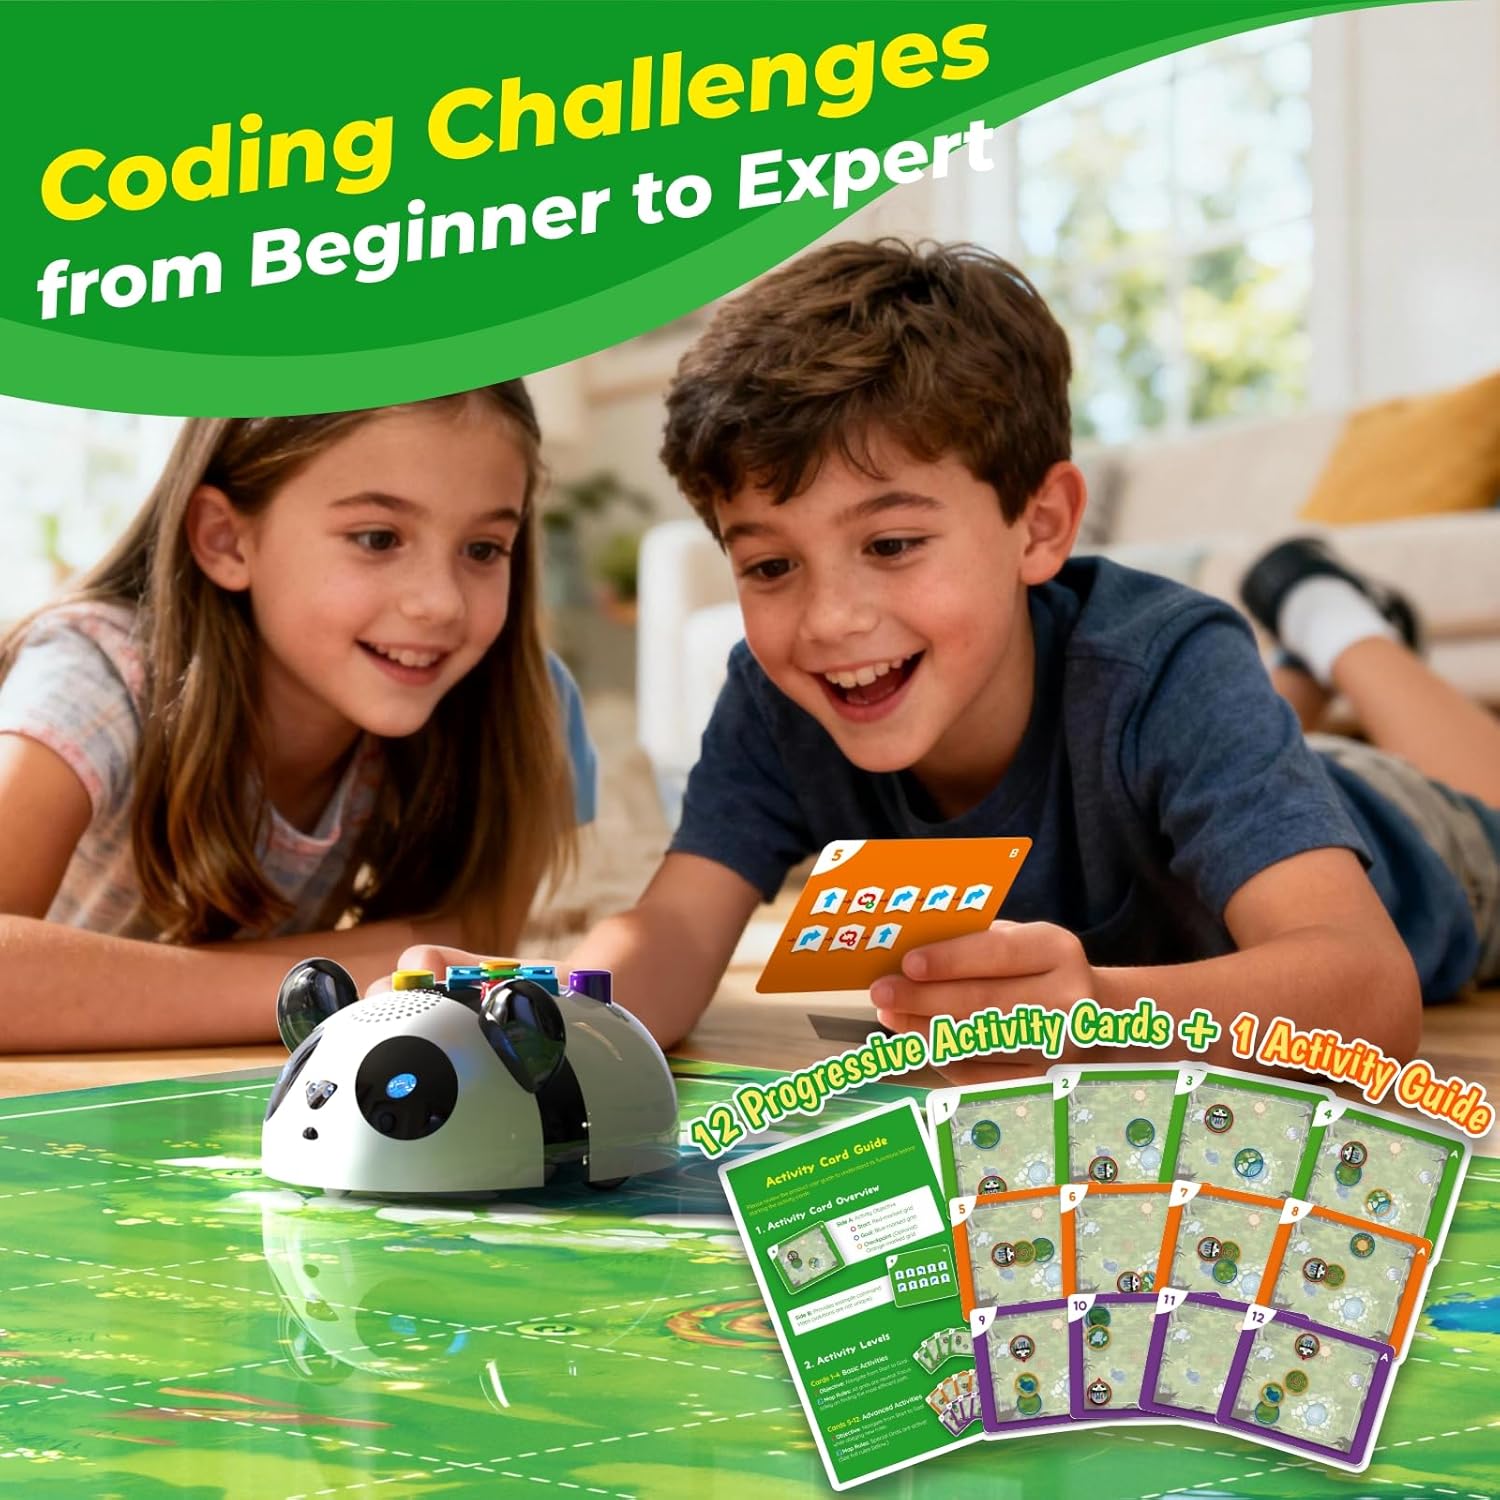
Figure 5.1: Coding Challenges. This image shows various activity cards, illustrating the progression from basic to advanced coding challenges.
Video 5.1: Basic Activity Card Example. This video segment demonstrates how to use a basic activity card (Card 1) to plan a route for the Robot Panda using coding cards and execute the program.
5.2 Advanced Activities (Cards 5-12)
These cards introduce more complex challenges, often incorporating the Loop and Sensor features. Checkpoints may require specific actions (e.g., spinning in place, or reacting to an obstacle) before the robot can proceed to the final destination.

Figure 5.2: Adventure Map. The map features various elements like a spiral, water, and rocks, providing a visually engaging environment for coding challenges.

Figure 5.3: Obstacle Detection. This image shows the Robot Panda interacting with an obstacle on the map, demonstrating its smart sensing capabilities.
Video 5.2: Advanced Activity Card Example. This video segment demonstrates how to use an advanced activity card (Card 5) which involves a checkpoint requiring a loop action, showcasing more complex programming.
Video 5.3: Advanced Activity Card Example (Sensor). This video segment demonstrates how to use an advanced activity card (Card 10) which involves a checkpoint requiring a sensor-based reaction, showcasing the robot's ability to adapt to obstacles.
6. Onderhoud
To ensure the longevity and optimal performance of your Robot Panda:
- Skoonmaak: Wipe the Robot Panda and map with a soft, dry cloth. Avoid using harsh chemicals or abrasive materials.
- Batterysorg: Verwyder batterye as die speelding vir 'n lang tydperk nie gebruik sal word nie om lekkasie te voorkom.
- Berging: Store all components in their original packaging or a designated storage area to prevent loss or damage.
7. Probleemoplossing
If you encounter any issues with your Robot Panda, please refer to the following common problems and solutions:
- Robot reageer nie:
- Maak seker dat die batterye korrek geïnstalleer is en nie leeg is nie. Vervang indien nodig.
- Check if the power button on the underside of the robot is pressed.
- Robot not moving as expected:
- Verify that the commands were entered correctly. Use the Clear button to reset and re-enter the sequence.
- Ensure the robot is placed on a flat, smooth surface.
- Sensor not detecting obstacles:
- Ensure the Purple Button (Sensor) was pressed to activate the sensor mode.
- Check for any obstructions on the sensor itself.
If the issue persists after trying these steps, please contact Apitor customer support for further assistance.
8. Spesifikasies
| Kenmerk | Spesifikasie |
|---|---|
| Handelsnaam | Apitor |
| Model Naam | Robot Panda |
| Modelnommer | 012 APRIL |
| Vervaardiger Minimum ouderdom | 48 maande (4 jaar) |
| Materiaal tipe | Akrilonitrielbutadieenstireen (plastiek) |
| Bedryfsmodus | Handleiding |
| Kragbron | Battery |
| Ondersteunde batterytipes | 3 AA-batterye (nie ingesluit nie) |
| Item gewig | 0.64 kilogram |
| Item afmetings | 5 x 4.3 x 2.4 duim |
9. Waarborg en Ondersteuning
Apitor products are designed for durability and educational value. For specific warranty information, please refer to the product packaging or contact Apitor customer support directly. For any questions, technical assistance, or support needs, please visit the official Apitor webwebwerf of kontak hul kliëntediens span. Bewaar jou aankoopbewys vir waarborg eise.