1. Inleiding
This manual provides essential information for the safe and efficient operation, setup, maintenance, and troubleshooting of your Scheppach HC26 Compressor Air Compressor. Please read this manual thoroughly before operating the device to ensure proper use and to prevent injury or damage.

Figure 1: Scheppach HC26 Compressor Air Compressor. This image shows the main unit with its 24-liter tank, motor housing, pressure gauges, and wheels, alongside a small container, likely for compressor oil.
2. Veiligheidsinstruksies
Neem altyd basiese veiligheidsmaatreëls in ag wanneer elektriese toestelle gebruik word om die risiko van brand, elektriese skok en persoonlike besering te verminder.
- Lees alle instruksies: Maak jouself vertroud met die kontroles en korrekte gebruik van die kompressor.
- Elektriese veiligheid: Ensure the power supply matches the specifications (230V). Do not operate in wet conditions.
- Persoonlike Beskermende Toerusting (PPE): Dra altyd veiligheidsbril of 'n veiligheidsbril. Gehoorbeskerming word aanbeveel tydens langdurige gebruik.
- Drukveiligheid: Never exceed the maximum working pressure of 8 bar. Do not direct compressed air at people or animals.
- Onderhoud: Disconnect from power before performing any maintenance or adjustments.
- Ventilasie: Gebruik die kompressor in 'n goed geventileerde area om oorverhitting te voorkom.
- Stabiliteit: Ensure the compressor is on a stable, level surface during operation.
3. Produk verbyview
3.1 Sleutelkenmerke
- Max. Working pressure: 8 bar
- Kettle size: 24 L
- Oil-lubricated piston compressor for durability and long-lasting performance.
- Quick connection coupling for fast and easy tool changes.
- Driving device (wheels) and ergonomic handle for easy transport.
- Motor Power: 1500 W (2.0 HP)
- Suction Power: 220 L/min
3.2 Komponente
The Scheppach HC26 compressor includes the main compressor unit with a 24L tank, motor, pressure gauges, pressure regulator, quick coupling, wheels, and a transport handle.

Figure 2: Pressure Gauge and Quick Coupling. This close-up shows the pressure gauge indicating tank pressure and the quick connection coupling for attaching pneumatic tools.
4. Opstelling
- Uitpak: Verwyder die kompressor en alle toebehore versigtig uit die verpakking. Inspekteer vir enige versendingskade.
- Wielsamestelling: Attach the wheels to the designated axles on the compressor base. Secure them firmly according to the included hardware.
- Olie Vulsel: As an oil-lubricated compressor, ensure the crankcase is filled with the appropriate compressor oil to the correct level before first use. Refer to the oil level indicator.
- Plasing: Position the compressor on a firm, level surface in a well-ventilated area, away from walls or obstructions to allow for proper airflow.
- Elektriese verbinding: Connect the compressor to a grounded 230V, 50Hz power outlet.
5. Bedryfsinstruksies
- Aanvanklike aanvang: After setup, turn on the compressor. It will begin to build pressure in the tank. The motor will automatically shut off once the maximum pressure (8 bar) is reached.
- Aanpassing van Uitsetdruk: Use the pressure regulator knob to set the desired output pressure for your pneumatic tool. Monitor the regulated pressure gauge.
- Connecting Tools: Attach your pneumatic tool to the quick connection coupling. Ensure a secure connection.
- Operasie: Begin using your tool. The compressor motor will cycle on and off automatically to maintain tank pressure as air is consumed.
- Af skakel: When finished, turn off the compressor. Disconnect the tool and then unplug the compressor from the power outlet.
- Dreinering van kondensaat: After each use, or at least daily, drain any accumulated moisture from the tank using the drain valve located at the bottom of the tank. This prevents rust and extends tank life.
5.1 Algemene toepassings
- Bande inflasie: Ideal for inflating vehicle tires, bicycle tires, and sports equipment.
- Nailing/Stapling: Powers pneumatic nailers and staplers for various woodworking and construction tasks.
- Spuitverf: Suitable for use with spray guns for painting projects.
- Blowing/Cleaning: Effective for blowing dust and debris from workspaces, tools, and machinery.
- Pneumatic Ratchets: Can power small pneumatic ratchets for mechanical work.

Figuur 3: Toepassing Examples. This diagram visually represents common uses for the air compressor, including powering nail guns, pneumatic ratchets, spray guns, and for tire inflation and general blowing tasks.
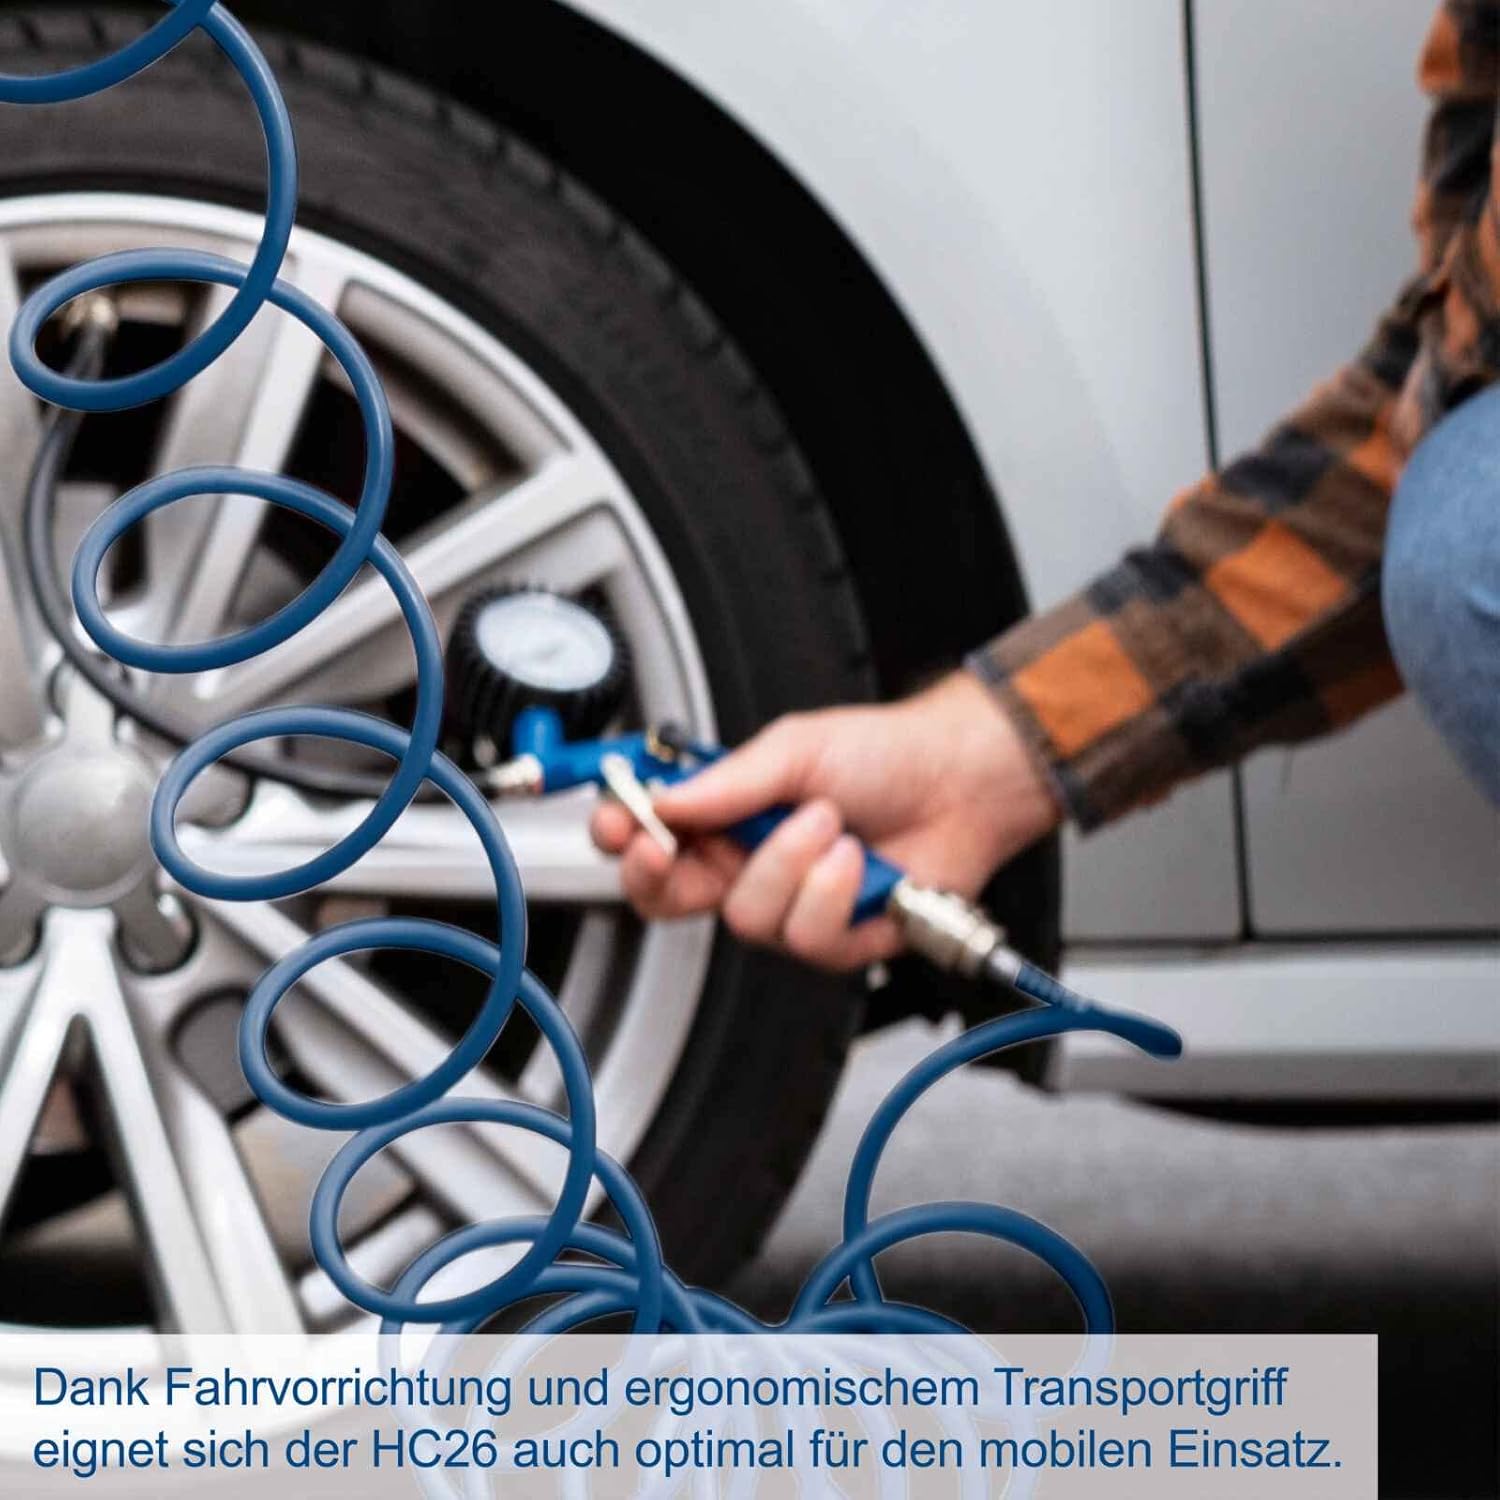
Figure 4: Mobile Use. A user is shown inflating a car tire, demonstrating the compressor's suitability for mobile applications thanks to its wheels and handle.
6. Onderhoud
Regular maintenance ensures the longevity and optimal performance of your air compressor. Always disconnect the power before performing any maintenance.
- Drain Condensate: Daily or after each use, open the drain valve at the bottom of the tank to release accumulated moisture.
- Kontroleer olievlak: Regularly check the oil level in the crankcase. Refill or change oil as needed, using only recommended compressor oil.
- Skoon lugfilter: Inspect and clean the air filter regularly. A clogged filter reduces efficiency and can damage the motor. Replace if necessary.
- Algemene skoonmaak: Keep the compressor clean and free of dust and debris. Wipe down exterior surfaces.
- Inspekteer slange en toebehore: Periodically check all hoses and fittings for leaks, cracks, or damage. Replace any worn parts.

Figure 5: Portability and Maintenance. This graphic highlights the compressor's ease of transport and its design for straightforward maintenance.
7. Probleemoplossing
Voordat u kliëntediens kontak, verwys na die volgende tabel vir algemene probleme en hul oplossings.
| Probleem | Moontlike oorsaak | Oplossing |
|---|---|---|
| Kompressor begin nie. | Geen krag, stroombreker het afgeskakel, foutiewe skakelaar. | Kontroleer die kragaansluiting, herstel die stroombreker, kontak diens indien die skakelaar foutief is. |
| Die kompressor loop aanhoudend of gereeld. | Air leak in system, check valve issue, excessive air demand. | Check hoses and fittings for leaks, inspect check valve, reduce air consumption. |
| Lae lugdruk. | Clogged air filter, air leak, pressure regulator set too low. | Maak lugfilter skoon/vervang, kontroleer vir lekkasies, verstel drukreguleerder. |
| Oormatige geraas of vibrasie. | Loose components, worn parts, insufficient oil. | Tighten fasteners, inspect for worn parts, check and add oil if needed. |
8. Tegniese spesifikasies
| Spesifikasie | Waarde |
|---|---|
| Model Naam | HC26 (5906135901) |
| Handelsmerk | Scheppach |
| Voltage | 230 Volt |
| Motorperdkrag | 1500 W (2.0 HP) |
| Maks. Werksdruk | 8 bar |
| Tenk kapasiteit | 24 liter |
| Air Flow Capacity (Suction) | 220 LPM |
| Item gewig | 1 kilogram (ongeveer 2.2 pond) |
| Produk afmetings | 0.04"L x 0.04"W x 0.04"H (Note: These dimensions appear to be placeholder values and may not reflect the actual size of the compressor.) |
| Spesiale kenmerk | Durable, Oil-lubricated piston compressor |

Figure 6: Key Specifications. This infographic highlights the maximum 8 bar working pressure, 220 L/min suction power, and 24 L tank volume. Please note the discrepancy regarding 'Oil-free' in the image versus 'Oil Lubricated' in the product description; the product is confirmed to be oil-lubricated.
9. Waarborg en Ondersteuning
For warranty information, technical support, or to order replacement parts, please contact Scheppach customer service. Retain your proof of purchase for warranty claims.
For the most up-to-date contact information, please visit the official Scheppach webwebwerf of verwys na die dokumentasie wat by u aankoop ingesluit is.