1. Produk verbyview
The Smart Sensor AR3126 is a high voltage insulation resistance tester, commonly referred to as a megohmmeter. This instrument is designed for measuring the insulation resistance of various electrical equipment, including generators, motors, power transformers, wiring, and other electrical appliances. It is an essential tool for routine maintenance procedures, helping to identify potential faults by monitoring changes in insulation resistance over time. Regular calibration is recommended to ensure the accuracy and reliability of the meter.
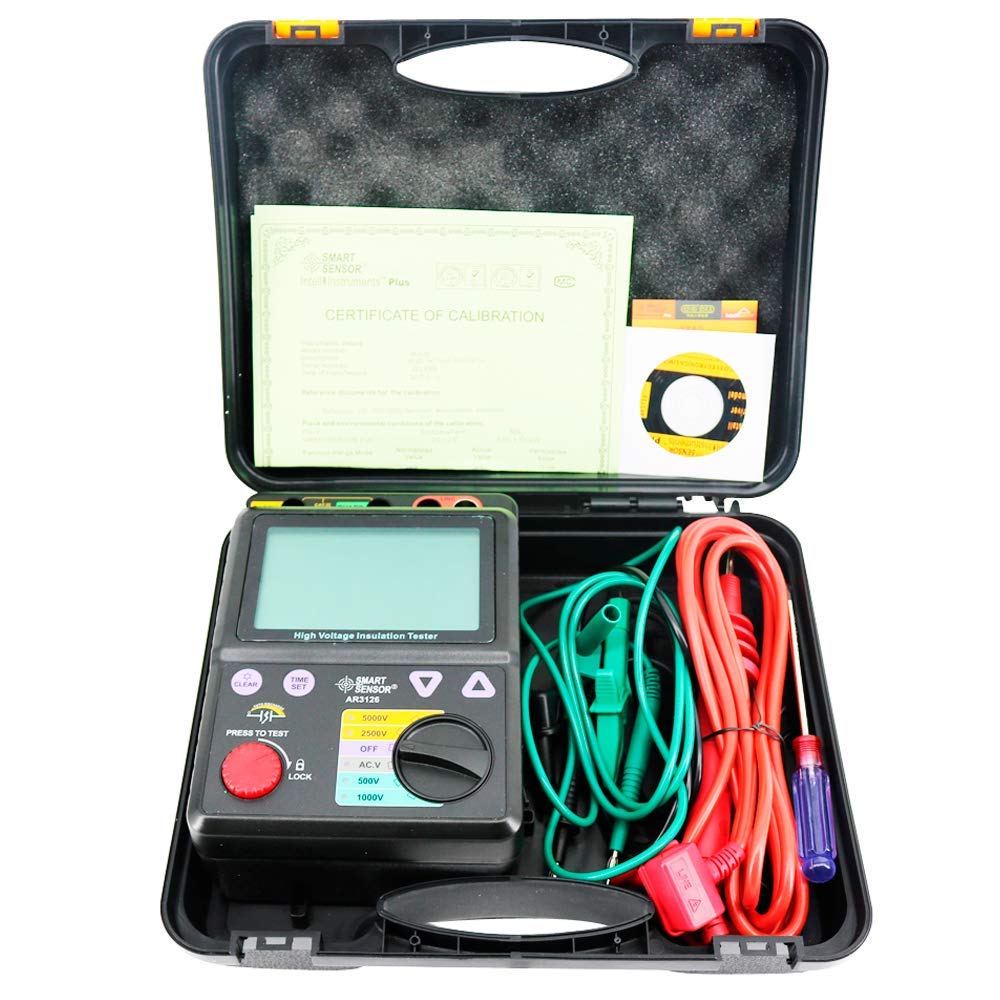
Figuur 1: Voorkant view of the AR3126 tester, displaying a high voltage insulation resistance measurement.
2. Veiligheidsinligting
Before operating the AR3126, please read and understand all safety warnings and operating instructions. Failure to do so may result in serious injury or damage to the instrument. This device generates high voltage; always exercise extreme caution.
- Ensure the device is turned off and disconnected from any power source before performing any maintenance or battery replacement.
- Always use appropriate personal protective equipment (PPE) when working with high voltage.
- Moenie die toetser in nat toestande of in die teenwoordigheid van plofbare gasse of dampe gebruik nie.
- Verify that test leads are in good condition, without any damage or exposed wiring.
- Never touch the test leads or the circuit under test during a measurement.
- Discharge the circuit completely after testing high voltage insulation resistance.
3. Opstelling en Voorbereiding
3.1 Battery installasie
The AR3126 requires 8 C-type batteries for operation. To install or replace batteries:
- Maak seker dat die toetser afgeskakel is.
- Vind die batterykompartement aan die agterkant van die toestel.
- Maak die batteryvakdeksel oop.
- Insert 8 C-type batteries, observing the correct polarity (+/-) as indicated inside the compartment.
- Sluit die deksel van die batterykas veilig.

Figure 2: Open battery compartment for C-type battery installation.
3.2 Verbinding van toetsdrade
Connect the provided test leads to the appropriate terminals on the top of the AR3126:
- Connect the green lead to the 'EARTH' terminal.
- Connect the black lead to the 'GUARD' terminal (if required for specific measurements).
- Connect the red lead to the 'LINE' terminal.

Figure 3: AR3126 tester with included test leads and accessories.
4. Bedryfsinstruksies
4.1 Aan-/afskakel
To power on the device, rotate the rotary switch from the 'OFF' position to any desired test voltage (e.g., 500V, 1000V, 2500V, 5000V) or 'AC.V' for voltage measurement. To power off, rotate the switch back to 'OFF'.
4.2 Kies Toetsvolumetage
The AR3126 offers multiple rated test voltages: 500V, 1000V, 2500V, and 5000V. Select the appropriate voltage for your application using the rotary switch on the front panel.
4.3 Performing an Insulation Resistance Test
- Ensure the circuit under test is de-energized and safely isolated.
- Connect the test leads to the circuit: 'LINE' to the conductor, 'EARTH' to the ground or protective earth. Use 'GUARD' if a guard ring measurement is required to eliminate surface leakage currents.
- Kies die gewenste toets voltage met behulp van die draaiskakelaar.
- Press and hold the red 'PRESS TO TEST' button. The display will show the insulation resistance value. For continuous testing, press the 'LOCK' button while holding 'PRESS TO TEST'.
- Observe the reading on the digital display.
- Release the 'PRESS TO TEST' button to stop the test. The device will automatically discharge the circuit.
4.4 DC/AC Voltage Toets
Om DC of AC voltage (range 30-600V), rotate the switch to the 'AC.V' position. Connect the test leads to the voltage source. The display will show the measured voltage.
5. Onderhoud
5.1 Skoonmaak
Maak die buitekant van die instrument skoon met 'n sagte, damp cloth. Do not use abrasive cleaners or solvents. Ensure the device is powered off and disconnected from any test leads before cleaning.
5.2 Batteryvervanging
Replace batteries when the low battery indicator appears on the display or when the device fails to power on. Refer to Section 3.1 for battery installation instructions.
5.3 Berging
When not in use, store the AR3126 in a dry, cool environment, away from direct sunlight and extreme temperatures. If storing for extended periods, remove the batteries to prevent leakage.
5.4 Kalibrasie
Regular calibration is necessary to maintain the accuracy of the AR3126. It is recommended to have the instrument calibrated by a qualified service center at least once a year, or as required by your quality assurance program.
6. Probleemoplossing
- Toestel skakel nie aan nie: Kontroleer batteryinstallasie en maak seker dat batterye nie leeg is nie. Vervang indien nodig.
- 'OL' (Overload) displayed during insulation test: This indicates that the measured resistance is higher than the maximum range of the selected voltage. This is often a normal reading for good insulation.
- Onakkurate lesings: Ensure test leads are properly connected and in good condition. Verify the circuit under test is clean and dry. Consider professional calibration if issues persist.
- No reading during test: Ensure the 'PRESS TO TEST' button is held down or 'LOCK' is engaged. Check for loose connections.
7. Spesifikasies
| Parameter | Waarde |
|---|---|
| Gegradeerde Voltage | 500V / 1000V / 2500V / 5000V |
| Testing Range (500V) | 0.0 ~ 999MΩ |
| Testing Range (1000V) | 0.0 ~ 1.99GΩ |
| Testing Range (2500V) | 0.0 ~ 99.9GΩ |
| Testing Range (5000V) | 0.0 ~ 1000GΩ |
| Akkuraatheid | ±2%rdg ±3dgt |
| DC/AC Voltage Toets | 30 ~ 600V |
| Voltage Resolusie | 1.0 V |
| Oorladingsbeskerming | AC 1200V / 10 seconds |
| Weerstaan Voltage | AC 8320V / 5 seconds |
| Insulated Impedance | 1000 XNUMX MΩ |
| Maks. Kortsluitstroom | 1.4mA |
| Polarisasie-indeks (PI) | Ja |
| Diëlektriese absorpsieverhouding (DAR) | Ja |
| Kragbron | 8 x C-type batteries |
| Produk Netto Gewig | 1027g |
| Produk Grootte | 153 x 213 x 95 mm |
| Materiaal | Plastiek |
8. Waarborginligting
Specific warranty details for the Smart Sensor AR3126 are not provided in this manual. Please refer to the warranty card included with your product or contact the seller/manufacturer directly for comprehensive warranty terms and conditions.
9. Ondersteuning
For technical assistance, service, or further inquiries regarding the Smart Sensor AR3126, please contact your point of purchase or the Smart Sensor customer support. Contact information can typically be found on the product packaging or the manufacturer's official webwebwerf.