BESDER BES-MH03
BESDER Huissekuriteit IP-kamera Gebruikershandleiding
Model: BES-MH03
1. Inleiding
Thank you for choosing the BESDER Home Security IP Camera. This wireless smart WiFi camera is designed to provide reliable surveillance, audio recording, and baby monitoring capabilities with high-definition video. This manual will guide you through the setup, operation, and maintenance of your new device to ensure optimal performance and security.
2. Veiligheidsinligting
- Ensure the camera is powered by the correct voltage (DC 5V) as specified.
- Do not expose the camera to water or moisture. It is designed for indoor use only.
- Vermy die plasing van die kamera in direkte sonlig of naby hittebronne.
- Moenie probeer om die kamera self uitmekaar te haal of te herstel nie. Kontak gekwalifiseerde personeel vir diens.
- Hou die kamera en sy bykomstighede buite bereik van kinders.
- Use only the provided power adapter and cable to prevent damage.
3. Pakketinhoud
Kontroleer asseblief die pakket om seker te maak dat alle items teenwoordig en in 'n goeie toestand is:
- BESDER Home Security IP Camera
- USB-kragkabel
- Kragadapter (DC 5V)
- Monteringskroewe en muurproppe
- Gebruikershandleiding (hierdie dokument)

Image showing the BESDER IP Camera along with its accessories: a USB power cable, a power adapter, and a packet of mounting screws.
4. Produk verbyview
Familiarize yourself with the main components of your BESDER IP Camera:
- Kameralens: Vang video footage.
- Infrarooi LED's: Vir nagvisie.
- Mikrofoon: Vir oudio-invoer.
- Spreker: Vir tweerigting-klankkommunikasie.
- SD-kaartgleuf: Vir plaaslike videoberging (ondersteun tot 64 GB).
- Power Interface (DC 5V): Koppel aan die kragadapter.
- Herstel-knoppie: Word gebruik om fabrieksinstellings te herstel.

Diagram illustrating the side view of the BESDER IP Camera, highlighting the SD Card slot, Power interface (DC 5V), and Reset button.
5. Opstelling
5.1. Aanskakel
- Connect the USB power cable to the camera's power interface.
- Steek die kragadapter in 'n standaard elektriese aansluiting.
- The camera will power on, and its indicator light will begin to flash, indicating it's ready for setup.
5.2. App Installation (iCSee)
The BESDER IP Camera uses the iCSee application for remote monitoring and control.
- Download the iCSee app from your mobile device's app store (App Store for iOS or Google Play Store for Android).
Laai af vir iOS | Laai af vir Android - Registreer 'n nuwe rekening of meld aan as jy reeds een het.
5.3. Wi-Fi-verbinding
Follow these steps to connect your camera to your home Wi-Fi network:
- Open the iCSee app and tap the "+" icon to add a new device.
- Select "Add My Device" or "Add Camera".
- Choose the "Wi-Fi Camera" option.
- Follow the on-screen prompts to enter your Wi-Fi network name (SSID) and password. Ensure your phone is connected to a 2.4GHz Wi-Fi network, as the camera may not support 5GHz.
- The app will generate a QR code. Position your phone's screen in front of the camera lens (approx. 15-20 cm away) until you hear a confirmation sound from the camera.
- Once connected, the camera's indicator light will turn solid blue. You can now name your camera and start monitoring.
5.4. Montering
The camera can be placed on a flat surface or mounted to a wall or ceiling.
- Choose a suitable location with a clear view and within Wi-Fi range.
- If mounting, use the provided mounting screws and wall plugs to secure the camera base.
- Adjust the camera's angle as needed within the app after mounting.
6. Bedryf
6.1. Leef View
Access real-time video feed from your camera through the iCSee app.
- Open the iCSee app and select your camera from the device list.
- The live video feed will appear. You can pan and tilt the camera remotely using the controls in the app.

Screenshot of a multi-camera monitoring interface, likely from the iCSee application, displaying live feeds from multiple cameras and recording controls.
6.2. Opname en berging
The camera supports local storage via a MicroSD card.
- Insert a MicroSD card (up to 64GB, Class 10 recommended) into the SD card slot.
- In the iCSee app settings, navigate to "Storage Settings" to format the SD card and configure recording modes (e.g., continuous, motion-triggered).
- Opgeneem footage kan wees viewed and downloaded directly from the app.
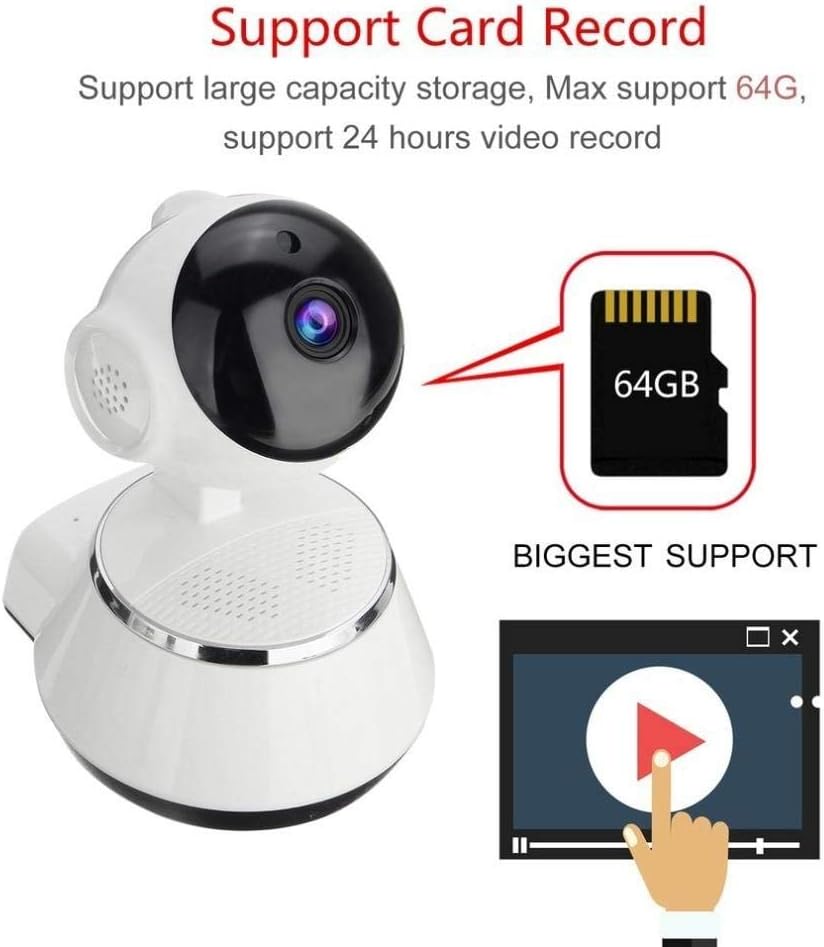
Image demonstrating the camera's support for large capacity storage, specifically showing a 64GB MicroSD card, indicating support for 24-hour video recording.
6.3. Bewegingsopsporing
Receive alerts when motion is detected in the camera's field of view.
- Enable "Motion Detection" in the camera settings within the iCSee app.
- Adjust sensitivity levels and set up notification preferences (e.g., push notifications, email alerts).
6.4. Nagvisie
The camera automatically switches to night vision in low-light conditions.
- Infrared LEDs provide clear black-and-white video up to 10 meters in complete darkness.
- No manual intervention is required for night vision activation.

Comparison image displayed on a smartphone screen, showing the difference between daytime and nighttime monitoring views, highlighting the infrared night vision capability.
6.5. Tweerigting-klank
Communicate through the camera using the built-in microphone and speaker.
- Terwyl in lewendige view, tap the microphone icon in the iCSee app to speak through the camera.
- Tik die luidspreker-ikoon om na klank van die kamera se omgewing te luister.
6.6. Afstandtoegang
Monitor your property from anywhere with an internet connection.
- As long as your camera is connected to Wi-Fi and your phone has internet access, you can view live feeds and manage settings remotely via the iCSee app.
7. Onderhoud
- Skoonmaak: Gebruik 'n sagte, droë lap om die kameralens en -behuizing skoon te maak. Moenie vloeibare skoonmaakmiddels of aërosols gebruik nie.
- Firmware -opdaterings: Regularly check for firmware updates through the iCSee app to ensure your camera has the latest features and security patches.
- SD-kaartbestuur: Periodically back up important recordings and format the SD card to maintain optimal performance.
- Berging: Wanneer dit nie vir lang tye gebruik word nie, bêre die kamera op 'n koel, droë plek weg van direkte sonlig.
8. Probleemoplossing
| Probleem | Moontlike oorsaak/oplossing |
|---|---|
| Kamera skakel nie aan nie | Ensure the power adapter is securely connected to both the camera and the power outlet. Try a different outlet. |
| Kan nie aan Wi-Fi koppel nie | Check if your Wi-Fi network is 2.4GHz. Ensure the Wi-Fi password is correct. Move the camera closer to the router. Reset the camera and try again. |
| Leef view is blurry or dark | Clean the camera lens. Check lighting conditions. Ensure night vision is functioning correctly in low light. |
| SD-kaart neem nie op nie | Ensure the SD card is inserted correctly and formatted in the app. Check if the card is full or corrupted. Try a different SD card. |
| Geen klank of swak klankgehalte | Check microphone and speaker settings in the app. Ensure there are no obstructions blocking the microphone or speaker. |
| Kamera ontkoppel gereeld | Weak Wi-Fi signal. Move the camera closer to the router or consider a Wi-Fi extender. Reduce network congestion. |
9. Spesifikasies
| Kenmerk | Detail |
|---|---|
| Modelnommer | BES-MH03 |
| Verbindingstegnologie | Draadloos (Wi-Fi) |
| Aanbevole gebruik | Baby Monitoring, Home Security |
| Spesiale kenmerke | Motion Sensor, Night Vision (Infrared distance 10m) |
| Vormfaktor | Koepel |
| Wattage | 3 watt |
| Berging Ondersteuning | MicroSD-kaart (maksimum 64 GB) |
| Oudio | Two-way audio (Audio Record) |
10. Waarborg en Ondersteuning
BESDER products are manufactured to high-quality standards. For warranty information, please refer to the terms and conditions provided at the point of purchase or contact your retailer. For technical support or further assistance, please refer to the support section within the iCSee application or visit the official BESDER webwebwerf (indien beskikbaar).