1. Inleiding
This manual provides detailed instructions for the installation, operation, and maintenance of your ASRock B365 PRO4 ATX Motherboard. Please read this manual thoroughly before proceeding with installation to ensure correct setup and to prevent damage to the components.
The ASRock B365 PRO4 motherboard supports 9th and 8th Generation Intel Core Processors, offering a robust platform for personal computing. It features a Digi Power Design with an 8 Power Phase Design, ensuring stable power delivery to the CPU.
2. Veiligheidsinligting
- Always disconnect the power supply before installing or removing any components.
- Dra 'n antistatiese polsband om elektrostatiese ontlading (ESD) skade aan sensitiewe komponente te voorkom.
- Hanteer die moederbord aan die kante om sensitiewe komponente nie aan te raak nie.
- Sorg vir behoorlike ventilasie binne jou rekenaarkas om oorverhitting te voorkom.
- Hou die moederbord weg van vog en uiterste temperature.
3. Opstelling en installering
3.1 Pakketinhoud
Verifieer dat alle items in die pakket teenwoordig is:
- ASRock B365 PRO4 Motherboard
- Vinnige installasiegids
- Ondersteuning CD
- I / O-skild
- 2 x SATA-datakabels
- 3 x Screws for M.2 Sockets
- 1 x Standoff for M.2 Socket

Image: ASRock B365 PRO4 Motherboard and its included accessories, including the quick installation guide, support CD, I/O shield, SATA cables, and M.2 screws/standoff.
3.2 Moederborduitleg
Maak jouself vertroud met die belangrikste komponente en verbindings op die moederbord.

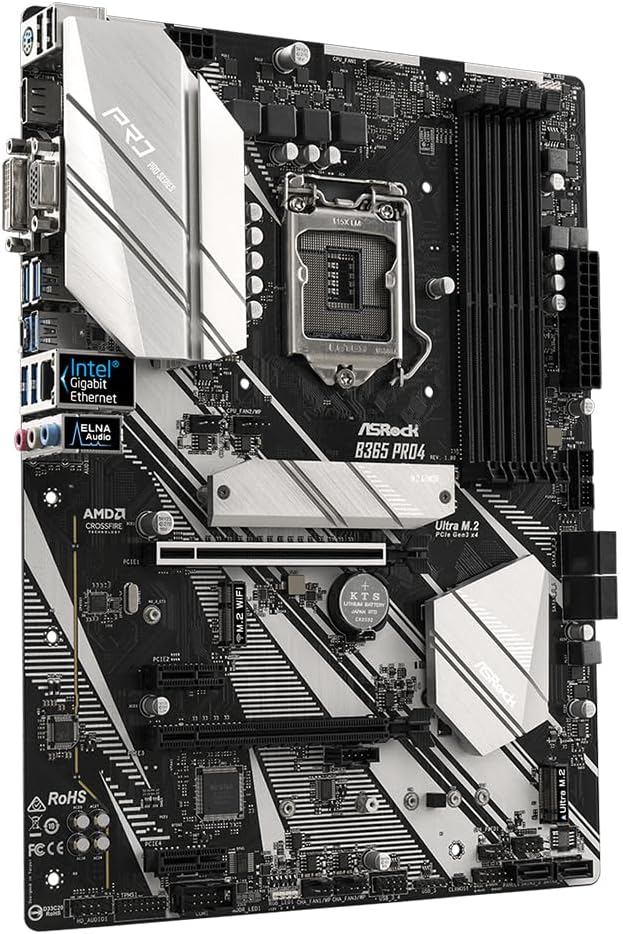
Beeld: Bo-onder view of the ASRock B365 PRO4 Motherboard, highlighting the CPU socket, RAM slots, PCIe slots, and M.2 slots.

Beeld: Hoekig view of the ASRock B365 PRO4 Motherboard, showing the heatsinks and various connectors.
3.3 CPU Installation (LGA1151)
- Maak die SVE-sokhendel oop en lig die laaiplaat op.
- Rig die SVE versigtig met die sok, en maak seker dat die goue driehoek op die SVE ooreenstem met die driehoek op die sok.
- Plaas die SVE versigtig in die sok sonder om dit te forseer.
- Maak die laaiplaat toe en maak dit met die hefboom vas.
3.4 Geheue (RAM) Installasie
The motherboard features 4 DDR4 DIMM slots, supporting dual-channel memory up to 64GB.
- Maak die knippies aan beide kante van die DIMM-gleuf oop.
- Align the notch on the RAM module with the key in the DIMM slot.
- Insert the RAM module firmly until the clips snap into place.
3.5 Installasie van bergingstoestelle
The motherboard supports 6 SATA3 ports and 2 Ultra M.2 ports.
- SATA-skywe: Connect SATA data cables to the SATA ports on the motherboard and to your storage devices (HDDs/SSDs). Connect power cables from your power supply to the devices.
- M.2 SSD's: Locate the M.2 slots. Insert the M.2 SSD into the slot at an angle, then gently push it down and secure it with the provided screw and standoff.
3.6 Installasie van uitbreidingskaart (PCIe)
The motherboard has 2 PCI-Express 3.0 x16 slots and 2 PCI-Express 3.0 x1 slots.
- Select an appropriate PCIe slot for your expansion card (e.g., graphics card).
- Remove the corresponding metal bracket from your PC case.
- Align the card with the slot and press firmly until it is seated correctly.
- Secure the card with a screw to the PC case.
3.7 Connecting Peripherals to the I/O Panel
The rear I/O panel provides various ports for connecting external devices.
Beeld: Nabyskoot view of the ASRock B365 PRO4 Motherboard's rear I/O panel, showing ports for PS/2, USB 2.0, USB 3.1 Gen 1, VGA, DVI-D, HDMI, LAN, and audio jacks.
- USB-poorte: Connect USB devices (keyboard, mouse, external drives) to the available USB 2.0 (5 ports) and USB 3.1 Gen 1 (8 ports, including 1 Type-C rear) ports.
- Video-uitsette: Connect your monitor to the VGA, DVI-D, or HDMI port.
- LAN-poort: Koppel 'n Ethernet-kabel vir netwerktoegang.
- Oudio-aansluitings: Connect speakers, headphones, or microphones to the audio jacks.
- PS/2-poort: Connect a PS/2 keyboard or mouse.
4. Bedryfsinstruksies
4.1 Eerste opstart en BIOS-opstelling
- After assembling all components, connect the power supply and monitor.
- Power on your system. Press Del or F2 tydens opstart om die BIOS/UEFI-opstellingsprogram te betree.
- Configure boot order, system time, and other necessary settings. Save changes and exit.
- Install your operating system from a bootable USB drive or optical media.
4.2 Bestuurderinstallasie
After installing the operating system, install the necessary drivers from the provided Support CD or download the latest versions from the ASRock webwebwerf. Sleutel dryfvere sluit in:
- Chipset-drywers
- Audio Drivers (Realtek ALC892)
- LAN Drivers (Intel I219V Gigabit Ethernet)
- Grafiese drywers (vir geïntegreerde grafika of diskrete GPU)
5. Onderhoud
- Stofverwydering: Maak gereeld stof van die moederbord en kaswaaiers skoon met saamgeperste lug. Maak seker dat die stelsel afgeskakel en ontkoppel is voordat jy dit skoonmaak.
- BIOS-opdaterings: Gaan die ASRock na website periodically for BIOS updates. Updates can improve system stability and compatibility. Follow the instructions carefully when updating the BIOS.
- Kabelbestuur: Maak seker dat kabels netjies gerig is om lugvloei te verbeter en steuring te voorkom.
6. Probleemoplossing
- Geen krag:
- Check all power connections, including the 24-pin ATX and 8-pin 12V CPU power connectors.
- Maak seker dat die kragtoevoerskakelaar in die AAN-posisie is.
- Geen skerm:
- Verify that the monitor is connected to the correct video output (either integrated graphics or discrete GPU).
- Plaas die grafiese kaart en RAM-modules terug.
- Stelselonstabiliteit/Ineenstortings:
- Check RAM modules for proper seating.
- Ensure CPU cooler is properly installed and making good contact.
- Dateer drywers en BIOS op na die nuutste weergawes.
- M.2 SSD nie opgespoor nie:
- Ensure the M.2 SSD is correctly seated and secured.
- Check BIOS settings to ensure M.2 slots are enabled and configured correctly (SATA vs. PCIe mode).
7. Spesifikasies
| Kenmerk | Detail |
|---|---|
| CPU-sok | LGA 1151 |
| Versoenbare verwerkers | 9th/8th Generation Intel Core Processors (up to 95W) |
| Chipset | Intel B365 |
| Geheue | 4 x DDR4 DIMM slots, Dual Channel, Non-ECC, Buffered, Max 64GB (2666/2400/2133 MHz) |
| Uitbreidingsgleuwe | 2 x PCIe 3.0 x16, 2 x PCIe 3.0 x1 |
| Multi-Graphics Support | AMD Quad CrossFireX and CrossFire Technology |
| Berging | 6 x SATA3 ports (RAID 0, 1, 5, 10), 2 x Ultra M.2 ports (PCIe Gen3 x4 & SATA3) |
| Oudio | Realtek ALC892 7.1-kanaal HD-oudio |
| LAN | Intel I219V Gigabit Ethernet |
| USB-poorte | 8 x USB 3.1 Gen1 (1 Type-C rear, 5 rear, 2 via header), 5 x USB 2.0 (2 rear, 3 via header) |
| Video-uitsette | 1 x VGA, 1 x DVI-D, 1 x HDMI |
| Vormfaktor | ATX (12.0 x 9.0 inch / 30.5 x 22.9 cm) |
8. Waarborg en Ondersteuning
8.1 Waarborginligting
The ASRock B365 PRO4 Motherboard comes with a 1-jaar beperkte waarborg. This warranty covers defects in materials and workmanship under normal use. For specific terms and conditions, please refer to the warranty card included with your product or visit the official ASRock webwebwerf.
Note: Damage caused by improper installation, misuse, unauthorized modifications, or natural disasters is not covered under warranty.
8.2 Tegniese Ondersteuning
For technical assistance, driver downloads, BIOS updates, or further troubleshooting, please visit the official ASRock support webwebwerf:
ASRock-ondersteuning Webwebwerf
You may also contact ASRock customer service directly through their website for personalized support.