1. Inleiding
Thank you for choosing the Vacmaster 10 Gallon 4 Peak HP Wet/Dry Vacuum with Detachable Blower, model VBVA1010PF. This manual provides essential information for the safe assembly, operation, maintenance, and troubleshooting of your new appliance. Please read all instructions carefully before use and retain this manual for future reference.
2. Belangrike veiligheidsinstruksies
WAARSKUWING: Om die risiko van brand, elektriese skok of besering te verminder, lees en verstaan alle instruksies voordat u hierdie toestel gebruik.
- Moenie die toestel sonder toesig laat wanneer dit ingeprop is nie. Trek uit die stopcontact wanneer dit nie gebruik word nie en voor diens.
- Moet nie buite of op nat oppervlaktes gebruik nie.
- Moenie toelaat dat dit as speelding gebruik word nie. Noukeurige aandag is nodig wanneer dit deur of naby kinders gebruik word.
- Gebruik slegs soos beskryf in hierdie handleiding. Gebruik slegs aanhegsels wat deur die vervaardiger aanbeveel word.
- Moet nie met beskadigde koord of prop gebruik nie. Indien toestel nie werk soos dit moet nie, laat val, beskadig is, buite gelaat is of in water laat val het, stuur dit terug na 'n dienssentrum.
- Moenie aan koord trek of dra nie, gebruik koord as 'n handvatsel, maak 'n deur op koord toe, of trek koord om skerp kante of hoeke. Moenie die toestel oor die koord laat loop nie. Hou koord weg van verhitte oppervlaktes.
- Moenie die prop uittrek deur aan die koord te trek nie. Om die prop te ontkoppel, gryp die prop vas, nie die koord nie.
- Moenie prop of toestel met nat hande hanteer nie.
- Moenie enige voorwerp in openinge sit nie. Moet nie gebruik met enige opening geblokkeer nie; hou vry van stof, pluis, hare en enigiets wat lugvloei kan verminder.
- Hou hare, los klere, vingers en alle liggaamsdele weg van openinge en bewegende dele.
- Moenie iets optel wat brand of rook nie, soos sigarette, vuurhoutjies of warm as.
- Moet nie gebruik om vlambare of brandbare vloeistowwe, soos petrol, op te tel of in gebiede te gebruik waar hulle teenwoordig kan wees nie.
- Moenie gebruik sonder filters in plek nie.
- Skakel alle kontroles af voordat u die prop ontkoppel.
- Wees ekstra versigtig wanneer jy op trappe skoonmaak.
- Do not use to pick up toxic, carcinogenic, combustible or other hazardous materials like asbestos, arsenic, barium, beryllium, lead, pesticides or other health endangering materials.
- Do not use to pick up soot, cement, plaster or drywall dust without a cartridge filter and filter bag in place. These are very fine particles that may affect the performance of the motor or be exhausted back into the air.
- Om die risiko van elektriese skok te verminder, het hierdie toestel 'n gepolariseerde prop (een lem is breër as die ander). Hierdie prop sal net op een manier in 'n gepolariseerde uitlaat pas. As die prop nie heeltemal in die uitlaat pas nie, draai die prop om. As dit steeds nie pas nie, kontak 'n gekwalifiseerde elektrisiën om die regte uitlaat te installeer. Moenie die prop op enige manier verander nie.
3. Pakketinhoud
Verifieer dat al die komponente wat hieronder gelys word, in u pakket ingesluit is. Kontak asseblief kliëntediens indien enige onderdele ontbreek of beskadig is.
- Vacmaster Wet/Dry Vacuum Unit (10 Gallon Tank, Motor Head)
- Detachable Blower Unit
- Flexible Hose (7 ft)
- Extension Wands (2 pieces)
- Vloerspuitstuk
- Spleetgereedskap
- Nutsstuk
- Cartridge Filter (for dry pickup)
- Foam Filter (for wet pickup)
- Gebruikershandleiding (hierdie dokument)
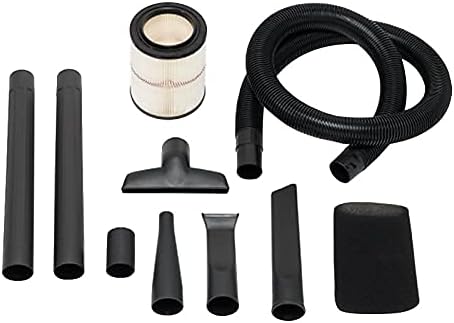
Image: Various accessories for the Vacmaster Wet/Dry Vacuum, including the flexible hose, two extension wands, a floor nozzle, a crevice tool, a utility nozzle, and both cartridge and foam filters.
4. Opstelinstruksies
4.1 Uitpak
- Verwyder alle inhoud uit die verpakking.
- Maak seker dat alle dele teenwoordig en onbeskadig is.
4.2 Attaching Casters
- Invert the tank.
- Insert the four caster feet into the slots on the bottom of the tank.
- Press firmly until each caster foot clicks securely into place.
4.3 Filterinstallasie
The correct filter must be installed for the type of cleaning you are performing.
For Dry Vacuuming: Cartridge Filter
- Maak seker dat die skuimfilter verwyder is.
- Slide the cartridge filter over the filter cage on the motor head.
- Secure the filter with the filter cap by twisting it clockwise until tight.
For Wet Vacuuming: Foam Filter
- Remove the cartridge filter and filter cap.
- Slide the foam filter over the filter cage on the motor head.
- Ensure the foam filter completely covers the filter cage.
4.4 Aanheg van die slang en toebehore
- Insert the large end of the flexible hose into the vacuum port on the tank and twist to lock.
- Attach desired accessories (extension wands, floor nozzle, crevice tool, utility nozzle) to the other end of the hose.

Image: The Vacmaster Wet/Dry Vacuum fully assembled, showing the main unit, flexible hose, and floor nozzle ready for use.
5. Bedryfsinstruksies
5.1 Algemene werking
- Ensure the vacuum is properly assembled with the correct filter for your task.
- Plug the power cord into a suitable 120V grounded outlet.
- Turn the power switch located on the motor head to the 'ON' position to start the vacuum.
- To stop operation, turn the power switch to the 'OFF' position.
5.2 Droë stofsuig
Use the cartridge filter for dry debris pickup.
- Maak seker dat die patroonfilter stewig geïnstalleer is.
- Use appropriate accessories for the type of dry debris (e.g., floor nozzle for large areas, crevice tool for tight spaces).
- Regularly check and clean the cartridge filter to maintain optimal suction.
5.3 Natstofsuig
Use the foam filter for liquid pickup.
- Ensure the foam filter is securely installed and the cartridge filter is removed.
- Do not overfill the tank. The vacuum is equipped with an automatic shut-off float mechanism that will stop suction when the tank is full. If suction stops, turn off the vacuum, unplug it, and empty the tank.
- After wet pickup, always empty and clean the tank thoroughly to prevent mold and odors.
5.4 Detachable Blower Function
Your Vacmaster unit features a detachable blower for versatile use.
- Detaching the Blower: Locate the release latches on the motor head. Unlatch them and lift the motor head from the tank. The motor head itself functions as the blower unit.
- Attaching Blower Nozzle: Attach the desired blower nozzle to the air outlet port on the motor head.
- Operasie: Plug the blower unit into a 120V grounded outlet. Turn the power switch to 'ON' to operate the blower.
- Reattaching to Vacuum: To convert back to a vacuum, place the blower unit (motor head) back onto the tank, aligning the latches, and secure them.

Image: A person demonstrating the detachment of the blue blower unit from the main vacuum tank, highlighting the versatility of the product.
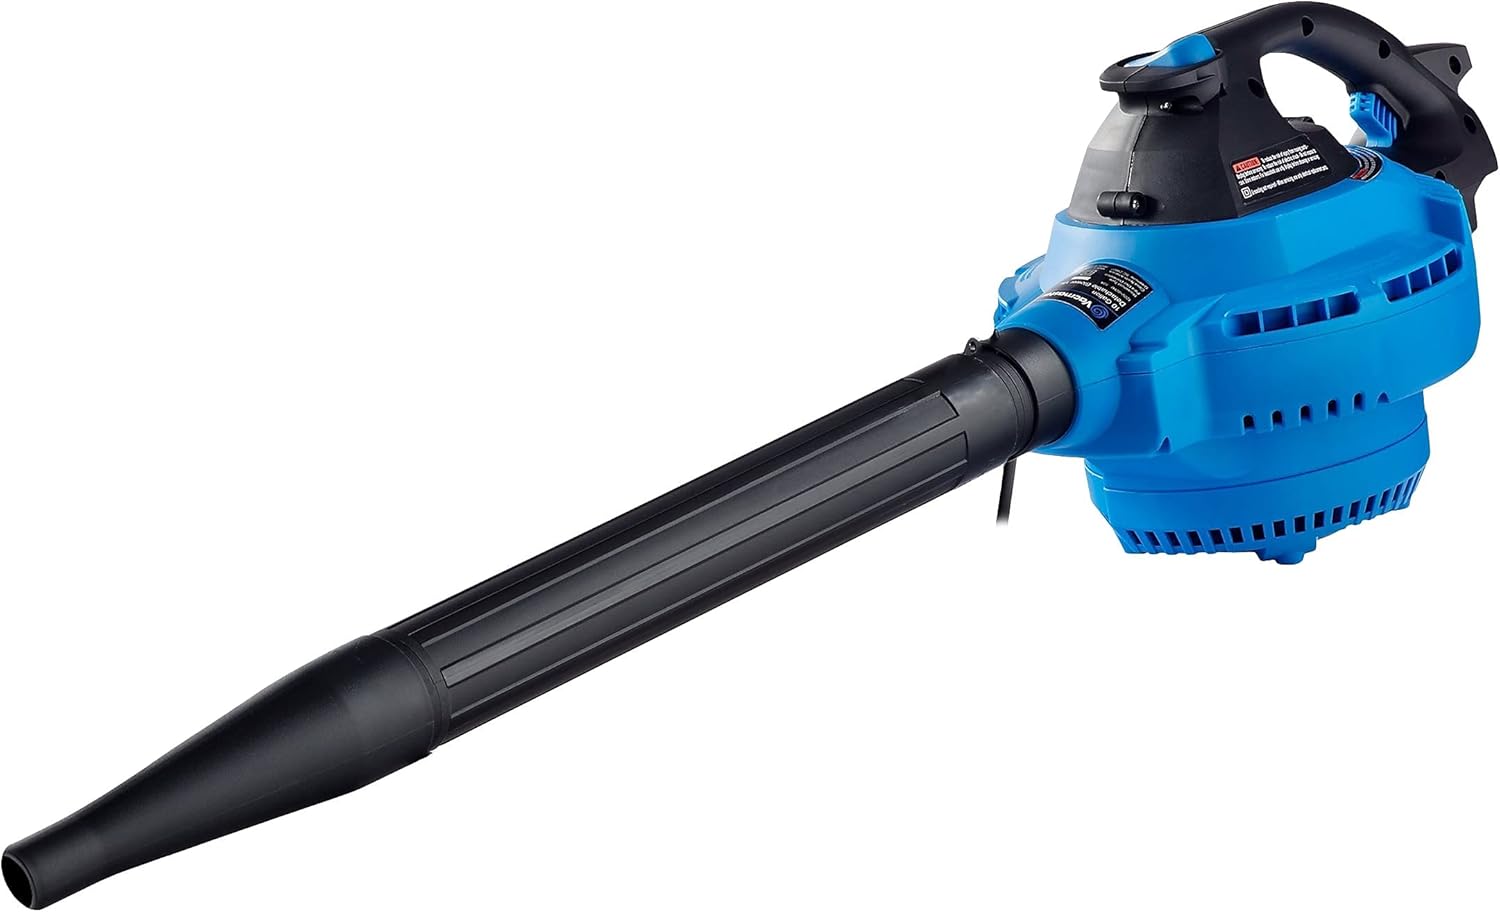
Image: The detached blower unit, a compact blue device with a black handle and a long black nozzle, ready for use as a standalone blower.
6. Onderhoud
Regular maintenance ensures optimal performance and extends the life of your Vacmaster wet/dry vacuum.
6.1 Filter Skoonmaak en Vervanging
Always unplug the vacuum before performing any maintenance.
Cartridge Filter (Dry Pickup)
- Remove the filter cap and cartridge filter from the filter cage.
- Gently tap the filter against the inside of a trash can to remove loose dirt.
- For thorough cleaning, rinse the filter under running water. Allow it to air dry completely before reinstallation. Do not use the filter if it is still wet.
- Replace the cartridge filter if it is damaged or if suction performance significantly decreases after cleaning.
Foam Filter (Wet Pickup)
- Verwyder die skuimfilter uit die filterkooi.
- Rinse the foam filter under running water to remove debris.
- Squeeze out excess water and allow it to air dry completely before storage or reinstallation.
6.2 Tenk skoonmaak
- After each use, especially wet pickup, empty the tank of all debris and liquids.
- Rinse the inside of the tank with water and mild detergent if necessary.
- Wipe the tank dry or allow it to air dry completely before storing to prevent odors and mildew.
6.3 Slang- en bykomstigheidsorg
- Inspekteer die slang en bykomstighede vir blokkasies of skade voor en na elke gebruik.
- Clean accessories with water and mild detergent as needed.
- Store the hose and accessories neatly to prevent kinking or damage. The vacuum unit has integrated storage for the hose and some accessories.

Image: The Vacmaster Wet/Dry Vacuum with its hose wrapped around the top and accessories stored in designated slots, demonstrating compact storage.
7. Probleemoplossing
If you encounter issues with your Vacmaster wet/dry vacuum, refer to the following common problems and solutions:
| Probleem | Moontlike oorsaak | Oplossing |
|---|---|---|
| Die stofsuier begin nie. | Geen krag na die stopcontact nie. Die kragkabel is nie ingeprop nie. Defekte kragskakelaar. | Gaan stroombreker / lont na. Ensure cord is firmly plugged into a working outlet. Kontak kliëntediens. |
| Verlies aan suiging. | Hose or accessory clogged. Die filter is vuil of verstop. Tank is full (wet pickup). Deksel nie behoorlik verseël nie. | Clear any blockages from hose or accessories. Maak die filter skoon of vervang dit. Maak die tenk leeg. Ensure motor head latches are securely fastened. |
| Motor loop, maar geen suiging nie. | Hose not connected to inlet. Hose or accessory clogged. Tank is full (wet pickup). | Ensure hose is securely attached to the vacuum port. Maak enige blokkasies skoon. Maak die tenk leeg. |
| Stof ontsnap uit die uitlaat. | Filter is missing or damaged. Filter nie korrek geïnstalleer nie. | Install or replace the correct filter. Ensure filter is properly seated and secured. |
8. Spesifikasies
| Kenmerk | Detail |
|---|---|
| Handelsmerk | Vakmeester |
| Model | VBVA1010PF |
| Kapasiteit | 10 liter |
| Motor | 4 Peak HP, 120V |
| Wattage | 270 watt |
| Amperageer | 10 Amps |
| Slang lengte | 7 Voet |
| Koordlengte | 10 Voet |
| Produkafmetings (L x B x H) | 18 x 18 x 24 duim |
| Item gewig | 26.2 pond |
| Filter tipe | Cartridge (Dry), Foam (Wet) |
| Spesiale kenmerke | Wet/Dry Functionality, Detachable Blower |
| Global Trade Identification Number (GTIN) | 00814953015406 |
| Universele produkkode (UPC) | 814953015406 |
9. Waarborginligting
This Vacmaster product is covered by a 1 jaar vervaardiger se waarborg from the date of purchase. This warranty covers defects in materials and workmanship under normal use. It does not cover damage resulting from misuse, abuse, accident, commercial use, or unauthorized repairs. Please retain your proof of purchase for warranty claims.
10. Kliëntediens
For technical assistance, replacement parts, or warranty inquiries, please contact Vacmaster customer support. Refer to the official Vacmaster webwebwerf of u produkverpakking vir die mees onlangse kontakinligting.
When contacting support, please have your model number (VBVA1010PF) and proof of purchase readily available.