1. Produk verbyview
The SoBuy KLS03-II-W Telescopic Garment Rack is an adjustable and versatile storage solution designed for organizing clothes in bedrooms or dressing rooms. Its robust construction and flexible design allow it to adapt to various space requirements without permanent installation.

Image 1.1: The SoBuy KLS03-II-W Telescopic Garment Rack, fully assembled and in use, showcasing its capacity for hanging various clothing items.
Sleutel kenmerke:
- Duursame konstruksie: Made from robust metal tubes and strong plastic connectors.
- Adjustable Dimensions: Width (124–226 cm) and height (200–295 cm) are fully adjustable to fit various room layouts.
- Hoë laaikapasiteit: Supports up to 65 kg of clothing.
- Veelsydige konfigurasie: Features 3 adjustable bars and 4 rods, allowing for customizable open wardrobe setups.
- Gereedskapvrye samestelling: Designed for quick and easy installation without the need for drilling or special tools.
- Skadevrye installasie: Protects walls, floors, and ceilings from damage.
- Bykomende berging: Includes a side hook and 10 extra hooks for accessories like hats, scarves, and bags.
2. Pakketinhoud
Before beginning assembly, please ensure all components listed below are present and undamaged. If any parts are missing or damaged, contact customer support.
- Telescopic metal tubes (various lengths)
- Plastiekverbindings
- Adjustable bars (3 units)
- Rods (4 units)
- Side hook
- Additional hooks (10 units)
- Monteerinstruksies
3. Monteer-instruksies
The SoBuy KLS03-II-W garment rack is designed for easy, tool-free assembly. Follow these steps carefully for a secure setup.
3.1. Voorbereiding
- Pak al die komponente uit en lê dit op 'n skoon, plat oppervlak neer.
- Verify all parts against the package contents list.
- Choose your desired location for the garment rack, ensuring sufficient ceiling height (200-295 cm) and width (124-226 cm).
3.2. Assembling the Vertical Poles

Image 3.1: Detail of the telescopic pole mechanism, illustrating the simple, drill-free installation process.
- Assemble the vertical telescopic poles by connecting the sections as shown in the diagram.
- Position the assembled poles vertically between the floor and ceiling.
- Extend each pole by twisting the locking mechanism until it firmly presses against the ceiling and floor. Ensure it is stable and secure.

Image 3.2: The base of the telescopic pole, designed to prevent damage to floors and ceilings during installation.
3.3. Attaching Bars and Rods

Image 3.3: Dimensional diagram illustrating the adjustable width and height of the garment rack, along with rod spacing.
- Attach the 3 adjustable bars and 4 rods to the vertical poles at your desired heights and widths. The system is highly flexible, allowing for various configurations.
- Ensure all connections are tight and secure before hanging any clothes.
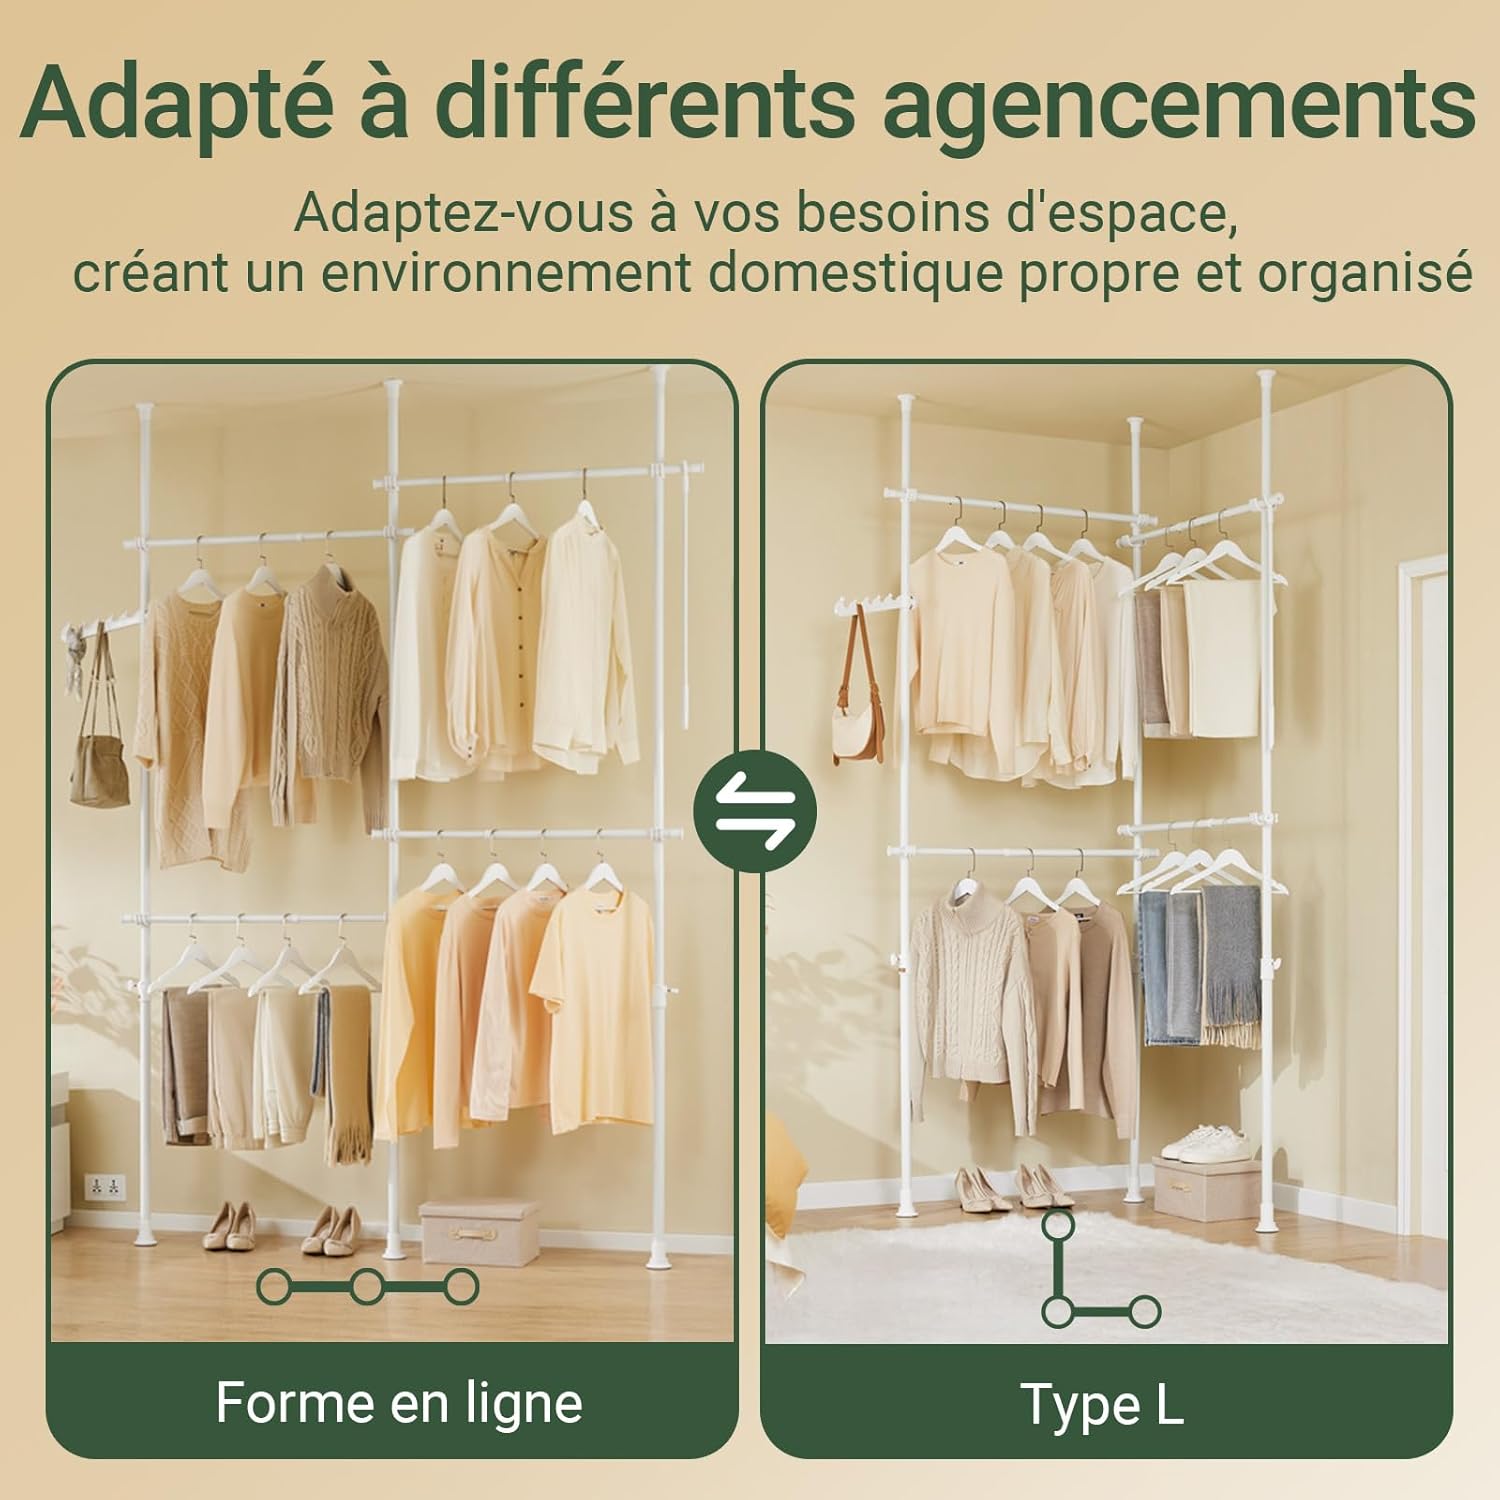
Beeld 3.4: Voorbeeldamples of flexible configurations, including a straight-line setup and an L-shaped corner setup, adapting to different room layouts.
3.4. Adding Accessories

Image 3.5: The side hook and additional hooks for organizing hats, bags, and other accessories.
- Attach the side hook to one of the vertical poles for hanging hats, bags, or scarves.
- Utilize the 10 additional hooks as needed for extra storage.
3.5. Videogids vir montering
Video 3.1: An official SoBuy video demonstrating the quick and easy assembly process of the telescopic garment rack, including various configuration options and features.
4. Bedryfsinstruksies
Once assembled, the SoBuy KLS03-II-W garment rack is ready for use. Its design allows for efficient organization of your clothing and accessories.
- Hangende Klere: Use hangers on the rods to store shirts, jackets, dresses, and other garments. Distribute weight evenly across the rods.
- Bybehore berging: Utilize the side hook and additional hooks for items like hats, scarves, belts, and bags.
- Adjusting Configuration: If you need to change the layout, carefully loosen the locking mechanisms on the vertical poles and horizontal bars, adjust to the new position, and re-secure firmly. Always ensure stability after adjustments.

Image 4.1: A visual comparison demonstrating the effectiveness of the garment rack in transforming a cluttered space into an organized one.
5. Onderhoud
Regular maintenance will help preserve the appearance and functionality of your garment rack.
- Skoonmaak: Wipe down metal and plastic surfaces with a soft, damp lap. Vermy skuurmiddels of harde chemikalieë wat die afwerking kan beskadig.
- Inspeksie: Periodically check all connections and locking mechanisms to ensure they remain tight and secure. Re-tighten if necessary.
- Gewig verspreiding: Avoid overloading any single rod or section. Distribute the weight of your clothes evenly to prevent stress on the structure. The maximum load capacity is 65 kg.
6. Probleemoplossing
If you encounter any issues with your SoBuy KLS03-II-W garment rack, refer to the following common solutions:
| Probleem | Moontlike oorsaak | Oplossing |
|---|---|---|
| Die rak is onstabiel of wankelrig. | Vertical poles not fully extended or locked. | Ensure all vertical poles are fully extended and their locking mechanisms are securely tightened against the ceiling and floor. |
| Horizontal bars sag or detach. | Connections are loose or overloaded. | Check and tighten all plastic connectors for the horizontal bars. Redistribute clothing weight if a section is overloaded. |
| Difficulty adjusting height or width. | Locking mechanisms are too tight or stuck. | Gently loosen the locking mechanisms. If stuck, apply a small amount of silicone spray (avoid oil-based lubricants) to the moving parts. |
| Ontbrekende dele tydens montering. | Verpakkingsfout. | Contact SoBuy customer support with your purchase details for replacement parts. |
7. Spesifikasies
| Kenmerk | Detail |
|---|---|
| Handelsmerk | SoKoop |
| Modelnommer | KLS03 |
| Kleur | Wit |
| Materiaal | Legeringstaal, plastiek |
| Verstelbare breedte | 124 – 226 cm (48.8 – 89 duim) |
| Verstelbare Hoogte | 200 – 295 cm (78.7 – 116.1 duim) |
| Item gewig | 5.6 kg (12.3 lbs) |
| Maksimum laaikapasiteit | Tot 65 kg (143 pond) |
| Number of Bars/Rods | 3 adjustable bars, 4 rods |
| Installasie tipe | Freestanding, Telescopic (No drilling required) |
| Spesiale kenmerke | Expandable, Adjustable, Includes 10 additional hooks |
| Land van oorsprong | China |
8. Waarborg en Ondersteuning
SoBuy products are designed for quality and durability. For warranty information, replacement parts, or technical support, please contact SoBuy customer service.
- Kliëntediens: Refer to the contact information provided with your purchase or visit the official SoBuy webwebwerf.
- Bewys van aankoop: Keep your receipt or proof of purchase for any warranty claims.