1. Belangrike veiligheidsinstruksies
Please read all instructions carefully before using the Schneider SCTO2S Toaster. Keep this manual for future reference.
- Moenie aan warm oppervlaktes raak nie. Gebruik handvatsels of knoppe.
- Om teen elektriese skok te beskerm, moenie die koord, proppe of broodrooster in water of ander vloeistof dompel nie.
- Noukeurige toesig is nodig wanneer enige toestel deur of naby kinders gebruik word.
- Trek uit die stopcontact wanneer dit nie gebruik word nie en voor skoonmaak. Laat afkoel voor jy dele aan- of afhaal.
- Moenie enige toestel gebruik met 'n beskadigde koord of prop, of nadat die toestel wanfunksioneer of op enige manier beskadig is nie.
- Moenie buite gebruik nie.
- Moenie dat koord oor die rand van tafel of toonbank hang, of aan warm oppervlaktes raak nie.
- Moenie op of naby 'n warm gas- of elektriese brander, of in 'n verhitte oond plaas nie.
- Moenie die toestel vir ander gebruik as die bedoeling gebruik nie.
- Oorgrootte kosse, metaalfoeliepakkies of eetgerei moet nie in 'n broodrooster geplaas word nie, aangesien dit 'n brand of die risiko van elektriese skok kan veroorsaak.
- 'n Brand kan voorkom as broodroosters bedek is of aan vlambare materiaal raak, insluitend gordyne, gordyne, mure en dies meer, wanneer dit in werking is.
- Moenie probeer om kos weg te gooi wanneer die broodrooster ingeprop is nie.
- Koppel altyd eers die prop aan die toestel, en steek dan die koord in die muursok. Om te ontkoppel, draai enige beheer na 'af' en verwyder dan die prop uit die muursok.
2. Produk verbyview
The Schneider SCTO2S Vintage 2-Slice Toaster is designed for efficient and convenient toasting. Familiarize yourself with its components.

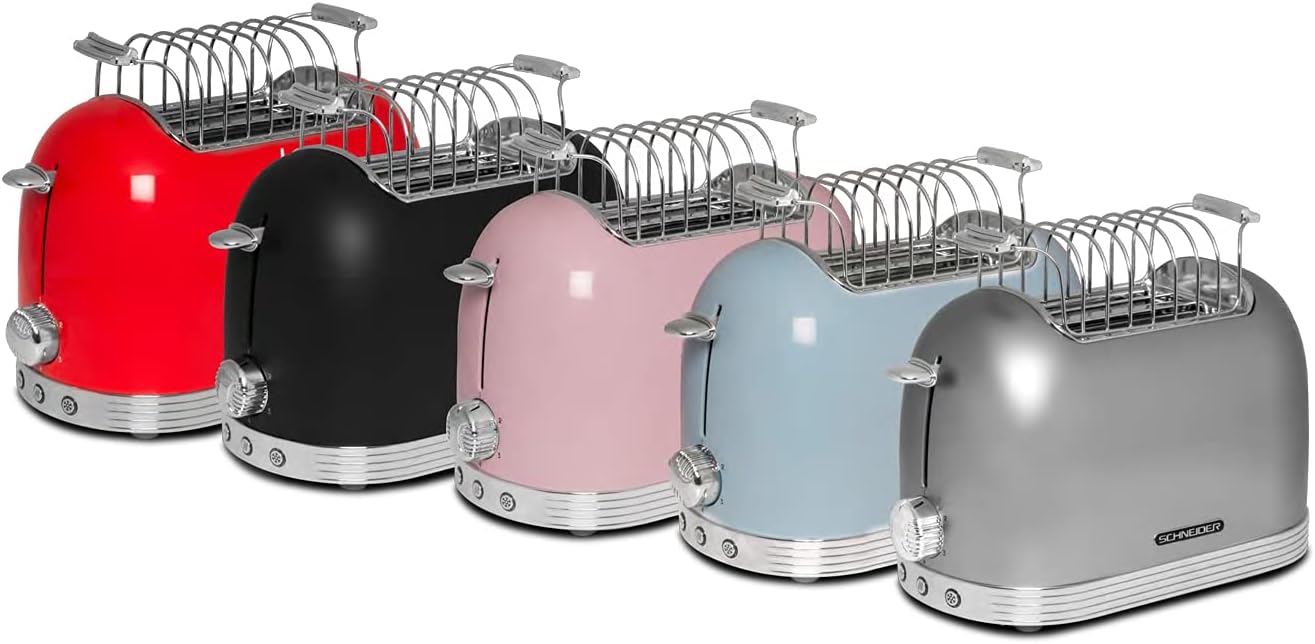
Beeld: Voorkant view of the Schneider SCTO2S Vintage 2-Slice Toaster, showcasing its silver finish and classic design.
Komponente:
- Roostergleuwe: Twee wye gleuwe vir verskillende soorte brood.
- Browning-beheerskakelaar: Adjustable dial with 6 settings for desired toast shade.
- Stopknoppie: Kanselleer die roostersiklus onmiddellik.
- Herverhit-knoppie: Verwarm roosterbrood sonder om verder te bruin.
- Ontdooi -knoppie: Ontdooi en rooster bevrore brood.
- Krummelbak: Verwyderbare bakkie vir maklike skoonmaak van krummels.
- Hefboom: Lowers and raises bread into the toasting slots.
- Bread Warmer Rack: An accessory for warming pastries or rolls.

Image: The Schneider SCTO2S Toaster with the removable bread warmer rack placed on top of the toasting slots.
3. Opstelling
- Uitpak: Verwyder die broodrooster en alle bykomstighede versigtig uit die verpakking. Bewaar die verpakking vir toekomstige berging of vervoer.
- Plasing: Plaas die broodrooster op 'n stabiele, plat, hittebestande oppervlak, weg van vlambare materiale soos gordyne of mure. Verseker voldoende ventilasie rondom die toestel.
- Eerste gebruik: Before first use, operate the toaster without bread on the highest browning setting (6) for a few minutes to burn off any manufacturing residues. A slight odor or smoke may be present; this is normal. Ensure the area is well-ventilated.
- Kragverbinding: Steek die kragkabel in 'n standaard 230V AC-elektriese uitlaat.
4. Bedryfsinstruksies
4.1. Basiese Rooster
- Steek snye brood in die roostergleuwe.
- Select your desired browning level using the browning control dial (settings 1-6, with 1 being lightest and 6 being darkest).
- Press the lever down until it locks into place. The toasting cycle will begin, and the indicator light will illuminate.
- Once the selected browning level is reached, the toast will automatically pop up, and the toaster will switch off.
4.2. Ontdooi-funksie
Use this function to toast frozen bread.
- Insert frozen bread into the toasting slots.
- Kies jou verlangde bruiningsvlak.
- Druk die hefboom af.
- Druk die ontdooi button (snowflake icon). The indicator light for this function will illuminate.
- The toaster will automatically adjust the toasting time to account for defrosting.
4.3. Herverhittingsfunksie
This function allows you to warm up previously toasted bread without further browning.
- Insert cold, previously toasted bread into the slots.
- Druk die hefboom af.
- Druk die Herverhit button (two wavy lines icon). The indicator light for this function will illuminate.
- The toaster will briefly warm the bread and then automatically pop it up.
4.4. Stop funksie
To cancel the toasting cycle at any time, press the Stop knoppie.
Beeld: 'n Nabyskoot view of the control panel on the Schneider SCTO2S Toaster, showing the browning dial (1-6), Stop, Reheat, and Defrost buttons.
4.5. Using the Bread Warmer Rack
The included bread warmer rack is ideal for warming croissants, rolls, or pastries.
- Place the bread warmer rack securely over the toasting slots.
- Plaas die items wat warm gemaak moet word op die rak.
- Stel die bruiningskontrole op 'n lae instelling (bv. 1 of 2).
- Press the lever down to start the warming cycle.
- Monitor the items closely to prevent burning. Cancel the cycle using the Stop button when desired warmth is achieved.
5. Onderhoud en Skoonmaak
Gereelde skoonmaak verseker optimale werkverrigting en verleng die lewensduur van jou broodrooster.
- Ontkoppel altyd die broodrooster uit die kragtoevoer en laat dit heeltemal afkoel voor skoonmaak.
- Krummelbak: Pull out the crumb tray located at the bottom of the toaster. Empty crumbs into a waste bin. Wipe the tray clean with a damp lap en droog deeglik af voordat jy dit weer insit.

Beeld: 'n Nabyskoot view of the removable crumb tray being pulled out from the side of the Schneider SCTO2S Toaster for cleaning.
- Buitekant: Vee die buitekant van die broodrooster af met 'n sagte, damp lap. Moenie skuurmiddels of skuursponse gebruik nie, aangesien dit die oppervlak kan krap.
- Binne: Do not attempt to clean the interior of the toaster with any tools or objects. If bread gets stuck, unplug the toaster and carefully remove it once cooled.
- Moet nooit die broodrooster in water of enige ander vloeistof dompel nie.
6. Probleemoplossing
As jy probleme met jou broodrooster ondervind, raadpleeg die volgende algemene probleme en oplossings:
| Probleem | Moontlike oorsaak | Oplossing |
|---|---|---|
| Rooster skakel nie aan nie. | Nie ingeprop nie; krag aftage; foutiewe aansluiting. | Maak seker dat die broodrooster stewig in 'n werkende stopcontact ingeprop is. Gaan jou stroombreker na. |
| Brood spring nie op nie. | Lever not fully pressed down; food jammed. | Ensure the lever is locked into place. Unplug the toaster and carefully remove any jammed food once cooled. |
| Roosterbrood is te lig/donker. | Bruinmaakbeheerinstelling is verkeerd. | Verstel die bruiningskontroleskakelaar na 'n hoër instelling vir donkerder roosterbrood of 'n laer instelling vir ligter roosterbrood. |
| Rook kom uit die broodrooster. | Krummels het opgehoop; kos het vasgesit; oorskot van eerste gebruik. | Immediately press the Stop button and unplug. Empty the crumb tray. If it's the first use, this is normal. If not, check for stuck food. |
Indien die probleem voortduur nadat u hierdie oplossings probeer het, kontak asseblief kliëntediens.
7. Spesifikasies
Detailed technical specifications for the Schneider SCTO2S Toaster.

Beeld: Sykant view of the Schneider SCTO2S Toaster with dimensions indicated: 16.51 cm (width), 21.49 cm (height), and 30 cm (depth).
| Kenmerk | Spesifikasie |
|---|---|
| Modelnommer | SCTO2S |
| Handelsmerk | Schneider |
| Afmetings (L x B x H) | 30 x 16.5 x 21.5 cm |
| Gewig | 1.8 kg |
| Krag | 685-815 Watt |
| Voltage | 230 Volt |
| Aantal snye | 2 |
| Verbruining vlakke | 6 posisies |
| Funksies | Defrost, Reheat, Stop |
| Krummelbak | Verwyderbaar |
| Materiaal | Metal (Silver finish) |
8. Waarborg en Ondersteuning
This Schneider SCTO2S Toaster comes with a standard manufacturer's warranty. Please refer to the warranty card included in your product packaging for specific terms and conditions, including the warranty period and coverage details.
For technical support, service, or warranty claims, please contact Schneider customer service. Contact information can typically be found on the manufacturer's official webwebwerf of op die produkverpakking.
Please have your model number (SCTO2S) and proof of purchase ready when contacting support.