1. Inleiding
The Aputure Amaran AL-F7 is a compact and versatile LED video light designed for various photographic and videographic applications. It features 256 high-CRI LED lights, offering a strong output and a wide color temperature range. The AL-F7 provides precise brightness and color temperature controls, multiple charging options, and a lightweight, portable design.
This manual provides detailed instructions for the safe and effective use of your Amaran AL-F7 LED video light. Please read it thoroughly before operation and retain it for future reference.
2. Veiligheidsinligting
To prevent damage to the product or injury to yourself or others, always observe the following basic safety precautions:
- Do not disassemble or modify the product. Unauthorized modifications may cause damage or malfunction.
- Keep the product away from water and other liquids. Do not operate with wet hands.
- Do not block the ventilation openings. Overheating can damage the device.
- Avoid direct eye exposure to the LED light. The light is very bright and can cause temporary vision impairment.
- Use only recommended power sources and accessories.
- Hou buite bereik van kinders.
3. Pakketinhoud
Maak asseblief seker dat al die items wat hieronder gelys word, in u pakket ingesluit is:
- Amaran AL-F7 LED Video Light
- Hot-shoe mounting ball head
- Seil sak
- USB Type-C charging cable (may vary by region)
- Gebruikershandleiding
4. Produk verbyview
Familiarize yourself with the components and controls of your Amaran AL-F7.
4.1 Front Panel (LED Array)
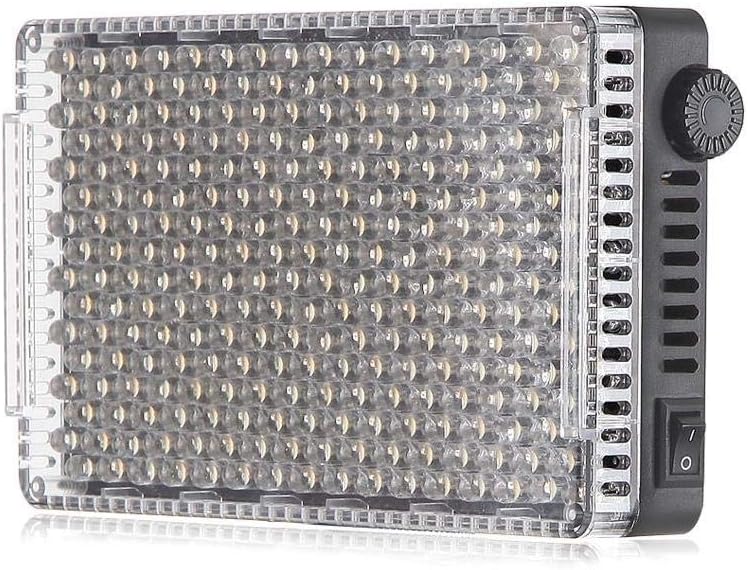
Figuur 1: Voorkant view of the AL-F7 LED panel, displaying the light-emitting diodes.
4.2 Rear Panel (Display and Battery Mount)

Figure 2: Rear panel of the AL-F7, featuring the LCD screen, battery mount, and control interface.
- LCD-skerm: Shows brightness percentage, color temperature (CT), and battery status.
- Beheer dialoog: Used to adjust brightness and color temperature. Press to switch between modes.
- Batteryplaat: Compatible with Sony NP-F series batteries for portable power.
4.3 Side Panels (Controls and Ports)

Figuur 3: Kant view showing the power switch and control dial.

Figuur 4: Kant view displaying the D-Tap input, 1/4" mounting point, and USB Type-C port.
- Krag skakelaar: Skakel die eenheid aan of af.
- D-Tap Input: For external power supply (e.g., V-mount battery).
- USB Tipe C-poort: For charging and powering the unit.
- 1/4" Screw Threads: Located on three sides for versatile mounting options.
5. Opstelling
5.1 Powering the AL-F7
The Amaran AL-F7 can be powered using one of three methods:
- Sony NP-F Series Battery: Attach a compatible NP-F battery to the battery plate on the rear of the unit.
- USB Tipe C: Connect a USB Type-C cable from a power bank or USB power adapter to the USB-C port on the side.
- D-Tap: Connect a D-Tap cable from a compatible power source (e.g., V-mount battery) to the D-Tap input.
Ensure the power source provides sufficient voltage and current for stable operation.
5.2 Mounting the AL-F7
The AL-F7 features 1/4" screw threads on three sides for flexible mounting. Use the included hot-shoe mounting ball head to attach the light to a camera's hot shoe or a light stand with a 1/4" screw.
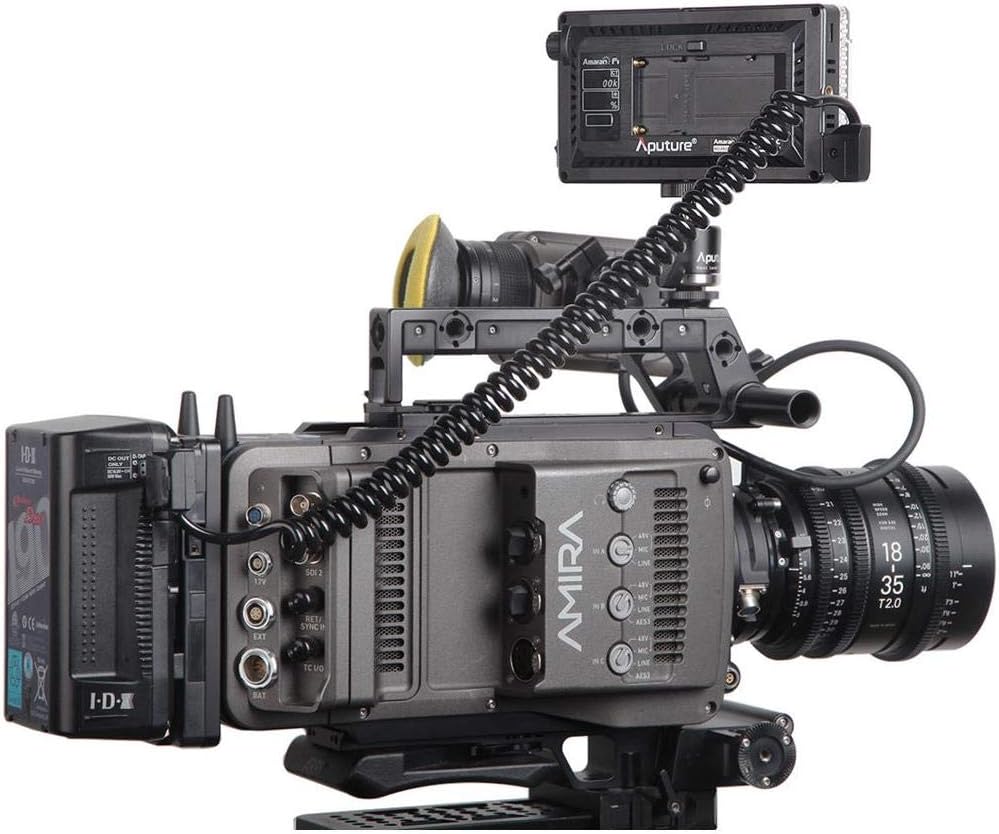
Figure 5: AL-F7 mounted on a camera rig, demonstrating a typical setup.
- Screw the hot-shoe mounting ball head into one of the 1/4" threads on the AL-F7.
- Secure the ball head to your camera's hot shoe or a light stand.
- Adjust the angle of the light using the ball head.
6. Bedryf
6.1 Krag aan/af
Locate the power switch on the side of the unit. Flip the switch to the 'ON' position to power on the light. Flip it to 'OFF' to power off.
6.2 Aanpassing van Helderheid
After powering on, the LCD display will show the current brightness percentage. Rotate the control dial to adjust the brightness from 1% to 100%. The AL-F7 offers stepless control for fine-tuning.
6.3 Aanpassing van kleurtemperatuur
To switch to color temperature adjustment mode, press the control dial. The display will show the current color temperature in Kelvin (K). Rotate the control dial to adjust the color temperature within the range of 3200K to 9500K. Press the dial again to switch back to brightness adjustment.
The AL-F7's maximum output is achieved at approximately 5500K, which corresponds to daylight balanced light.
6.4 Geheue funksie
The AL-F7 features a built-in memory function that automatically stores the last brightness and color temperature settings used. When the light is powered on again, it will recall these settings.
7. Onderhoud
- Skoonmaak: Use a soft, dry cloth to clean the light. Do not use harsh chemicals or abrasive materials.
- Berging: Store the light in a cool, dry place, away from direct sunlight and extreme temperatures. Use the provided canvas bag for protection during transport and storage.
- Batterysorg: If using NP-F batteries, follow the manufacturer's guidelines for charging and storage to prolong battery life.
8. Probleemoplossing
| Probleem | Moontlike oorsaak | Oplossing |
|---|---|---|
| Lig gaan nie aan nie | No power supply; battery depleted; power switch off | Ensure power switch is ON. Connect to a power source (USB-C, D-Tap) or replace/charge NP-F battery. |
| Ligte flikker of verdof onverwags | Low battery; unstable power connection; overheating | Charge or replace battery. Check power cable connections. Ensure adequate ventilation. |
| Cannot adjust brightness/color temperature | Control dial malfunction; incorrect mode selected | Press the control dial to switch between brightness and color temperature modes. If issue persists, contact support. |
9. Spesifikasies
| Kenmerk | Detail |
|---|---|
| Modelnommer | AL-F7 |
| Produk afmetings | 6.69 x 2.76 x 1.57 duim (170 x 70 x 40 mm) |
| Item gewig | 9.2 onse (260 g) |
| Kleurtemperatuurreeks | 3200K - 9500K |
| Helderheidsbeheer | 1% - 100% Stepless |
| Krag Invoer | D-Tap, USB Type-C, Sony NP-F series battery |
| Verbindingstegnologie | USB |
| Montering | 1/4" screw thread (3 sides) |
| Batterye benodig | 1 Lithium Polymer (NP-F type, not included) |
10. Waarborg en Ondersteuning
Aputure products are covered by a limited warranty. For detailed warranty information, please refer to the warranty card included with your product or visit the official Aputure webwebwerf. Bewaar u aankoopbewys as bewys van aankoop vir waarborgeise.
For technical support, service, or inquiries, please contact Aputure customer service through their official website or authorized distributors. Do not attempt to repair the unit yourself, as this may void your warranty.