Produk verbyview
The HBK Handy Stitch Handheld Sewing Machine is a compact and portable sewing tool designed for quick repairs and alterations. It is suitable for various fabrics including silks, denim, wool, leather, and crafts. This cordless device offers convenience for both travel and household use.
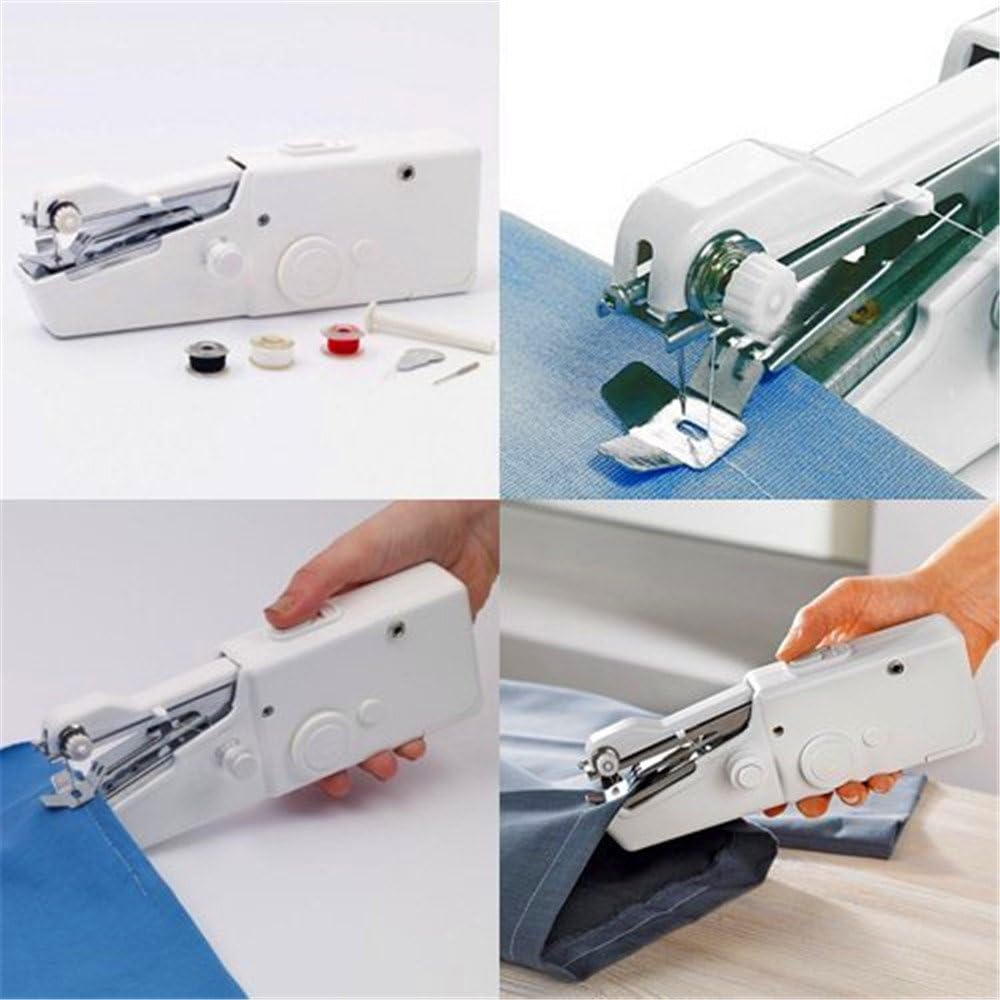
Image: The HBK Handy Stitch Handheld Sewing Machine, showing its compact design and included accessories like bobbins, extension spindle, spare needle, and threader.
Pakketinhoud
- 1 x Handheld Sewing Machine
- 1 x Extension Spindle
- 1 x Spare Needle
- 1 x Thrower
- 3 x spoele
- 1 x Gebruikershandleiding (hierdie dokument)
Onderdele-identifikasie

Image: Diagram illustrating the key components of the handheld sewing machine, including Tension Control, Set Screw, Fastening Plate, Needle Arm, Thread Guide, Bobbin, Rotary Wheel, On/off Switch, Adapter Input, and Battery Compartment.
Familiarize yourself with the following parts of your sewing machine:
- Tension Control: Verstel draadspanning.
- Verstelskroef: Secures the needle.
- Fastening Plate: Holds fabric in place during sewing.
- Needle Arm: Houses the needle.
- Thread Guide: Guides the thread from the bobbin to the needle.
- Spoel: Holds the thread supply.
- Rotary Wheel: Manual control for needle movement.
- On/off Switch: Activates and deactivates the machine.
- Adapter-invoer: Port for optional DC 6V power adapter.
- Battery kompartement: Houses 4 x 1.5V AA batteries.
Opstelling
1. Installasie van kragtoevoer
The machine can be powered by 4 x 1.5V AA batteries or a DC 6V power adapter (neither are included). Important: Do not use both power sources simultaneously, as this may damage the machine.
Battery installasie:
- Locate the battery compartment on the side of the machine.
- Skuif die deksel van die batterykompartement oop.
- Insert 4 x 1.5V AA batteries, ensuring correct polarity (+/-) as marked inside the compartment.
- Maak die batterykompartement se deksel stewig toe.

Beeld: Nabyskoot view of the open battery compartment, showing the correct orientation for inserting AA batteries.
Adapter Use (Optional):
- Insert the DC 6V power adapter (not included) into the Adapter Input port.
- Steek die adapter in 'n geskikte kragaansluiting.
2. Die masjien inryg
Proper threading is crucial for correct operation. The machine uses a single thread system.
- Place a bobbin onto the extension spindle or directly onto the bobbin pin if using a pre-wound bobbin.
- Guide the thread through the thread guide located on the top of the machine.
- Pass the thread through the tension control disc.
- Thread the needle from front to back using the provided threader for ease.
- Pull approximately 10-15 cm of thread through the needle eye.

Beeld: Gedetailleerd view of the needle, thread guide, and tension control, illustrating the threading path.
Bedryfsinstruksies
1. Voorbereiding om te naai
- Ensure the machine is properly threaded and powered.
- Lift the fastening plate.
- Place the fabric under the fastening plate, aligning the desired sewing line with the needle.
- Lower the fastening plate to secure the fabric.
- Hold the fabric gently with one hand, guiding it as you sew.

Image: A hand holding the sewing machine, demonstrating how to position it on fabric for sewing.
2. Begin en stop
- To start sewing, slide the On/off Switch to the "On" position. The machine will begin stitching.
- Guide the fabric slowly and steadily along the sewing line.
- To stop sewing, slide the On/off Switch to the "Off" position.
- After stopping, lift the fastening plate and gently pull the fabric away from the machine.
- Cut the thread, leaving a tail of a few centimeters.
- Let wel: As this is a single-thread sewing machine, you will need to knot the thread manually at the beginning and end of your stitch line to secure it.
3. Aanpassing van spanning
If stitches are too loose or too tight, adjust the Tension Control dial. Turn it clockwise to increase tension and counter-clockwise to decrease tension. Test on a scrap piece of fabric until the desired stitch quality is achieved.
4. Fabric Compatibility
The Handy Stitch is suitable for a variety of materials, including:
- Sye
- Denim
- Wol
- Leather (thin)
- Handwerk
- Thin curtains
- Kids' cloth
Avoid excessively thick or rigid materials that may strain the machine or break the needle.
Onderhoud
1. Skoonmaak
- Always ensure the machine is turned off and disconnected from any power source before cleaning.
- Gebruik 'n sagte, droë lap om die buitekant van die masjien af te vee.
- Gently remove any lint or thread fragments from the needle area and fastening plate using a small brush or tweezers.
2. Berging
- Store the machine in a dry, cool place, away from direct sunlight and moisture.
- Indien dit vir 'n lang tydperk gestoor word, verwyder die batterye om lekkasie te voorkom.
Probleemoplossing
| Probleem | Moontlike oorsaak | Oplossing |
|---|---|---|
| Masjien kan nie aanskakel nie. |
|
|
| Thread breaks frequently. |
|
|
| Stitches are loose or uneven. |
|
|
| Machine jams or makes unusual noise. |
|
|
Spesifikasies
| Handelsmerk | H.B.K. |
| Modelnommer | 5edfc7a5-ea20-4b64-b88f-c47ef9de699f |
| Materiaal | Plastic & Stainless Steel Needle |
| Needle Speed | 600 ± 50 stitches/minute |
| Kragtoevoer | 4 x 1.5V AA Batteries (not included) or DC 6V Power Adapter (not included) |
| Produk afmetings | 21 x 6.5 x 3.5 cm (8.27 x 2.56 x 1.38 duim) |
| Item gewig | 300 g (10.6 onse) |
| Kleur | Wit |

Image: The handheld sewing machine with its dimensions labeled: 21cm length, 6.5cm width, and 3.5cm height.
Waarborg en Ondersteuning
Waarborg inligting
Specific warranty details for the HBK Handy Stitch Handheld Sewing Machine are not provided in this manual. Please refer to your purchase documentation or contact the retailer/manufacturer for warranty terms and conditions.
Kliënte ondersteuning
For further assistance, technical support, or inquiries regarding your HBK Handy Stitch Handheld Sewing Machine, please contact the manufacturer, QY, or your point of purchase. Keep your purchase receipt and model number (5edfc7a5-ea20-4b64-b88f-c47ef9de699f) readily available when contacting support.