Project Source 40804
Gebruikershandleiding
Project Source 2-Pack 13-in W Bronze Flush Mount Light
Model: 40804
1. Inleiding
Dankie vir die aankoopasing the Project Source 2-Pack 13-inch Bronze Flush Mount Light fixtures. These fixtures are designed to provide ambient lighting with a traditional aesthetic, featuring a durable bronze finish and an elegant alabaster glass shade. They are suitable for various indoor spaces, including bathrooms, bedrooms, kitchens, dining rooms, and living rooms, enhancing the decor while providing reliable illumination.
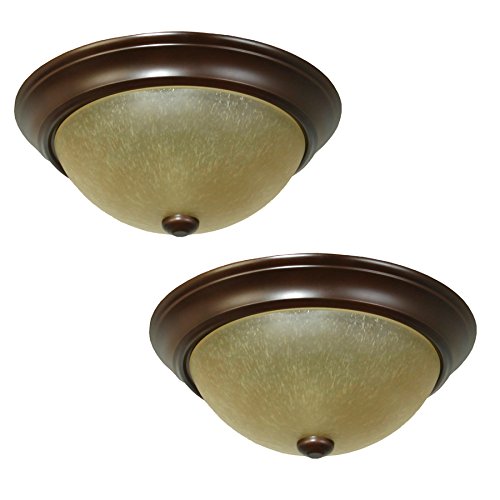
Figuur 1: Two Project Source 13-inch Bronze Flush Mount Light fixtures. Each fixture features a round bronze base and a dome-shaped alabaster glass shade, secured by a small finial at the bottom center of the shade.
2. Belangrike veiligheidsinligting
WAARSKUWING: Risiko van elektriese skok. Ontkoppel die krag by die sekeringboks of stroombreker voor installasie of onderhoud.
- Lees alle instruksies noukeurig deur voordat jy begin met installasie.
- Alle elektriese verbindings moet in ooreenstemming wees met plaaslike kodes, verordeninge of die Nasionale Elektriese Kode (NEC). Raadpleeg 'n gekwalifiseerde elektrisiën as u nie vertroud is met behoorlike elektriese bedradingsverbindings nie.
- Use only UL-listed wire connectors for the electrical connections.
- Moenie die maksimum wat oorskry nietage specified for this fixture (14 Watts per bulb).
- Wear safety glasses and appropriate protective gear during installation.
- Maak seker dat die toebehore behoorlik geaard is.
3. Pakketinhoud
Verifieer dat alle komponente teenwoordig is voordat u met die installasie begin:
- 2 x 13-inch Bronze Flush Mount Light Fixtures (with alabaster glass shades)
- Monteringshardeware (skroewe, draadmoere, monteerbeugel)
- Note: Light bulbs are NOT included.
4. Spesifikasies
| Kenmerk | Detail |
|---|---|
| Handelsmerk | Projek Bron |
| Modelnommer | 40804 |
| Afmetings (Breedte x Hoogte) | 13 duim x 5.36 duim |
| Voltooi | Brons |
| Skadu Materiaal | Albaste glas |
| Aantal ligte | 2 per fixture |
| Gloeilamp basis tipe | Medium basis (E-26) |
| Aanbevole gloeilampvorm | A15 |
| Maksimum gloeilamp Wattage | 14 Watts (per bulb) |
| Veiligheidslys | UL gelys |
| Kamerversoenbaarheid | Bathroom, Bedroom, Kitchen, Dining Room, Living Room |
| Installasie tipe | Spoelberg |
| Item Weight (Package) | 7.04 pond |
5. Opstelling en installering
Gereedskap benodig: Phillips head screwdriver, flathead screwdriver, wire strippers, electrical tape, safety glasses.
Voorinstallasiestappe:
- Skakel krag af: Locate the circuit breaker or fuse box that supplies power to the light fixture location. Turn off the power completely before proceeding.
- Berei die area voor: Clear the work area and ensure you have stable footing if using a ladder.
- Pak uit: Carefully remove the fixture and all components from the packaging.
Installasie stappe:
- Heg monteringsbeugel aan: Secure the mounting bracket (included) to the electrical junction box in the ceiling using the provided screws. Ensure it is firmly attached.
- Koppel elektriese drade:
- Koppel die swart (hot) wire from the ceiling to the swart wire of the fixture using a wire nut.
- Koppel die wit (neutral) wire from the ceiling to the wit wire of the fixture using a wire nut.
- Koppel die grond wire (bare copper or green) from the ceiling to the grond wire of the fixture (or the ground screw on the mounting bracket) using a wire nut or by wrapping it securely around the screw.
- Secure Fixture to Mounting Bracket: Carefully push the wired fixture up towards the ceiling, aligning the holes in the fixture base with the screws on the mounting bracket. Secure the fixture in place with the decorative nuts or screws provided.
- Installeer gloeilampe: Insert the recommended A15 shape, E-26 medium base light bulbs (not included) into the sockets. Do not exceed 14 Watts per bulb.
- Heg glasskerm aan: Carefully place the alabaster glass shade onto the fixture. Secure it in place using the finial or retaining ring provided, tightening it gently until snug. Do not overtighten.
- Herstel krag: Sodra die installasie voltooi is en alle verbindings veilig is, herstel die krag by die stroombreker.
6. Bedryfsinstruksies
Once the Project Source Flush Mount Light fixtures are correctly installed and power is restored, they can be operated using the standard wall switch connected to the circuit. Simply toggle the wall switch to turn the lights on or off.
7. Sorg en Onderhoud
Regular cleaning will help maintain the appearance and performance of your light fixtures.
- Skoonmaak van die toebehore: Dust the bronze finish regularly with a soft, dry cloth. For more thorough cleaning, wipe the bronze finish with a damp cloth and a mild, non-abrasive soap solution, then dry immediately with a clean, soft cloth to prevent water spots.
- Cleaning the Glass Shade: The alabaster glass shade can be removed for cleaning. Wash it with mild soap and water, then rinse thoroughly and dry completely before reattaching to the fixture.
- Gloeilamp vervanging: Always ensure the power is turned off at the circuit breaker and the bulbs have cooled down before attempting to replace them. Use only bulbs that meet the specified wattage en basis tipe.
- Do not use abrasive cleaners, solvents, or polishes on any part of the fixture, as they may damage the finish or glass.
8. Probleemoplossing
As jy probleme met jou ligte ondervind, raadpleeg die volgende algemene probleme en oplossings:
- Lig gaan nie aan nie:
- Check that the power supply is on at the circuit breaker.
- Ensure the light bulbs are correctly installed and are not burnt out. Try replacing with a known working bulb.
- Verify that all wire connections (black to black, white to white, ground) are secure and properly connected.
- Ligte flikker:
- Ensure the light bulbs are fully tightened in their sockets.
- Check for any loose wire connections within the fixture or junction box.
- Confirm that the bulbs used are compatible with the fixture and are not exceeding the maximum wattage.
- Glass shade is loose or wobbles:
- Gently tighten the finial or retaining ring that secures the glass shade. Do not overtighten.
If the problem persists after attempting these solutions, please consult a qualified electrician or contact customer support.
9. Waarborg en Kliëntediens
For detailed warranty information regarding your Project Source 2-Pack 13-in W Bronze Flush Mount Light, please refer to the documentation included with your original purchase. Warranty terms typically cover defects in materials and workmanship for a specified period.
If you require technical assistance, have questions about installation, or need to report a defect, please contact Project Source customer service directly through their official website or the contact information provided in your product packaging. Please have your model number (40804) and purchase details ready when contacting support.
Ask a question about this manual
Ask about setup, troubleshooting, compatibility, parts, safety, or missing instructions. Manuals+ will review the question and use this page’s manual context to help answer it.