1. Belangrike veiligheidsinligting
Please read all instructions carefully before using your VonHaus 600W Corded 2-in-1 Stick Vacuum Cleaner. Retain this manual for future reference.
- Always ensure the appliance is unplugged from the power supply before assembling, disassembling, or cleaning.
- Moenie die toestel op nat oppervlaktes gebruik of om vloeistowwe op te suig nie.
- Hou hare, los klere, vingers en alle dele van die liggaam weg van openinge en bewegende dele.
- Moenie iets optel wat brand of rook nie, soos sigarette, vuurhoutjies of warm as.
- Gebruik slegs soos beskryf in hierdie handleiding. Gebruik slegs aanhegsels wat deur die vervaardiger aanbeveel word.
- Moet nie gebruik sonder die stofbeker en/of filters in plek nie.
- As die toevoerkoord beskadig is, moet dit deur die vervaardiger, sy diensagent of soortgelyke gekwalifiseerde persone vervang word om 'n gevaar te vermy.
2. Pakketinhoud
Verifieer dat alle komponente teenwoordig en in 'n goeie toestand is:
- Hoofvakuumeenheid
- Verlengbare handvatsel
- Vloerborselkop
- Spleetgereedskap
- Borselaanhegting
- HEPA-filter (vooraf geïnstalleer)
- Sponge Filter (pre-installed)

Figuur 2.1: Ingesluite bykomstighede vir veelsydige skoonmaak.
3. Opstelling en samestelling
Your VonHaus vacuum can be assembled in two configurations: upright stick vacuum or handheld vacuum.
3.1 Upright Stick Vacuum Assembly
- Heg die handvatsel aan: Insert the extendable handle into the main vacuum unit until it clicks securely into place.
- Heg die vloerborselkop aan: Connect the floor brush head to the main vacuum unit. Ensure it is firmly attached.
- Kragverbinding: Steek die kragsnoer in 'n geskikte elektriese aansluiting.

Figure 3.1: The VonHaus 2-in-1 Stick Vacuum Cleaner in its two primary configurations.
3.2 Handheld Vacuum Assembly
- Detach Handle and Floor Head: If assembled as an upright vacuum, press the release buttons to detach the extendable handle and the floor brush head from the main unit.
- Heg bykomstighede aan: Select the desired accessory (crevice tool or brush attachment) and firmly attach it to the main vacuum unit.
- Kragverbinding: Steek die kragsnoer in 'n geskikte elektriese aansluiting.
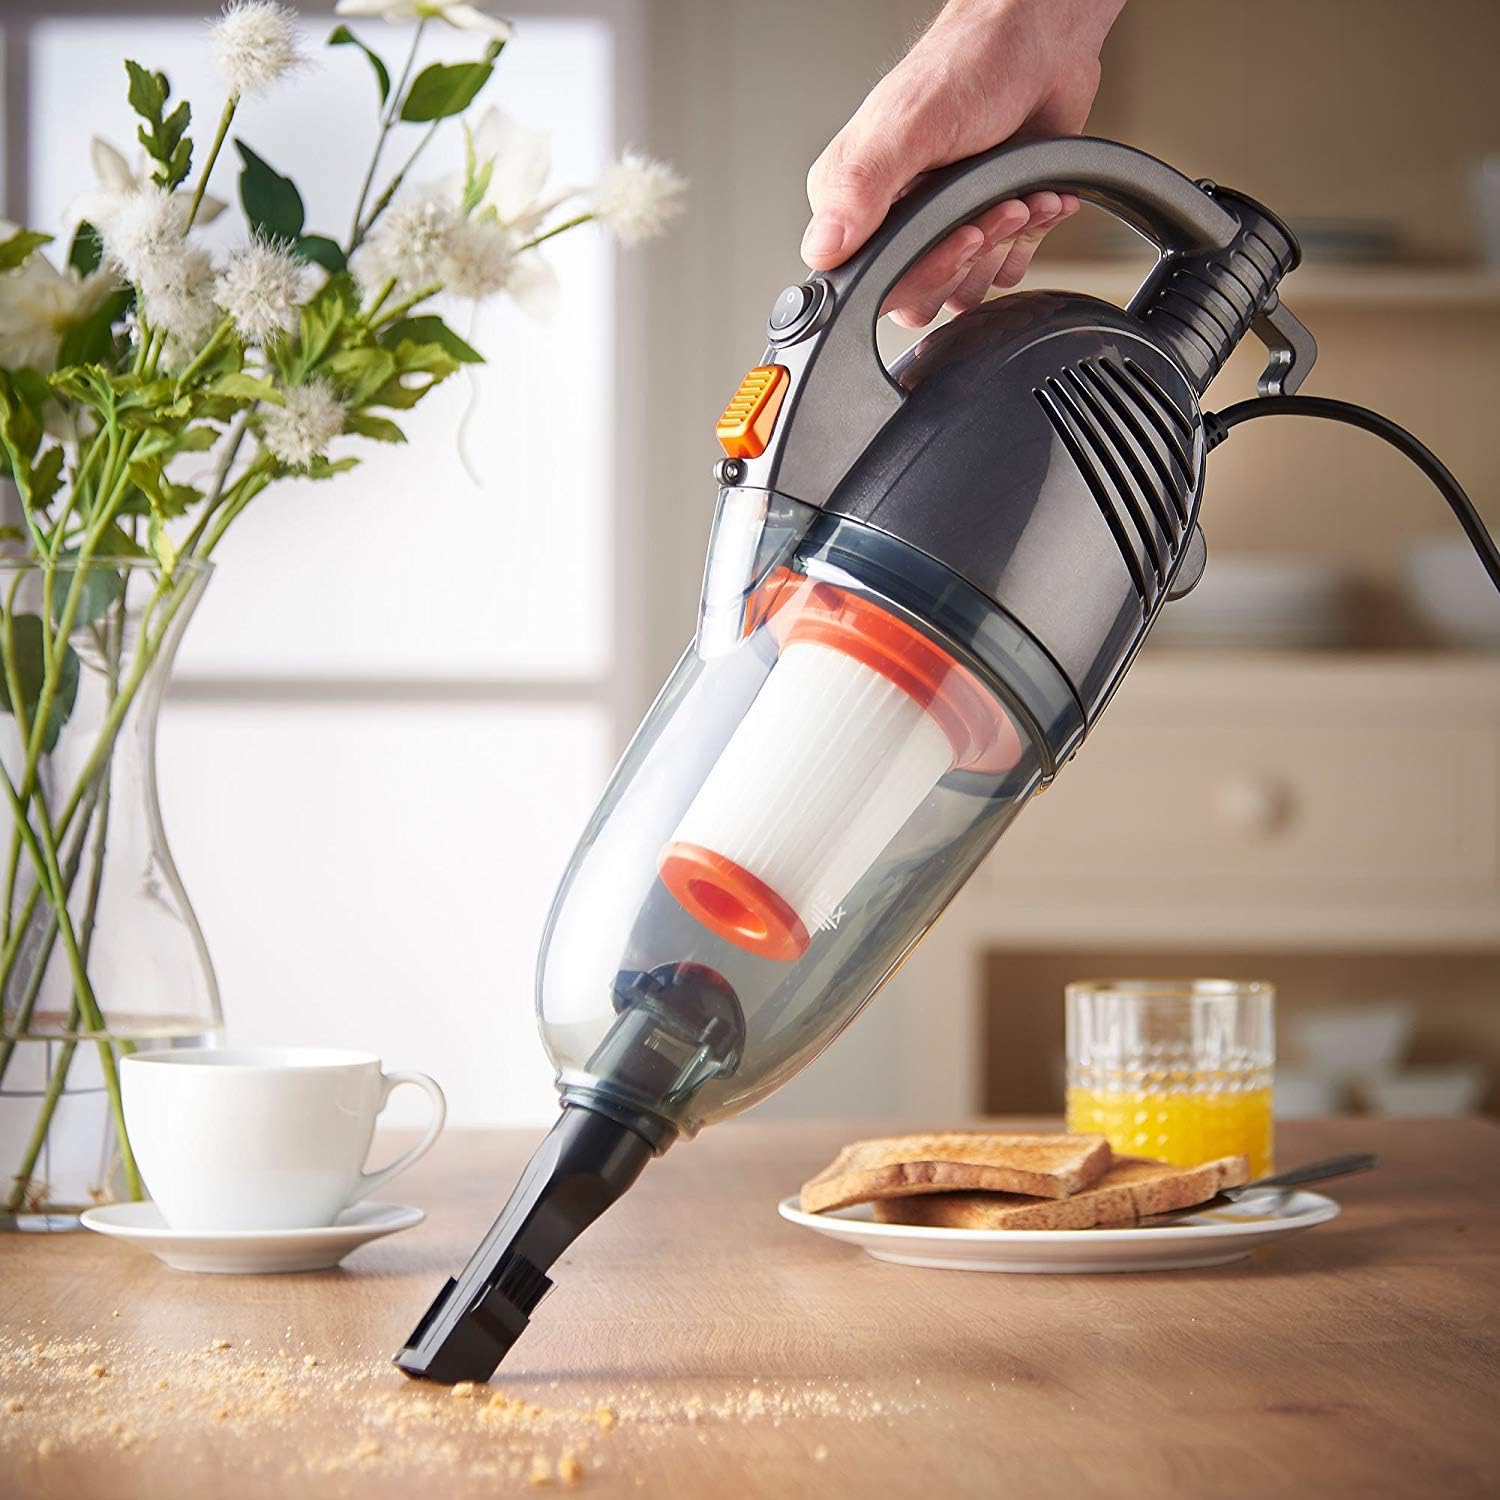
Figure 3.2: Handheld configuration for detailed cleaning tasks.
3.3 Visuele Opstellingsgids
For a visual demonstration of the assembly process, please refer to the video below:
Video 3.1: General guide for assembling and operating a stick vacuum. This video demonstrates attaching the handle, floor brush, and accessories, as well as emptying and cleaning the dust cup and filter.
4. Bedryfsinstruksies
Once assembled and plugged in, your vacuum is ready for use.
- Krag aan/af: Locate the power switch on the main unit and slide it to the 'On' position to start vacuuming. Slide to 'Off' to stop.
- Regop modus: Use the extendable handle and floor brush head for cleaning carpets, hard floors, and tiles. The lightweight design (approximately 0.01 ounces) allows for easy maneuverability.
- Handmodus: For smaller messes, upholstery, car interiors, or hard-to-reach areas, use the main unit with the appropriate attachment.
- Gebruik aanhegsels: The crevice tool is ideal for tight spaces and corners. The brush attachment is suitable for delicate surfaces and upholstery.

Figure 4.1: Effective cleaning of hard floors using the upright stick vacuum.
5. Onderhoud
Gereelde onderhoud verseker optimale werkverrigting en verleng die lewensduur van jou stofsuier.
5.1 Leegmaak van die stofhouer
Empty the dust cup regularly, ideally after each use, to maintain strong suction power.
- Maak die stofhouer los: Hold the main vacuum unit and press the dust cup release button. Gently pull the dust cup away from the main unit.
- Remove Cyclone Separator: Over a waste bin, gently pull out the cyclone separator from the dust cup.
- Leë inhoud: Tip the dust cup to empty all collected debris into the waste bin.
- Hermonteer: Reinsert the cyclone separator, ensuring it aligns correctly. Reattach the dust cup to the main unit until it clicks securely.

Figure 5.1: The 1.3L dust tank and HEPA sponge filtration system.
5.2 Maak die HEPA-filter skoon
The washable HEPA filtration system helps trap small particles. Clean the filter periodically.
- Verwyder filter: After detaching the dust cup, carefully remove the HEPA filter.
- Skud puin af: Gently shake the filter over a waste bin to remove loose dirt and debris.
- Wasfilter: Rinse the filter under running water until clean. Do not use detergents or hot water.
- Droog heeltemal: Allow the filter to air dry completely in a well-ventilated area before reinserting it. Ensure it is completely dry to prevent mold or damage.
- Voeg filter weer in: Place the dry filter back into the vacuum, ensuring it is securely sealed.
5.3 Visual Maintenance Guide
For a visual demonstration of emptying the dust cup and washing the filter, please refer to the video below:
Video 5.1: General guide for emptying the dust cup and washing the filter of a stick vacuum.
6. Probleemoplossing
As jy probleme met jou stofsuier ondervind, raadpleeg die volgende algemene stappe vir probleemoplossing:
- Geen krag:
- Maak seker dat die kragkabel stewig in 'n werkende stopcontact ingeprop is.
- Check the power switch is in the 'On' position.
- Verlies van suiging:
- Maak die stofbeker leeg.
- Clean or replace the HEPA and sponge filters.
- Check for blockages in the nozzle, hose, or extension tube.
- Ongewone geraas:
- Check for any foreign objects caught in the floor brush head or main unit.
- Ensure all parts are correctly assembled and securely fastened.
If problems persist after attempting these steps, please contact VonHaus customer support.
7. Spesifikasies
| Kenmerk | Spesifikasie |
|---|---|
| Handelsmerk | VonHaus |
| Model Naam | 2 in 1 Stick Vacuum 600W (07/813) |
| Kragbron | Elektries met koord |
| Wattage | 600 watt |
| Amperageer | 5 Amps |
| Kapasiteit | 1.3 liter |
| Filter tipe | HEPA and Sponge Filtration (Washable) |
| Vormfaktor | Handgeskik, Stok |
| Aanbevole gebruike | Carpet, Hard Floor, Tile Floor, Hardwood, Upholstery |
| Spesiale kenmerke | Compact, HEPA, Lightweight, Wheels |
| Geraasvlak | 80 Desibel |
| Item gewig | 0.01 onse |
| Pakket afmetings | 19.33 x 11.93 x 7.44 duim |
8. Waarborg en Ondersteuning
For warranty information, product registration, or technical support, please refer to the documentation included with your purchase or visit the official VonHaus webwebwerf. Bewaar u bewys van aankoop vir enige waarborgeise.
For additional assistance, you may contact VonHaus customer service directly.