KING KB2410-1-B2-ECO
KING KB ECO2S Garage Heater Instruction Manual
Model: KB2410-1-B2-ECO
1. Inleiding
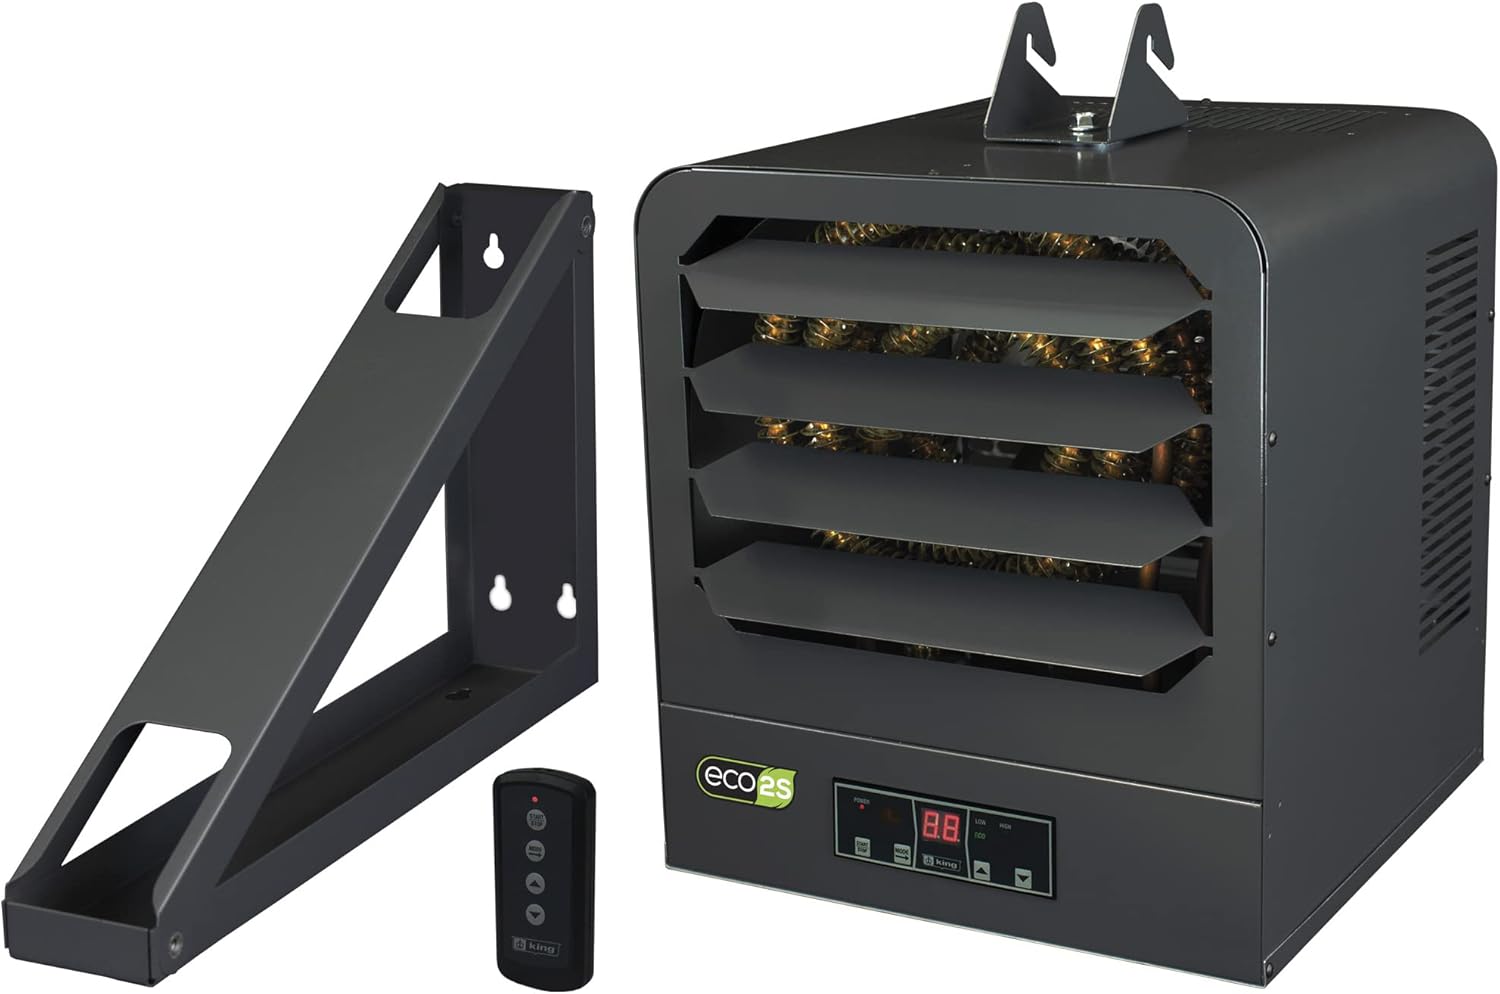
This manual provides essential information for the safe and efficient operation of your KING KB ECO2S Garage Heater. The KB ECO2S series offers advanced heating solutions with an integrated electronic thermostat and remote control, designed for energy-efficient 2-stage heating. It features an Eco mode, fan-only operation, and timer functions, making it suitable for primary or supplemental heating in garages, workshops, and similar large spaces.
Please read this manual thoroughly before installation and use, and retain it for future reference.

Image 1: KING KB ECO2S Garage Heater, showing the main unit, remote control, and mounting bracket.
2. Belangrike veiligheidsinligting
WAARSKUWING: Risiko van brand, elektriese skok of besering aan persone.
- Lees alle instruksies voordat u hierdie verwarmer gebruik.
- This heater is hot when in use. To avoid burns, do not let bare skin touch hot surfaces. Keep combustible materials, such as furniture, pillows, bedding, papers, clothes, and curtains, at least 3 feet (0.9 m) from the front of the heater and keep them away from the sides and rear.
- Uiterste versigtigheid is nodig wanneer enige verwarmer deur of naby kinders of invalides gebruik word en wanneer die verwarmer ook al in werking gelaat word en sonder toesig.
- Moenie enige verwarmer gebruik met 'n beskadigde koord of prop of nadat die verwarmer wanfunksioneer, laat val of op enige manier beskadig is nie. Gooi verwarmer weg, of stuur terug na gemagtigde diensfasiliteit vir ondersoek en/of herstel.
- Moenie buite gebruik nie.
- Hierdie verwarmer is nie bedoel vir gebruik in badkamers, wasserye en soortgelyke binnenshuise plekke nie. Moet nooit verwarmer opspoor waar dit in 'n bad of 'n ander houer kan val nie.
- Moenie koord onder die matte dra nie. Moenie koord bedek met matte, lopers of soortgelyke bedekkings nie. Rangskik koord weg van die verkeersarea en waar dit nie gestruikel sal word nie.
- Om verwarmer te ontkoppel, draai kontroles af en trek dan die prop uit die uitlaat.
- Moenie enige ventilasie- of uitlaatopening inbring of toelaat dat vreemde voorwerpe binnedring nie, aangesien dit 'n elektriese skok of brand kan veroorsaak, of die verwarmer kan beskadig.
- Om 'n moontlike brand te voorkom, moenie luginlate of -uitlaat op enige manier blokkeer nie. Moet nie op sagte oppervlaktes, soos 'n bed, gebruik waar openinge geblokkeer kan word nie.
- ’n Verwarmer het warm en vlam- of vonkende dele binne. Moet dit nie gebruik in areas waar petrol, verf of vlambare dampe of vloeistowwe gebruik of gestoor word nie.
- Gebruik hierdie verwarmer slegs soos beskryf in hierdie handleiding. Enige ander gebruik wat nie deur die vervaardiger aanbeveel word nie, kan brand, elektriese skok of beserings aan persone veroorsaak.
- This heater must be hardwired by a qualified electrician. Do not attempt to install or service this unit yourself if you are not qualified.
3. Pakketinhoud
Verifieer dat alle komponente teenwoordig en onbeskadig is voordat u met die installasie voortgaan.
- KING KB ECO2S Garage Heater Unit
- Universal Wall/Ceiling Mounting Bracket
- Afstandbeheer
- Instructiehandleiding (hierdie dokument)

Image 2: The heater unit, mounting bracket, and remote control as included in the package.
4. Installasie
IMPORTANT: This heater requires hardwiring to a 240V electrical supply. Installation must be performed by a qualified, licensed electrician in accordance with all local and national electrical codes.
4.1 Montering van die verwarmer
The heater comes with a universal bracket for wall or ceiling mounting. Ensure the mounting surface is structurally sound and capable of supporting the heater's weight (approximately 37.5 lbs).
- Select a mounting location that allows for proper air circulation and is at least 3 feet (0.9 m) away from combustible materials.
- Securely attach the universal bracket to the chosen wall or ceiling studs/joists using appropriate hardware (not included).
- Mount the heater unit onto the bracket. The bracket allows for adjustable positioning to direct heat flow.
4.2 Elektriese aansluiting
WARNING: Ensure power is disconnected at the main circuit breaker before attempting any electrical wiring.
- A dedicated 240V circuit with appropriate ampouderdom (45 Amps for the 10000W model) is required.
- Access the internal wiring compartment of the heater. This typically involves removing a panel on the unit.
- Connect the supply wires to the heater's terminals as indicated in the wiring diagram located inside the heater's wiring compartment and in the full installation guide. Ensure proper grounding.
- Securely close the wiring compartment.
- Sodra die installasie voltooi is, herstel die kragtoevoer by die stroombreker.

Prent 3: Agter view of the heater, illustrating the fan and the typical location for electrical wiring access.
5. Bedryfsinstruksies
The KB ECO2S heater can be operated using the integrated control panel or the included remote control.
5.1 Beheerpaneel verbyview
The front panel features a digital display and control buttons for power, mode selection, and temperature adjustment.
Beeld 4: Gedetailleerd view of the heater's control panel with digital display and buttons.
5.2 Afstandbeheerfunksies
The remote control provides convenient access to all heater functions from a distance.
- Krag aan/af: Druk die kragknoppie om die verwarmer aan of af te skakel.
- Temperatuuraanpassing: Use the up/down arrows to set the desired temperature. The digital display will show the set temperature.
- Moduskeuse: Cycle through available modes (Heat, Eco, Fan Only, Timer) using the mode button.
- Eko-modus: Automatically adjusts wattage to maintain the set temperature efficiently.
- Slegs waaiermodus: Operates the fan without engaging the heating elements, useful for air circulation.
- Timer funksie: Set a timer for automatic shut-off. Refer to the full manual for detailed timer programming.
5.3 Aanvanklike werking
Upon first use, the heater may emit a slight odor as manufacturing oils burn off. This is normal and will dissipate quickly.
Set the desired temperature. The heater will operate in 2-stage heating, using the lowest wattage necessary to reach and maintain the set temperature, optimizing energy consumption.
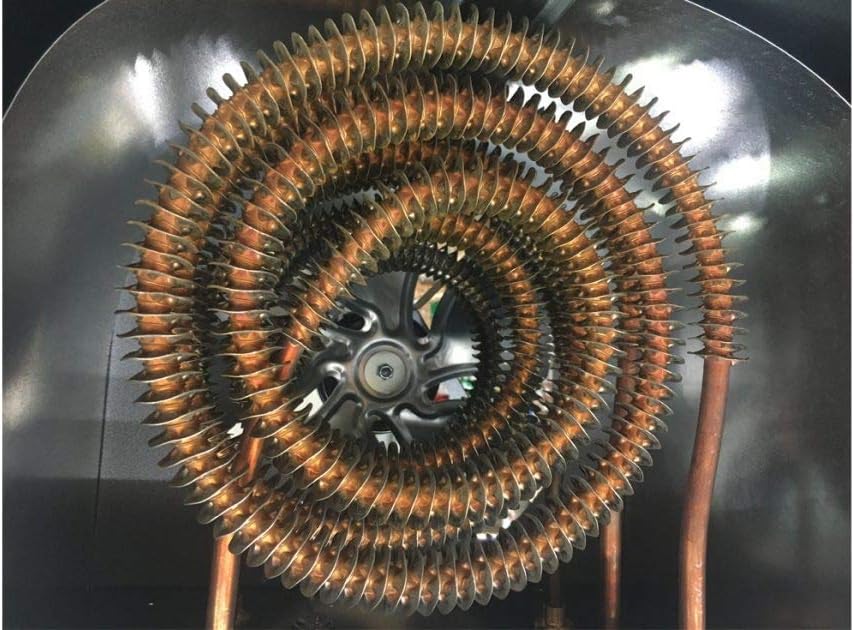
Prent 5: View of the spiral steel heating elements and fan, designed for efficient heat distribution.
6. Onderhoud
WARNING: Disconnect power at the main circuit breaker before performing any maintenance.
- Skoonmaak: Maak die buitekant van die verwarmer gereeld skoon met 'n sagte, damp lap. Moenie skuur skoonmaakmiddels of oplosmiddels gebruik nie.
- Luginlaat/Uitlaat: Ensure that the air intake and exhaust grilles are free from dust, debris, and obstructions. Use a vacuum cleaner with a brush attachment to gently clean these areas.
- Interne inspeksie: For internal cleaning or inspection, it is recommended to contact a qualified service technician.
- Berging: Indien die verwarmer vir 'n lang tydperk gestoor word, maak seker dat dit skoon en droog is. Bêre op 'n koel, droë plek.
7. Probleemoplossing
Voordat u kliëntediens kontak, hersienview die volgende algemene probleme en oplossings:
| Probleem | Moontlike oorsaak | Oplossing |
|---|---|---|
| Verwarmer skakel nie aan nie. | No power supply; circuit breaker tripped; wiring issue. | Check circuit breaker. Ensure proper electrical connection (consult electrician if unsure). |
| Verwarmer produseer onvoldoende hitte. | Incorrect temperature setting; room size exceeds heating capacity; poor insulation. | Increase set temperature. Verify heater wattage is appropriate for the space (refer to specifications). Improve room insulation. |
| Heater cycles on/off frequently (clicking sound). | Thermostat sensitivity; rapid temperature changes. | This can be normal operation as the thermostat maintains temperature. If excessive, ensure proper air circulation around the unit and that the thermostat is not exposed to drafts. If the issue persists, contact customer support. |
| Afstandbeheer werk nie. | Dead batteries; obstruction; out of range. | Replace remote control batteries. Ensure no obstructions between remote and heater. Operate within recommended range. |
8. Spesifikasies
| Kenmerk | Detail |
|---|---|
| Model | KB2410-1-B2-ECO |
| Handelsmerk | KONING |
| Voltage | 240 Volt |
| Amperageer | 45 Amps |
| Wattage | 10000 Watt |
| Verhittingsdekking | Up to 900 sq ft (based on 8-ft ceiling height and FHA standard insulation values) |
| Produk Afmetings (D x B x H) | 13.5" x 15" x 16.5" |
| Item gewig | 37.5 pond |
| Spesiale kenmerke | Remote Control, Electronic Thermostat, 2-Stage Heating, Eco Mode, Fan Only Mode, Timer |
| Aantal snelhede | 2 |
| Brandstof tipe | Elektries |
| Montage tipe | Universal Wall/Ceiling Bracket (included) |

Image 6: Heating coverage chart for various wattage models, including the 10000W model covering up to 900 sq ft.
9. Waarborg en Ondersteuning
For warranty information, technical support, or service inquiries, please refer to the official KING Electric webwebwerf of kontak hul kliëntediens direk. Bewaar u aankoopbewys as bewys van aankoop vir waarborgeise.
Manufacturer: King Electric
Webwebwerf: www.king-electric.com
10. Produkvideo's
KING Electric - Smart Heating Solutions
Video 1: 'n Oorview of KING Electric's commitment to smart heating solutions and manufacturing quality.