KING KB2407-1-B2-ECO
KING KB2407-1-B2-ECO ECO2S 7500W Garageverwarmer Gebruikershandleiding
Model: KB2407-1-B2-ECO
1. Inleiding
This manual provides essential instructions for the safe installation, operation, and maintenance of your KING KB2407-1-B2-ECO ECO2S 7500W Garage Heater. Please read this manual thoroughly before installation and use, and retain it for future reference. Proper installation and adherence to these instructions are crucial for optimal performance and safety.
2. Belangrike veiligheidsinligting
WAARSKUWING: Risiko van brand, elektriese skok of besering aan persone.
- Lees alle instruksies voordat u hierdie verwarmer installeer of gebruik.
- This heater is hot when in use. To avoid burns, do not let bare skin touch hot surfaces. Keep combustible materials, such as furniture, pillows, bedding, papers, clothes, and curtains, at least 3 feet (0.9 m) from the front of the heater and keep them away from the sides and rear.
- Uiterste versigtigheid is nodig wanneer enige verwarmer deur of naby kinders of invalides gebruik word en wanneer die verwarmer ook al in werking gelaat word en sonder toesig.
- Moenie enige verwarmer gebruik met 'n beskadigde koord of prop nie, of nadat die verwarmer wanfunksioneer, laat val of op enige manier beskadig is nie. Gooi die verwarmer weg of stuur dit terug na 'n gemagtigde diensfasiliteit vir ondersoek en/of herstelwerk.
- Moenie buite gebruik nie.
- Hierdie verwarmer is nie bedoel vir gebruik in badkamers, wasserye en soortgelyke binnenshuise plekke nie. Moet nooit verwarmer opspoor waar dit in 'n bad of 'n ander houer kan val nie.
- Moenie koord onder die matte dra nie. Moenie koord bedek met matte, lopers of soortgelyke bedekkings nie. Rangskik koord weg van die verkeersarea en waar dit nie gestruikel sal word nie.
- Om verwarmer te ontkoppel, draai kontroles af en trek dan die prop uit die uitlaat.
- Moenie enige ventilasie- of uitlaatopening inbring of toelaat dat vreemde voorwerpe binnedring nie, aangesien dit 'n elektriese skok of brand kan veroorsaak, of die verwarmer kan beskadig.
- Om 'n moontlike brand te voorkom, moenie luginlate of -uitlaat op enige manier blokkeer nie. Moet nie op sagte oppervlaktes, soos 'n bed, gebruik waar openinge geblokkeer kan word nie.
- ’n Verwarmer het warm en vlam- of vonkende dele binne. Moet dit nie gebruik in areas waar petrol, verf of vlambare dampe of vloeistowwe gebruik of gestoor word nie.
- Gebruik hierdie verwarmer slegs soos beskryf in hierdie handleiding. Enige ander gebruik wat nie deur die vervaardiger aanbeveel word nie, kan brand, elektriese skok of beserings aan persone veroorsaak.
- Prop verwarmers altyd direk in 'n muuraansluiting/houer in. Moet nooit met 'n verlengkoord of herplaasbare kragkraan (uitlaat/kragstrook) gebruik nie.
- This heater is for 240V applications only.
3. Pakketinhoud
Verify that all components are present and undamaged. If any items are missing or damaged, contact your retailer.
- KING KB2407-1-B2-ECO ECO2S Garage Heater (7500W / 240V)
- Universal Wall/Ceiling Mounting Bracket
- Afstandbeheer
- Gebruikershandleiding (hierdie dokument)

Image 3.1: The KING KB2407-1-B2-ECO ECO2S Garage Heater, showing the main unit, the universal mounting bracket, and the remote control.
4. Opstelling en installering
Installasie moet deur 'n gekwalifiseerde elektrisiën uitgevoer word in ooreenstemming met alle plaaslike en nasionale elektriese kodes.
4.1 Montageplek
- Select a location where the heater is protected from water spray, dripping water, and excessive dust.
- Ensure adequate clearance from combustible materials (minimum 3 feet from front, sides, and rear).
- Mount the heater securely to a structural member (stud, joist) capable of supporting its weight (approximately 33.5 lbs).
- The universal bracket allows for wall or ceiling mounting.
4.2 Montering van die verwarmer
- Attach the universal mounting bracket to a sturdy wall stud or ceiling joist using appropriate fasteners (not included). Ensure the bracket is level and securely fastened.
- Lift the heater and align the hanging hooks on top of the heater with the slots on the mounting bracket.
- Slide the heater onto the bracket until it is securely seated.
- Adjust the heater's angle as desired and secure it using the provided hardware to prevent accidental movement.
4.3 Elektriese bedrading
DANGER: Disconnect power at the main service panel before attempting any wiring to prevent electric shock.
- This heater requires a dedicated 240V circuit.
- The heater is rated for 7500W, drawing approximately 31.25 Amps. A circuit breaker and wiring sized appropriately for this load are required (e.g., 40 Amp breaker with 8-gauge wire, consult local codes).
- Access the internal wiring compartment by removing the appropriate cover plate on the heater.
- Connect the 240V supply wires to the heater's terminals as indicated in the wiring diagram inside the heater's compartment. Ensure proper grounding.
- Secure all wiring connections and replace the cover plate.

Prent 4.1: Agter view of the heater, illustrating the fan and location of electrical warning labels. Ensure all wiring is done by a qualified professional.
5. Operasie
Once properly installed and powered, the heater can be operated using its integrated control panel or the remote control.
5.1 Beheerpaneel verbyview

Beeld 5.1: Voorkant view of the heater, highlighting the digital display and control buttons for direct operation.
Die beheerpaneel beskik oor 'n digitale skerm en verskeie knoppies:
- Digitale skerm: Shows current temperature, set temperature, and mode indicators.
- Kragknoppie: Skakel die verwarmer AAN/AF.
- MODUS-knoppie: Cycles through heating modes (ECO, HIGH, FAN ONLY).
- OP/AF Pyle: Pas die ingestelde temperatuur aan.
- TIMER-knoppie: Activates or adjusts the timer function.
5.2 afstandbeheer
The included remote control provides convenient access to all heater functions from a distance.
- Ensure batteries are correctly installed in the remote control.
- Point the remote control towards the heater's control panel for optimal signal reception.
- Buttons on the remote mirror the functions of the control panel (Power, Mode, Up/Down Temperature, Timer).
5.3 Bedryfsmodusse
- ECO -modus: The heater automatically selects the lowest wattage needed to maintain the set temperature, optimizing energy consumption.
- HIGH Heat Mode: The heater operates at full wattage (7500W) to quickly reach and maintain the set temperature.
- FAN ONLY Mode: The fan operates without engaging the heating elements, providing air circulation.
5.4 Stel die temperatuur in
- Press the POWER button to turn the heater on.
- Use the UP or DOWN arrow buttons to set your desired temperature. The display will show the set temperature, then revert to the ambient temperature.
- The heater will automatically cycle on and off to maintain the set temperature.
5.5 Timer-funksie
The timer allows you to set a duration for the heater to operate before automatically turning off.
- Met die verwarmer aan, druk die TIMER-knoppie.
- Use the UP or DOWN arrow buttons to set the desired operating time (e.g., 1-12 hours).
- The heater will operate for the set duration and then power off.
6. Onderhoud
WARNING: Always disconnect power to the heater at the main service panel before performing any maintenance or cleaning.
- Skoonmaak: Maak die buitekant van die verwarmer gereeld skoon met 'n sagte, damp lap. Moenie skuur skoonmaakmiddels of oplosmiddels gebruik nie.
- Stofverwydering: Use a vacuum cleaner with a brush attachment to remove dust from the grilles and internal components. Ensure the fan blades are free of obstructions.
- Inspeksie: Regularly inspect the power cord and plug for any signs of damage. If damage is found, discontinue use and contact a qualified electrician for repair.
- Geen smering is nodig vir die motor nie.
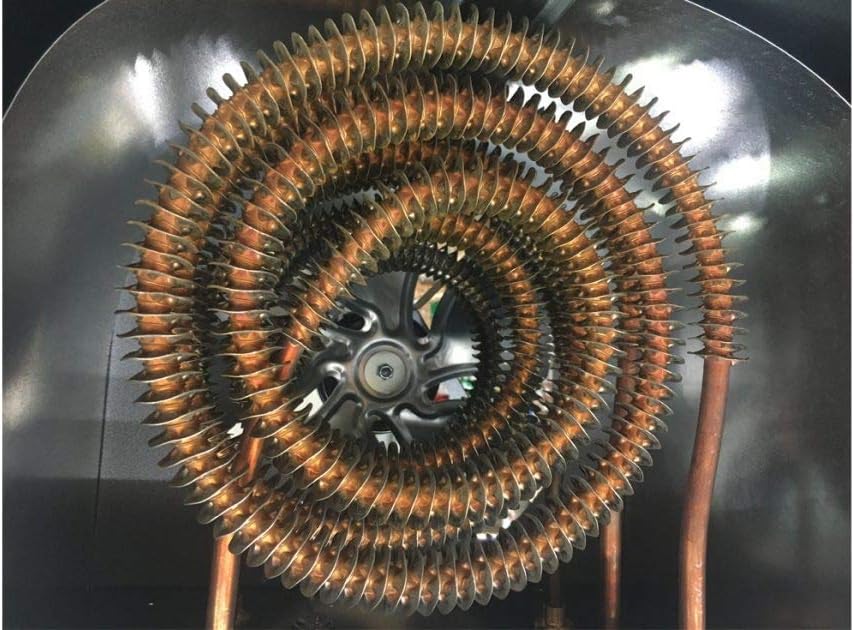
Image 6.1: Close-up of the spiral steel heating elements. Regular cleaning helps maintain efficiency and prolong heater life.
7. Probleemoplossing
Indien u verwarmer nie korrek werk nie, raadpleeg die volgende tabel voordat u kliëntediens kontak.
| Probleem | Moontlike oorsaak | Oplossing |
|---|---|---|
| Verwarmer skakel nie aan nie. | Geen kragtoevoer. Stroomonderbreker het gestruikel. Oorverhitbeskerming geaktiveer. | Ensure heater is properly wired and connected to 240V supply. Kontroleer en herstel die stroombreker. Turn off heater, allow to cool for 30 minutes, then restart. Clear any obstructions. |
| Verwarmer produseer onvoldoende hitte. | Verkeerde modus gekies. Stel temperatuur te laag. Kamergrootte oorskry verhittingskapasiteit. | Ensure HIGH or ECO mode is selected, not FAN ONLY. Verhoog die ingestelde temperatuur. Verify the heater's coverage area (700 sq ft for 7500W) is appropriate for your space. |
| Die waaier loop, maar daar is geen hitte nie. | FAN ONLY mode selected. Heating elements malfunction. | Switch to ECO or HIGH heat mode. If problem persists, contact a qualified technician. |
| Afstandbeheer werk nie. | Dooie batterye. Obstruksie tussen afstandbeheerder en verwarmer. | Vervang afstandbeheerbatterye. Ensure a clear line of sight to the heater's control panel. |

Image 7.1: Heating coverage chart for various KING garage heater wattages. The 7500W model covers up to 750 sq ft.
8. Spesifikasies
| Kenmerk | Detail |
|---|---|
| Model | KB2407-1-B2-ECO |
| Handelsmerk | KONING |
| Wattage | 7500 Watt |
| Voltage | 240 Volt |
| Amperageer | 31.25 Amps |
| Verhittingsdekking | Up to 700 ft² (based on 8 ft ceiling height and FHA standard insulation values) |
| Spesiale kenmerke | Remote Control, Built-In Fan Delay, Summer Fan Only & Timer Modes, ECO2S Electronic Thermostat |
| Montage tipe | Universal Wall/Ceiling Bracket |
| Produk afmetings | 13.5 x 15 x 16.5 duim |
| Item gewig | 33.5 pond |
| UPC | 093319220405 |
9. Waarborg en Ondersteuning
For warranty information or technical support, please refer to the warranty card included with your product or visit the manufacturer's official webwebwerf. Bewaar u aankoopbewys as bewys van aankoop vir waarborgeise.
Manufacturer: King Electric
For further assistance, contact King Electric customer service.
Ask a question about this manual
Ask about setup, troubleshooting, compatibility, parts, safety, or missing instructions. Manuals+ will review the question and use this page’s manual context to help answer it.