1. Belangrike veiligheidsinstruksies
Please read these instructions carefully before using the appliance and keep them for future reference. Failure to follow these safety instructions may result in fire, electric shock, or injury.
- Always ensure the appliance is disconnected from the power supply before cleaning or maintenance.
- Do not immerse the main body of the appliance (above the minimum water level mark) in water or other liquids.
- Hierdie toestel is nie bedoel vir gebruik deur persone (insluitend kinders) met verminderde fisiese, sensoriese of geestelike vermoëns, of 'n gebrek aan ervaring en kennis nie, tensy hulle toesig of instruksies oor die gebruik van die toestel gegee is deur 'n persoon wat verantwoordelik is vir hul veiligheid. .
- Kinders moet onder toesig wees om te verseker dat hulle nie met die toestel speel nie.
- Use the appliance only for its intended purpose, which is sous vide cooking.
- Do not operate the appliance if it has a damaged cord or plug, or if it malfunctions or has been damaged in any manner. Contact customer support for assistance.
- Always place the appliance in a suitable pot or container on a stable, heat-resistant surface.
- Ensure the water level is always between the 'MIN' and 'MAX' marks on the immersion circulator.
- Moenie aan warm oppervlaktes raak nie. Gebruik handvatsels of knoppe.
2. Produk verbyview
The ProfiCook PC-SV 1126 is a high-quality sous vide cooker designed for precise temperature control, ensuring perfectly cooked food every time. It features an LED multifunction display, a touch control panel, and an integrated fastening clamp for easy use with various pots.
Komponente
- Sous Vide -onderdompeling
- Integrated Fastening Clamp
- LED Multifunction Display
- Raak Kontrolepaneel

Image: The ProfiCook PC-SV 1126 Sous Vide Cooker, a sleek black and stainless steel device with an LED display.

Image: Close-up of the LED multifunction display showing current temperature, selected temperature, and timer settings.

Image: The integrated fastening clamp securely attaching the sous vide cooker to the side of a cooking pot.
3. Opstelling
Before first use, ensure all packaging materials are removed and the appliance is clean.
3.1 Uitpak en Aanvanklike Inspeksie
- Carefully remove the sous vide cooker from its packaging.
- Check for any visible damage. If damaged, do not use and contact customer support.
- Wipe the stainless steel part of the circulator with a damp lap.
3.2 Placement and Water Filling
- Place a suitable cooking pot or heat-resistant container on a stable, level, and heat-resistant surface.
- Attach the sous vide cooker to the side of the pot using the integrated fastening clamp. Ensure it is securely fixed.
- Fill the pot with water. The water level must be between the 'MIN' and 'MAX' marks indicated on the sous vide cooker. Do not overfill or underfill.
- Plug the appliance into a grounded electrical outlet. The display will illuminate.

Image: The sous vide cooker immersed in a pot of water, illustrating the water circulation for even temperature distribution.
4. Bedryfsinstruksies
The PC-SV 1126 allows for precise temperature control for various cooking methods.
4.1 Basic Sous Vide Cooking
- Berei kos voor: Season your food and place it in a vacuum-sealable bag. Remove as much air as possible and seal the bag.
- Stel temperatuur: With the appliance plugged in, use the touch control panel to set your desired cooking temperature. The temperature can be set between 20°C and 100°C in 0.5°C increments.
- Stel timer: Set the desired cooking time using the touch control panel. The timer can be set up to 99 hours.
- Begin verhit: Press the start button. The appliance will begin heating the water to the set temperature. The LED display will show the current water temperature.
- Voeg kos by: Sodra die water die teikentemperatuur bereik, plaas die verseëlde kossak versigtig in die waterbad. Maak seker dat die sak heeltemal ondergedompel is en nie die watersirkulasie blokkeer nie.
- Kookproses: The timer will begin counting down once the target temperature is reached. The appliance will maintain the precise temperature throughout the cooking process.
- Voltooi kook: When the timer expires, the appliance will alert you. Carefully remove the food bag from the water bath.
- Sear (Optional): For many foods, especially meats, a quick sear in a hot pan after sous vide cooking will create a desirable crust.
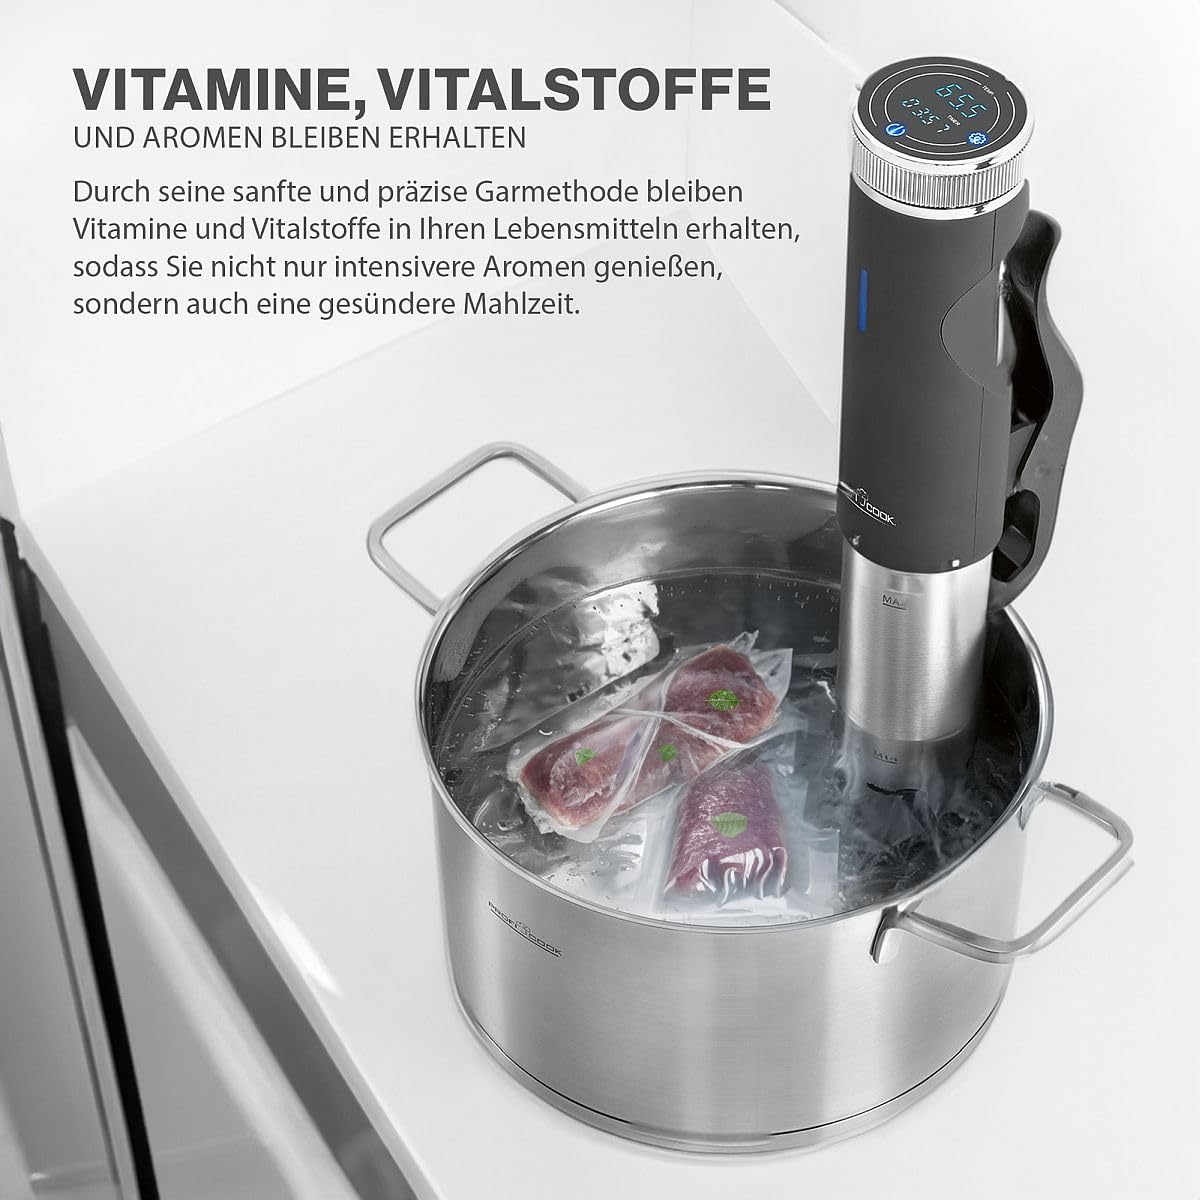
Image: A vacuum-sealed bag of meat being carefully placed into the water bath with the sous vide cooker.
4.2 Spesiale Funksies
The PC-SV 1126 also offers additional functions for versatility:
- Jogurtmaker: This function allows you to maintain the ideal temperature for making homemade yogurt. Refer to specific yogurt recipes for temperature and time settings.
- Hou warm: Use this function to keep cooked food warm at a safe temperature.
- Ontdooi: The appliance can be used to gently defrost food at a controlled temperature.

Image: The sous vide cooker operating in a pot, demonstrating its use for making yogurt.
5. Skoonmaak en Onderhoud
Regular cleaning and maintenance will ensure the longevity and optimal performance of your sous vide cooker.
5.1 Algemene Skoonmaak
- Ontkoppel altyd die toestel en laat dit heeltemal afkoel voordat dit skoongemaak word.
- Vee die buitekant van die toestel af met adamp lap. Moenie skuurskoonmakers of skuursponsies gebruik nie.
- The stainless steel part of the immersion circulator can be cleaned with a mild detergent and water. Rinse thoroughly.
- Do not immerse the top part of the appliance (where the display and controls are located) in water.
5.2 Ontkalking
Over time, mineral deposits (limescale) may build up on the heating element, especially in areas with hard water. Descaling is recommended periodically.
- Fill a pot with water and add white vinegar (approximately 1 part vinegar to 4 parts water).
- Attach the sous vide cooker and set the temperature to 60°C (140°F).
- Run the appliance for 30 minutes to 1 hour, or until the limescale deposits are dissolved.
- Unplug the appliance, let it cool, and rinse the stainless steel part thoroughly with clean water.
5.3 Berging
Berg die toestel op 'n skoon, droë plek wanneer dit nie gebruik word nie.
6. Probleemoplossing
If you encounter issues with your PC-SV 1126, refer to the following table:
| Probleem | Moontlike oorsaak | Oplossing |
|---|---|---|
| Toestel skakel nie aan nie. | Nie ingeprop nie; kragpunt wanfunksioneer. | Ensure the plug is securely inserted into a working outlet. Check the circuit breaker. |
| Water word nie warm nie. | Temperature not set; heating element malfunction. | Verify the desired temperature is set and the start button is pressed. If the problem persists, contact support. |
| Foutboodskap op skerm. | Low water level; internal error. | Check water level and add water if below 'MIN' mark. If error persists, unplug and replug the device. Contact support if the issue continues. |
| Onakkurate temperatuurlesing. | Limescale buildup on sensor. | Perform descaling as described in the maintenance section. |
7. Tegniese spesifikasies
| Kenmerk | Spesifikasie |
|---|---|
| Modelnommer | PC-SV 1126 (501126) |
| Krag | 800 Watt |
| Voltage | 220 V |
| Temperatuurreeks | 20°C - 100°C (in stappe van 0.5°C) |
| Afteller | Tot 99 uur |
| Water sirkulasie | 7-8 Liters/minute |
| Afmetings (L x B x H) | 11 x 44.5 x 13 cm (Product) / 12P x 46l x 14H cm (Item) |
| Gewig | 1.45 kilogram |
| Materiaal | Vlekvrye staal |
| Beheer metode | Raak Beheer |

Image: Diagram showing the dimensions of the ProfiCook PC-SV 1126 Sous Vide Cooker.
8. Waarborg en Ondersteuning
The ProfiCook PC-SV 1126 Sous Vide Cooker comes with a 2-year availability for spare parts, ensuring long-term usability and support for your appliance.
For technical assistance, warranty claims, or to inquire about spare parts, please refer to the contact information provided with your purchase documentation or visit the official ProfiCook webwebwerf.