1. Produk verbyview
The Vonyx STM3030 is a compact and versatile 4-channel DJ mixer designed for various audio applications. Despite its size, it offers extensive connectivity, including two switchable phono/line inputs for turntables and three dedicated line inputs for external audio sources such as CD players, laptops, or smartphones. An integrated MP3 player allows direct music playback from USB drives or SD cards. For wireless convenience, the STM3030 features a Bluetooth receiver, enabling seamless audio streaming from compatible devices. Additionally, it includes a recording function, allowing users to capture their mixes directly to a USB drive or SD card. The mixer is equipped with an LED VU meter for visual signal monitoring and illuminated potentiometers for enhanced visibility in low-light environments. Microphone inputs are provided for vocal performances or announcements, and a headphone output facilitates pre-listening to tracks before they go live.
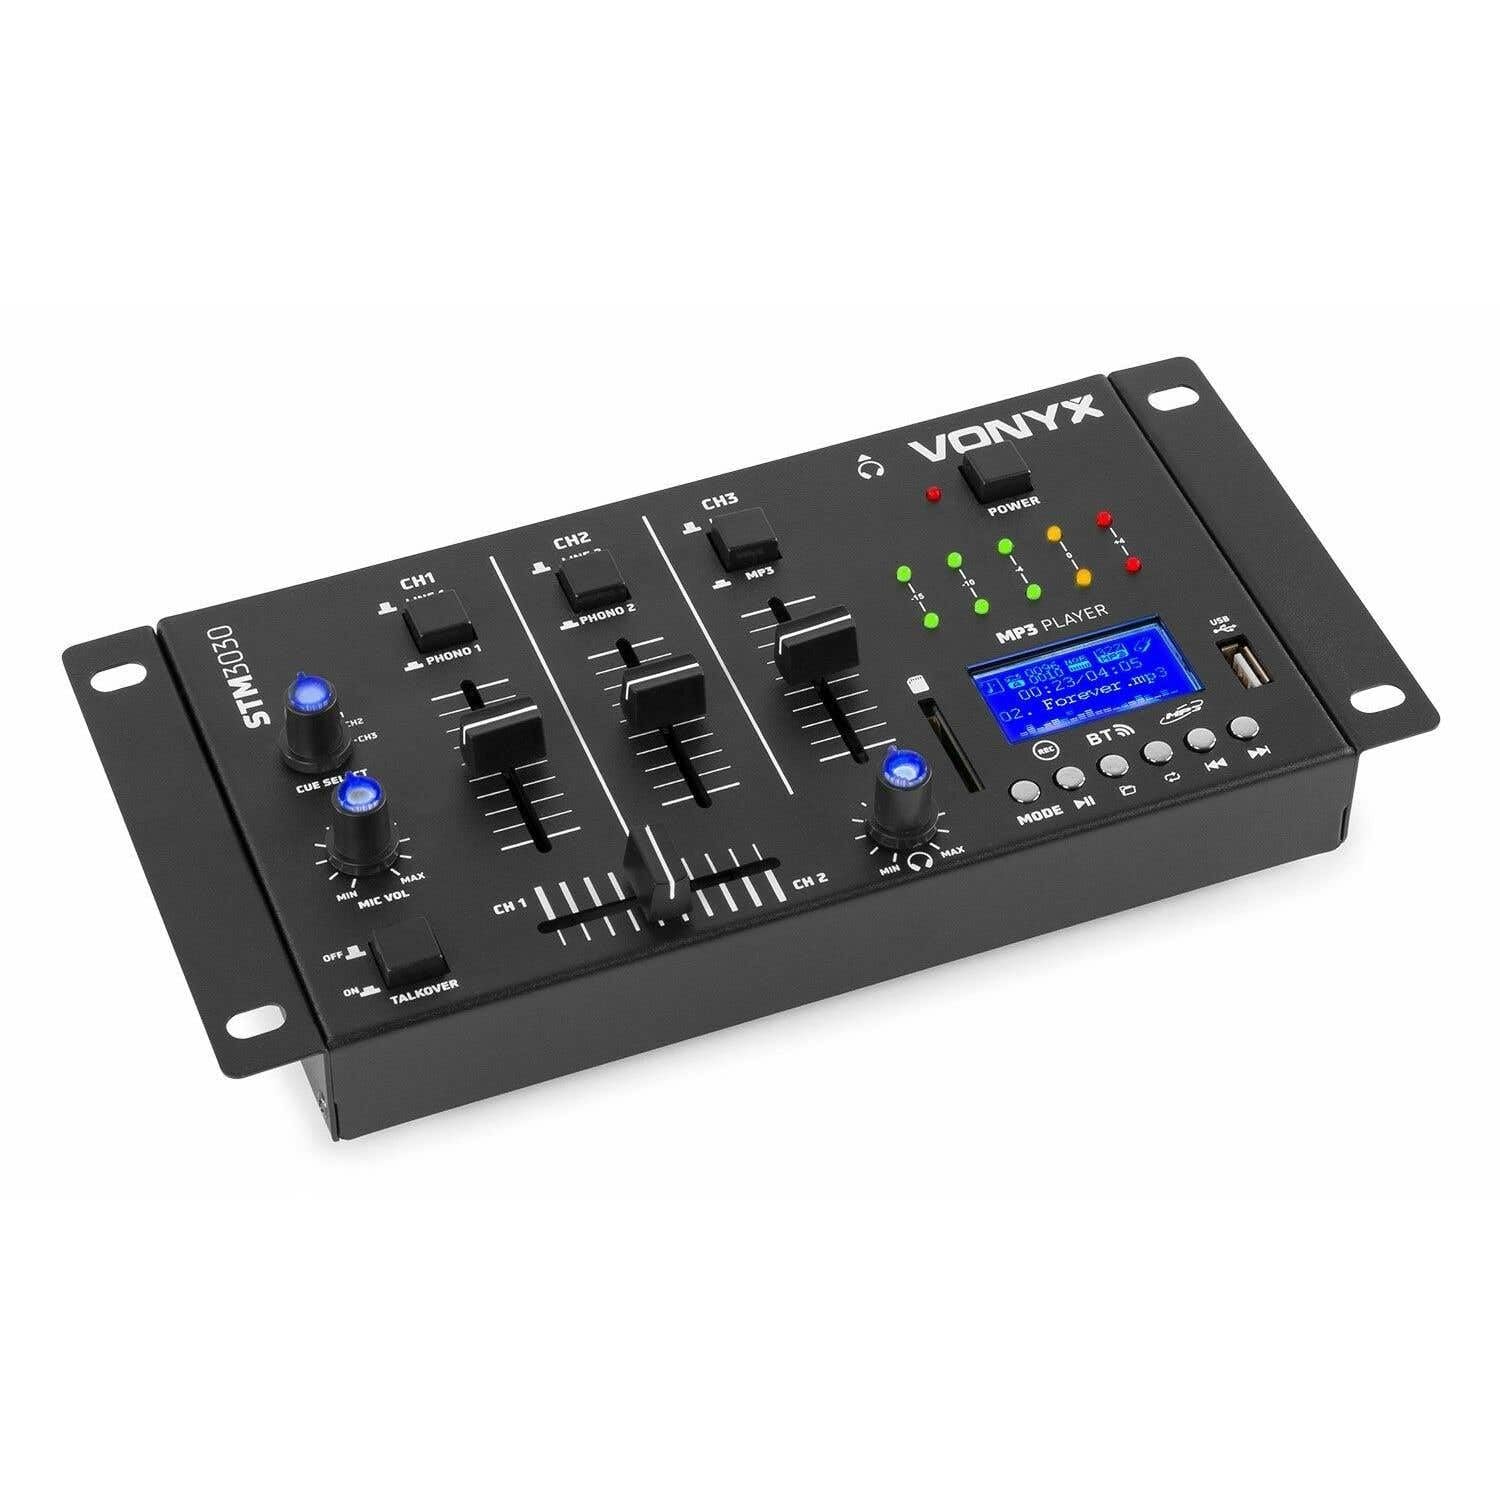
Prent 1.1: Voorkant view of the Vonyx STM3030 DJ Mixer, showcasing sy kompakte ontwerp en beheeruitleg.
2. Sleutel kenmerke
- 4-kanaalmenger: Provides four input channels for connecting multiple audio sources.
- Veelsydige verbindings: Includes Jack and RCA inputs for various devices.
- Bluetooth-koppelvlak: Enables wireless music streaming from smartphones, tablets, or computers.
- Geïntegreerde MP3-speler: Supports direct playback from USB drives and SD cards.
- USB Recording Function: Allows recording of live mixes to USB or SD storage.
- Cue Function: For pre-listening to tracks through headphones.
- LED VU Meter: Provides visual feedback on audio signal levels.
- Illuminated Controls: Potentiometers are illuminated for easy operation in dark environments.
- Crossfader: For smooth transitions between channels.
- Talkover Function: Automatically reduces music volume when the microphone is used.
- Kompakte ontwerp: Easy to integrate into any DJ setup.
3. Veiligheidsinstruksies
Please read these safety instructions carefully before operating the device and retain them for future reference. Incorrect use may result in electric shock, fire, or other hazards.
- Kragtoevoer: Gebruik slegs die meegeleverde kragadapter. Maak seker die volume istage pas by die vereistes wat op die toestel gespesifiseer word.
- Water en vog: Do not expose the device to rain, moisture, or liquids. Never place objects filled with liquids on the device.
- Ventilasie: Ensure proper ventilation. Do not block any ventilation openings. Install the device according to the manufacturer's instructions.
- Hittebronne: Moenie naby enige hittebronne soos verkoelers, hitteregisters, stowe of ander toerusting (insluitend ampversterkers) wat hitte produseer.
- Kragkoordbeskerming: Beskerm die kragkoord teen geloop of vasgeknyp, veral by proppe, geriefshouers en die punt waar dit uit die apparaat kom.
- Skoonmaak: Unplug the device from the power outlet before cleaning. Use only a dry, soft cloth.
- Diens: Moenie probeer om hierdie produk self te diens nie. Verwys alle diens na gekwalifiseerde dienspersoneel. Diens is nodig wanneer die apparaat op enige manier beskadig is, soos wanneer die kragtoevoerkoord of prop beskadig is, vloeistof gemors is of voorwerpe in die apparaat geval het, die apparaat aan reën of vog blootgestel is, nie normaal werk nie, of laat val is.
- Weerlig: Ontkoppel hierdie apparaat tydens weerligstorms of wanneer dit vir lang tye ongebruik word.
4. Kontroles en verbindings
4.1 Voorpaneelkontroles

Prent 4.1: Hoekige bokant view of the Vonyx STM3030, highlighting the front panel controls.
- CH1 / CH2 / CH3: Input channels.
- LINE 1 / PHONO 1 (CH1): Selector switch for Channel 1 input source.
- LINE 2 / PHONO 2 (CH2): Selector switch for Channel 2 input source.
- LINE 3 / MP3 (CH3): Selector switch for Channel 3 input source.
- Channel Faders: Adjust the volume level for each channel.
- Crossfader: Blends audio between Channel 1 and Channel 2.
- CUE SELECT: Rotary knob to select which channel(s) to monitor through headphones.
- MIC VOL (MIN/MAX): Adjusts the volume of the microphone input.
- TALKOVER (OFF/ON): Activates the talkover function, which automatically lowers music volume when the microphone is in use.
- KRAG-LED: Indicates when the mixer is powered on.
- LED VU Meter: Displays the output level of the master mix.
- MP3 PLAYER Display: Shows track information, mode, and status.
- USB-poort: Vir die koppeling van USB-flash drives.
- SD-kaartgleuf: Vir die invoeging van SD-geheuekaarte.
- MP3 Player Controls (MODE, Play/Pause, Skip, REC, BT):
- WYSE: Switches between USB, SD, and Bluetooth modes.
- Speel/pouse: Begin of laat wag die afspeel.
- Skip (Previous/Next): Navigates between tracks.
- REK: Initiates or stops recording to USB/SD.
- BT: Aktiveer Bluetooth-paringsmodus.

Prent 4.2: Close-up of the integrated MP3 player, showing the display, controls, USB port, and SD card slot.
4.2 Agterpaneelverbindings

Prent 4.3: Rear panel of the Vonyx STM3030, detailing all input and output connections.
- AC 12V 500mA: Kraginvoeraansluiting vir die ingeslote wisselstroomadapter.
- Headphone Output (6.3mm Jack): Vir die koppeling van oorfone vir monitering.
- OUTPUT (RCA L/R): Main stereo RCA output to connect to an ampverligter of aangedrewe luidsprekers.
- LINE 3 (RCA L/R): Stereo RCA input for Channel 3.
- LINE 2 / PHONO 2 (RCA L/R): Stereo RCA input for Channel 2, switchable between Line and Phono.
- LINE 1 / PHONO 1 (RCA L/R): Stereo RCA input for Channel 1, switchable between Line and Phono.
- MIC 1 / MIC 2 (6.3mm Jack): Mikrofooninsette.
5. Opstelgids
- Pak uit en plaas: Carefully remove the mixer from its packaging. Place it on a stable, flat surface with adequate ventilation.
- Koppel krag: Connect the provided AC power adapter to the 'AC 12V 500mA' input on the rear panel of the mixer. Plug the adapter into a suitable wall outlet. The POWER LED on the front panel should illuminate.
- Connect Main Output: Connect the 'OUTPUT' RCA jacks on the rear panel to the input of your amplifier or powered speakers using RCA cables.
- Koppel oudiobronne:
- Draaitafels: Connect turntables to the 'PHONO 1' and 'PHONO 2' RCA inputs. Ensure the corresponding channel selector switches (CH1, CH2) are set to 'PHONO'.
- CD Players/Laptops/Other Line Devices: Connect these devices to the 'LINE 1', 'LINE 2', or 'LINE 3' RCA inputs. Set the corresponding channel selector switches to 'LINE'.
- Koppel mikrofone: If using microphones, plug them into the 'MIC 1' or 'MIC 2' 6.3mm jack inputs on the rear panel.
- Koppel oorfone: Plug your headphones into the 6.3mm headphone output jack on the rear panel for monitoring.
6. Bedryfsinstruksies
6.1 Basiese werking
- Krag aan: Ensure all connections are secure. Turn on your amplifier/speakers first, then the STM3030 mixer.
- Kies invoer: For each channel, use the LINE/PHONO/MP3 selector switch to choose the desired audio source.
- Adjust Channel Volume: Use the individual channel faders (CH1, CH2, CH3) to adjust the volume of each input.
- Monitor uitset: Observe the LED VU meter to ensure your master output level is not clipping (reaching the red indicators).
6.2 Using the MP3 Player (USB/SD)
- Voeg media in: Steek 'n USB-geheuestokkie in die USB-poort of 'n SD-kaart in die SD-kaartgleuf.
- Select MP3 Mode: Ensure the CH3 selector switch is set to 'MP3'. Press the 'MODE' button on the MP3 player until 'USB' or 'SD' is displayed.
- Terugspeel: Use the Play/Pause button to start or pause playback. Use the Skip buttons to navigate between tracks.
6.3 Bluetooth-konnektiwiteit
- Aktiveer Bluetooth: Ensure the CH3 selector switch is set to 'MP3'. Press the 'MODE' button on the MP3 player until 'BT' is displayed. The display will show 'BT' and typically flash, indicating it's in pairing mode.
- Koppel toestel: On your smartphone, tablet, or laptop, go to Bluetooth settings and search for available devices. Select 'Vonyx STM3030' (or similar name) to pair.
- Stream Audio: Once paired, you can stream audio wirelessly from your device through Channel 3 of the mixer.
6.4 Opnamefunksie
- Prepare Storage: Insert a USB flash drive or SD card into the MP3 player section. Ensure it has sufficient free space and is formatted correctly (FAT32 is generally recommended).
- Begin opname: Press the 'REC' button on the MP3 player. The display will indicate that recording has started.
- Monitorvlakke: Adjust your channel faders and monitor the VU meter to ensure optimal recording levels without distortion.
- Stop opname: Press the 'REC' button again to stop recording. The recorded file will be saved to your USB drive or SD card.
6.5 Microphone Usage and Talkover
- Koppel mikrofoon: Plug your microphone(s) into the MIC 1 or MIC 2 jacks on the rear panel.
- Adjust Mic Volume: Use the 'MIC VOL' knob on the front panel to adjust the microphone's volume.
- Activate Talkover: If you wish for the music volume to automatically decrease when you speak into the microphone, set the 'TALKOVER' switch to 'ON'. Set it to 'OFF' to disable this function.
6.6 Headphone Monitoring (Cue)
- Koppel oorfone: Plug your headphones into the headphone output jack.
- Kies kanale: Use the 'CUE SELECT' rotary knob to choose which channel(s) you want to pre-listen to in your headphones without affecting the main output.
7. Probleemoplossing
- Geen klankuitset nie:
- Check if the mixer is powered on and the POWER LED is lit.
- Ensure all audio cables are securely connected to the correct inputs and outputs.
- Verify that channel faders and the master output level are raised.
- Confirm the correct input source (LINE/PHONO/MP3) is selected for each channel.
- Check the volume and input selection on your connected ampverligter of aangedrewe luidsprekers.
- Verwronge klank:
- Reduce the input level of the audio source.
- Lower the channel faders or master output level to prevent clipping (indicated by red LEDs on the VU meter).
- Ensure the correct input type (LINE/PHONO) is selected for turntables; incorrect selection can cause distortion.
- Bluetooth verbind nie:
- Ensure the mixer's MP3 player is in 'BT' mode and flashing, indicating pairing mode.
- Make sure your Bluetooth device is within range (typically up to 10 meters) and has Bluetooth enabled.
- Probeer om die toestel te ontkoppel en weer te koppel.
- USB/SD Recording Not Working:
- Check if the USB drive or SD card is properly inserted.
- Ensure the storage device is formatted to FAT32.
- Verify that there is sufficient free space on the USB drive or SD card.
8. Spesifikasies
| Handelsmerk | Vonyx |
| Model | STM3030 |
| Aantal kanale | 4 |
| Verbindingstegnologie | Bluetooth, USB |
| Kragbron | Mains powered (AC 12V / 500mA adapter included) |
| Frekwensierespons | 20 Hz - 20 kHz |
| Oudio-insette | 2x Phono (RCA), 3x Line (RCA), 2x Microphone (6.3mm Jack), USB, SD, Bluetooth |
| Klankuitsette | 1x Master (RCA), 1x Headphone (6.3mm Jack) |
| Supported Data Types | MP3, WAV |
| Afmetings (L x B x H) | 125 x 267 x 55 mm |
| Item gewig | 0.9 kg (Product weight), 1.3 kg (Shipping weight) |
9. Onderhoud
To ensure the longevity and optimal performance of your Vonyx STM3030 DJ Mixer, follow these maintenance guidelines:
- Skoonmaak: Regularly wipe the mixer with a dry, soft, lint-free cloth. Do not use abrasive cleaners, solvents, or strong detergents, as these can damage the finish and internal components.
- Stofbeskerming: Keep the mixer free from dust. When not in use for extended periods, consider covering it with a dust cover.
- Omgewing: Avoid operating the mixer in excessively hot, cold, humid, or dusty environments. Keep it away from direct sunlight and sources of vibration.
- Kabelbestuur: Ensure cables are not tangled or pinched, which can lead to damage over time.
10. Waarborg en Ondersteuning
The Vonyx STM3030 DJ Mixer comes with a 24 maande waarborg vanaf die aankoopdatum. Hierdie waarborg dek vervaardigingsdefekte en materiaalfoute onder normale gebruik.
For warranty claims, technical support, or service inquiries, please contact your retailer or the manufacturer directly. Please retain your proof of purchase for warranty validation.