Einhell TE-CD 18/2 Li (Model 4513830)
Einhell TE-CD 18/2 Li Cordless Drill Power X-Change Kit User Manual
Model: TE-CD 18/2 Li (4513830)
1. Inleiding
This manual provides essential information for the safe and effective operation, maintenance, and troubleshooting of your Einhell TE-CD 18/2 Li Cordless Drill Power X-Change Kit. Please read this manual thoroughly before using the product and keep it for future reference.
The Einhell TE-CD 18/2 Li is a powerful, robust, and versatile cordless drill designed for demanding screwing and drilling tasks in various materials. It is part of the Einhell Power X-Change family, ensuring compatibility with other Power X-Change batteries and chargers.

Image 1.1: Einhell TE-CD 18/2 Li Cordless Drill Kit components.
2. Veiligheidsinligting
Always observe the following safety precautions to prevent electric shock, injury, and fire:
- Dra gepaste persoonlike beskermende toerusting (PPE) soos veiligheidsbril, gehoorbeskerming en handskoene.
- Maak seker die werkarea is goed belig en vry van obstruksies.
- Hou kinders en omstanders weg terwyl die werktuig gebruik word.
- Moenie elektriese gereedskap in plofbare atmosfeer gebruik nie, soos in die teenwoordigheid van vlambare vloeistowwe, gasse of stof.
- Ontkoppel altyd die batterypak voordat u enige aanpassings maak, bykomstighede verander of die gereedskap bêre.
- Use only Einhell Power X-Change batteries and chargers with this tool.
- Do not expose the tool or battery to rain or wet conditions.
- Vermy per ongeluk begin. Maak seker dat die skakelaar in die af-posisie is voordat die batterypak ingesit word.
3. Pakketinhoud
The Einhell TE-CD 18/2 Li Cordless Drill Power X-Change Kit typically includes the following items:
- 1 x Einhell TE-CD 18/2 Li Cordless Drill-Driver
- 2 x 1.5 Ah Power X-Change Lithium-Ion Batteries
- 1 x Power X-Change Fast Charger
- 1 x gordelhaak
- 1 x Plastiek Draagtas
Please check that all items are present and undamaged upon unpacking. If any items are missing or damaged, contact your retailer.
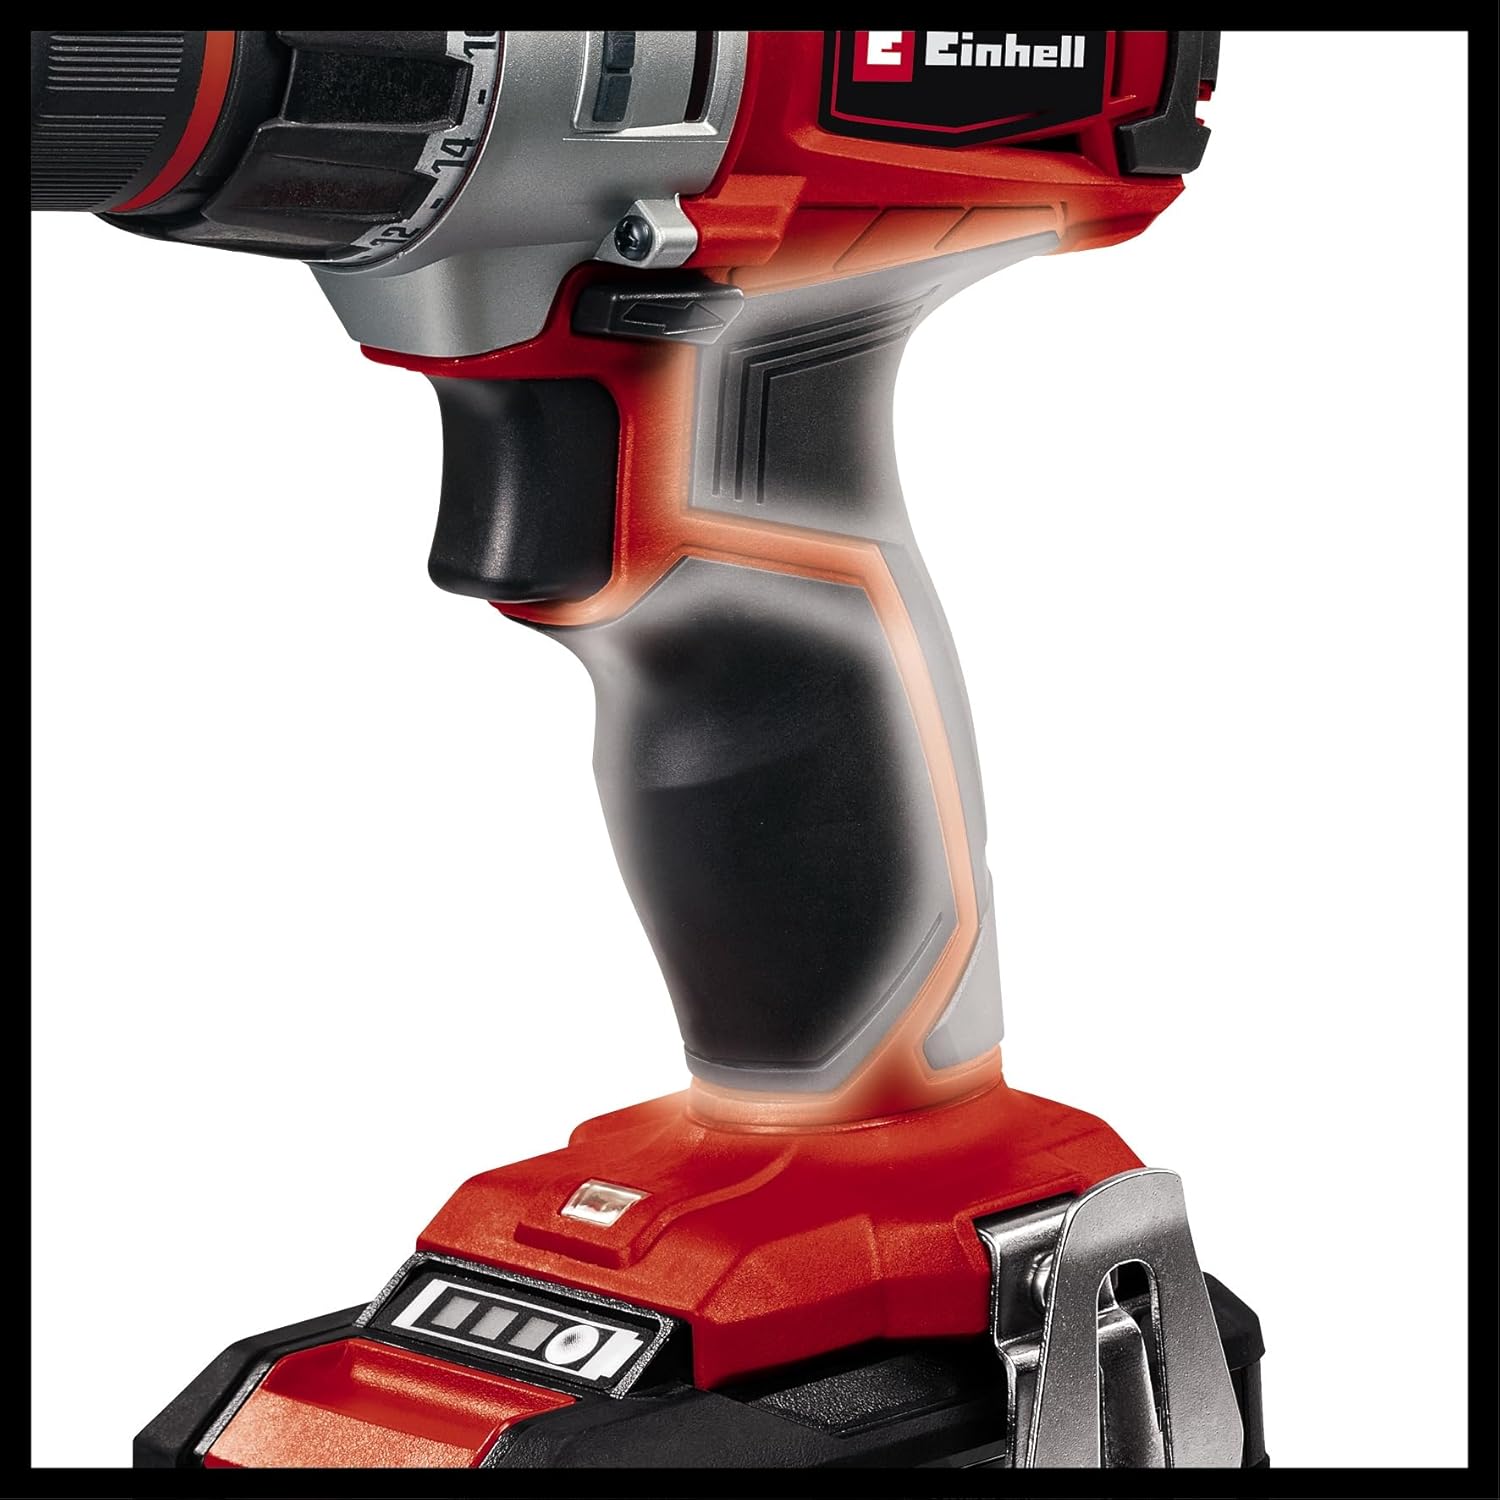
Image 3.1: All components included in the kit.
4. Opstelling
4.1 Laai die battery
Before first use, fully charge the battery pack. The charger is designed for Einhell Power X-Change batteries only.
- Plaas die batterypak in die laaier. Maak seker dat dit in plek klik.
- Plug the charger into a suitable power outlet (120V AC, 60Hz).
- The charging indicator light on the charger will show the charging status. Refer to the charger's specific manual for detailed light indications.
- Sodra dit volledig gelaai is, ontkoppel die laaier van die kragtoevoer en verwyder die batterypak.
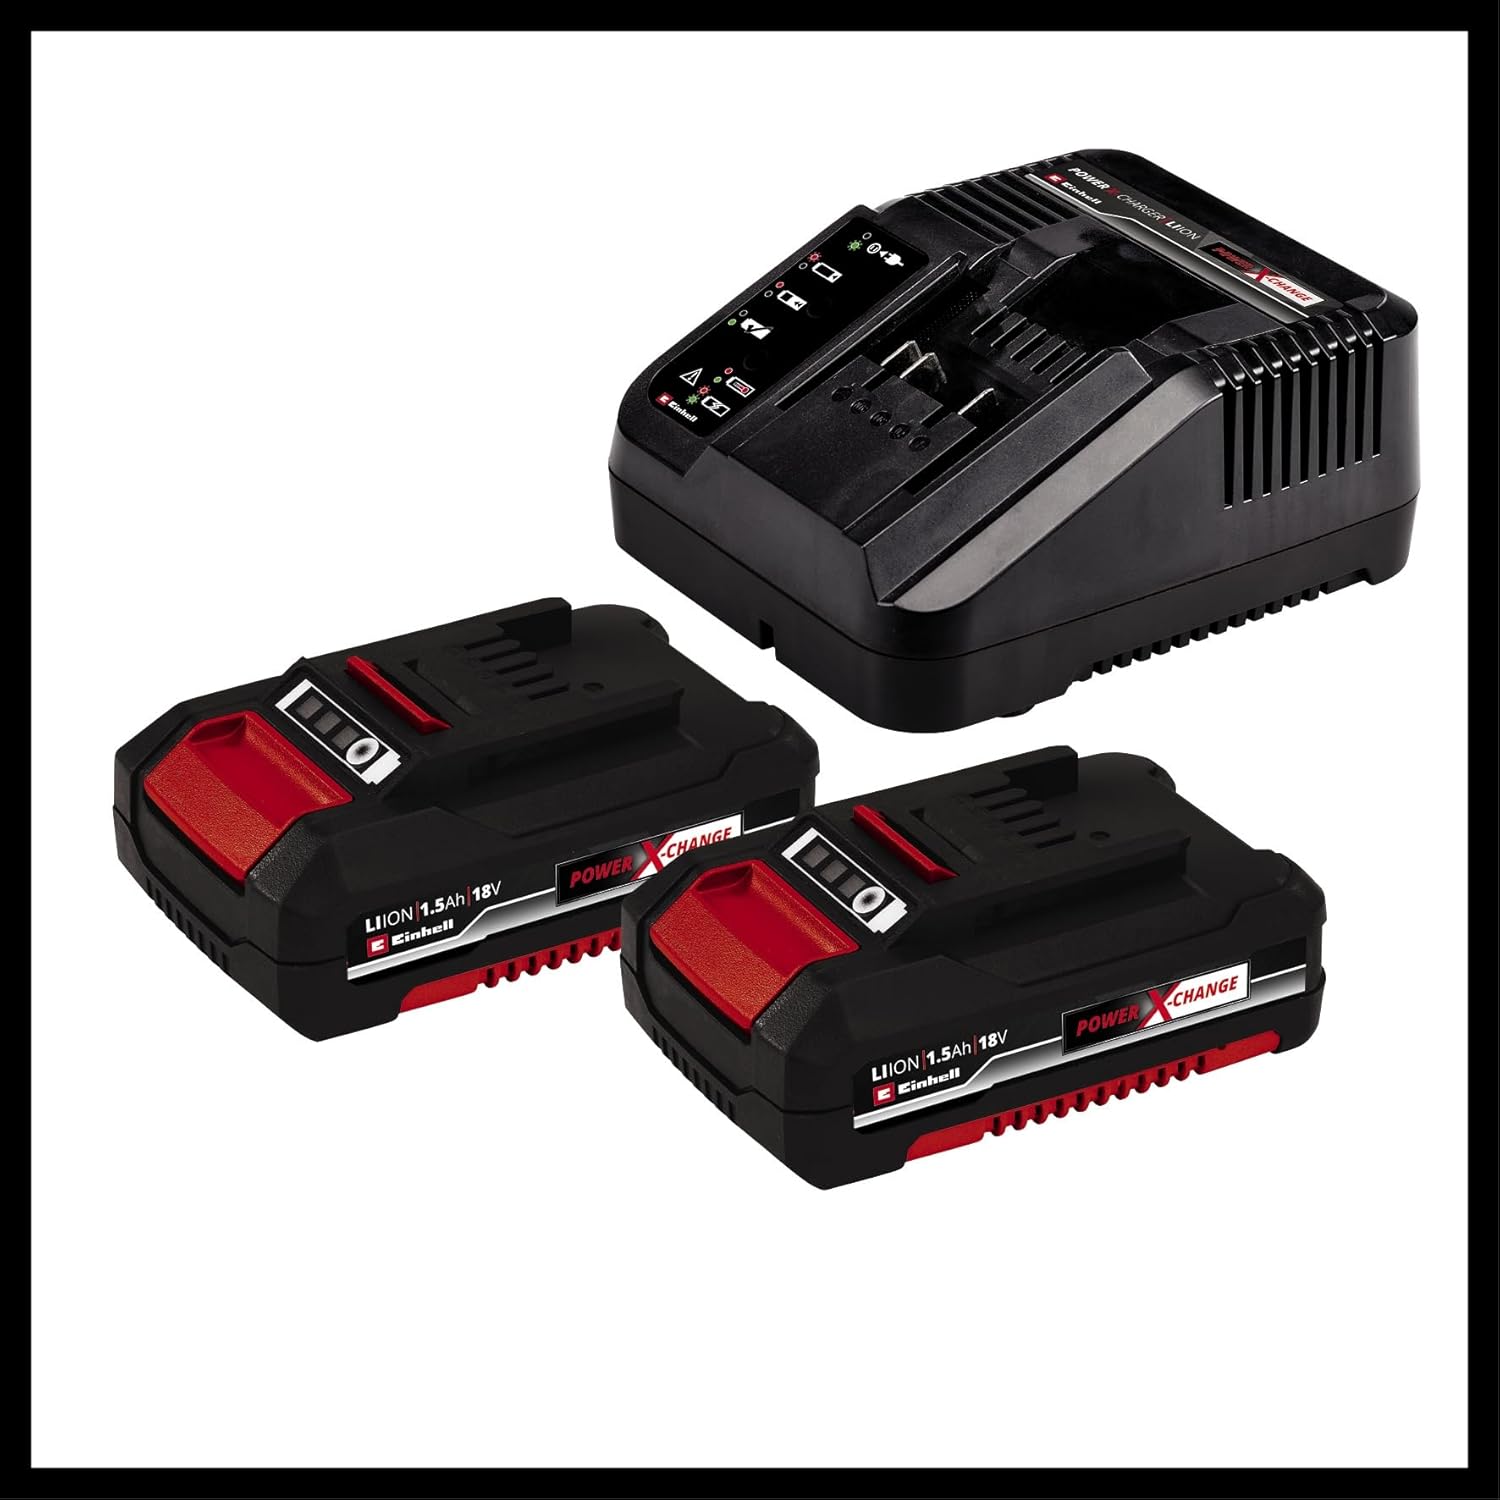
Image 4.1: Einhell Power X-Change batteries and charger.
4.2 Installering van die batterypak
Om die battery te installeer:
- Rig die batterypak met die batterypoort aan die onderkant van die boorhandvatsel.
- Skuif die batterypak in die poort totdat dit stewig in plek klik.
To remove the battery pack, press the release button(s) on the sides of the battery and slide it out.
4.3 Attaching/Changing Drill Bits
The drill features a quick-change chuck for easy bit changes.
- Ensure the drill is off and the battery is removed for safety.
- Draai die klauwplaat antikloksgewys om die kake oop te maak.
- Steek die boorpunt of skroewedraaierpunt volledig in die boorkop.
- Draai die boorkop kloksgewys om die kake stewig om die boorpunt vas te draai. Draai dit met die hand stewig vas.
5. Bedien die boor
5.1 Aan-/afskakel
The drill is activated by pressing the trigger switch. The speed is variable depending on how far the trigger is pressed.
- To start: Press the trigger switch.
- To stop: Release the trigger switch. The quick-stop function will rapidly halt the chuck rotation.

Image 5.1: Proper use of the cordless drill.
5.2 Vorentoe/Agtertoe Rotasie
A slide switch located above the trigger controls the direction of rotation:
- Slide left for forward rotation (for drilling and tightening screws).
- Slide right for reverse rotation (for loosening screws).
- Middelposisie sluit die sneller vir veiligheid tydens vervoer of boorpuntveranderings.
5.3 Speed Settings (2-Speed Gearbox)
The drill features a 2-speed gearbox for optimal performance in different applications:
- Rat 1 (Lae Spoed, Hoë Wringkrag): Ideal for heavy-duty screwing and drilling large holes in tough materials.
- Rat 2 (Hoë Spoed, Laer Wringkrag): Suitable for fast drilling in wood, plastic, and light metals, and for smaller screws.
To change gears, slide the gear selector switch on top of the drill. Ensure the drill is stopped before changing gears to prevent damage.

Image 5.2: Key features: High Power, Drill/Screw, 2 Gears.
5.4 Torque Adjustment (Clutch Setting)
The torque adjustment ring allows you to set the desired torque for screwing applications. This prevents over-tightening screws and damaging the workpiece or screw head.
- Rotate the torque adjustment ring to select a setting from 1 to 21. Lower numbers provide less torque, higher numbers provide more.
- Die boor simbool setting bypasses the clutch for maximum torque, suitable for drilling.
- Start with a lower torque setting and increase it as needed until the screw is driven flush without stripping.
5.5 LED-werkslig
The integrated LED work light illuminates the work area when the trigger is pressed, improving visibility in dimly lit spaces.

Image 5.3: LED work light and battery charge indicator.
5.6 Ergonomic Design and Belt Clip
The drill features an ergonomic soft grip handle for comfortable and secure handling during extended use. A convenient belt clip allows for easy carrying and quick access while working.
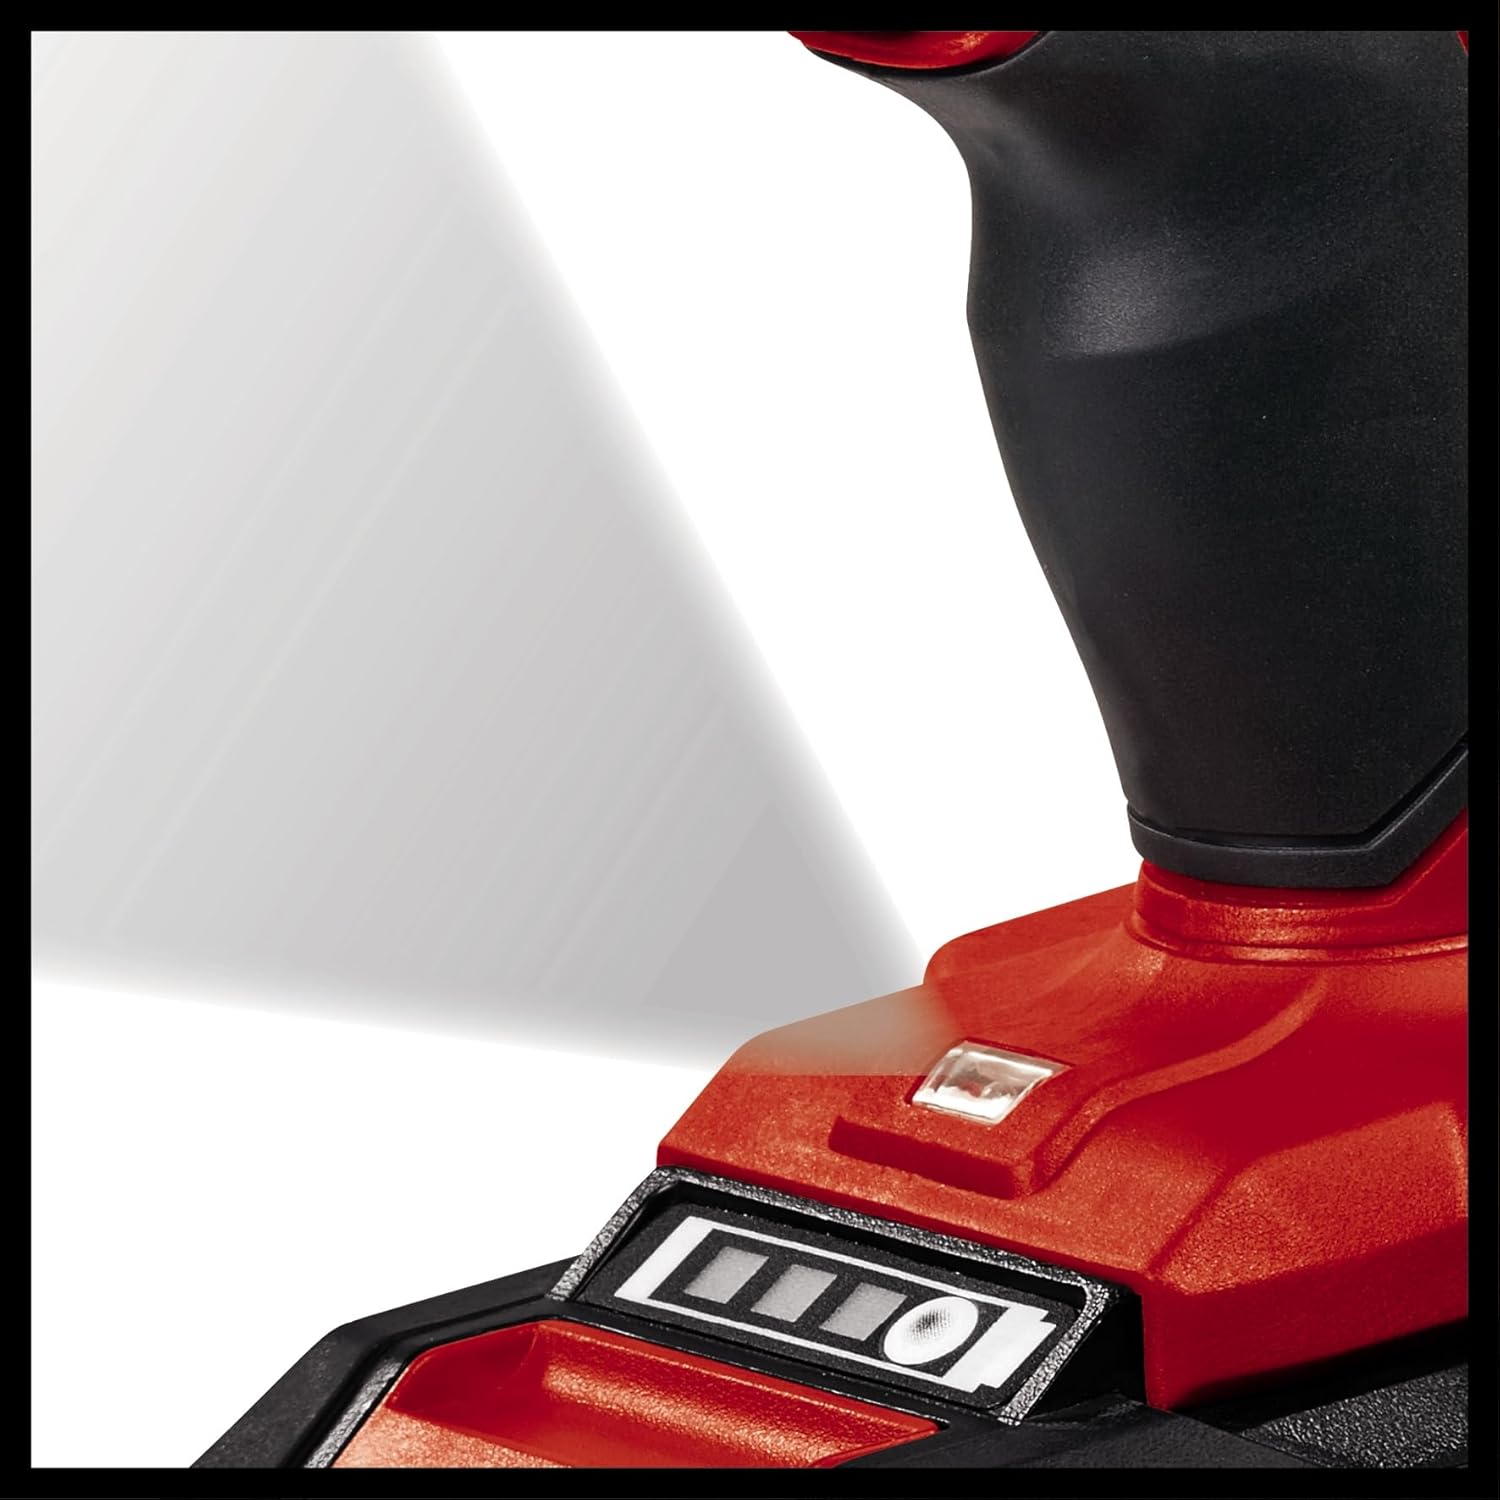
Image 5.4: Ergonomic soft grip handle for comfortable use.
6. Onderhoud
Gereelde onderhoud verseker die lang lewensduur en optimale prestasie van jou boor.
- Skoonmaak: Keep the ventilation openings clean and free from dust. Use a soft, damp cloth to wipe down the tool. Do not use harsh chemicals or abrasive cleaners.
- Berging: Store the drill, batteries, and charger in a dry, cool place, away from direct sunlight and moisture. Use the provided carrying case for protection.
- Batterysorg: Store batteries at room temperature and partially charged (around 50%) if storing for extended periods. Do not store fully discharged batteries.
- Inspeksie: Periodically inspect the chuck, power cord (of the charger), and housing for any signs of damage. Do not use the tool if any part is damaged.
7. Probleemoplossing
| Probleem | Moontlike oorsaak | Oplossing |
|---|---|---|
| Boor begin nie. | Battery nie korrek geplaas nie of ontlaai. Snellerslot ingeskakel. | Ensure battery is fully inserted and charged. Disengage the forward/reverse switch from the center (locked) position. |
| Verminderde krag of spoed. | Battery laag. Oorlading. | Recharge battery. Reduce pressure on the tool or use a lower gear setting. |
| Die boorkop hou nie die boorpunt stewig vas nie. | Klauwplaat nie voldoende vasgedraai nie. Die boorpunt se skag is vuil of beskadig. | Draai die boorkop weer stewig vas. Maak die boorpunt skoon of vervang dit. |
| Oorverhitting. | Aanhoudende swaar gebruik. Geblokkeerde ventilasie. | Laat die gereedskap afkoel. Verwyder enige obstruksies uit ventilasie-openinge. |
8. Spesifikasies
| Kenmerk | Spesifikasie |
|---|---|
| Model | TE-CD 18/2 Li (4513830) |
| Voltage | 18 V |
| Battery Tipe | Lithium-Ion (Power X-Change) |
| Battery kapasiteit | 1.5 Ah (x2 ingesluit) |
| Geen-las spoed (rat 1) | 0-350 XNUMX RPM |
| Geen-las spoed (rat 2) | 0-1250 XNUMX RPM |
| Maks. Wringkrag | 44 Nm |
| Wringkrag instellings | 21 + Drill |
| Chuck tipe | Sleutellose Chuck |
| Produkafmetings (L x B x H) | 12.99" x 3.94" x 13.11" (ongeveer) |
| Item gewig | 8.38 pond (ongeveer) |

Image 8.1: Internal gear mechanism for powerful performance.
9. Waarborg en Ondersteuning
Einhell products are manufactured to high quality standards and are subject to strict quality controls. This product is covered by a manufacturer's warranty. Please refer to the warranty card included with your product for specific terms and conditions, including warranty period and coverage details.
For technical support, spare parts, or warranty claims, please contact Einhell customer service. Contact information can typically be found on the Einhell official webwebwerf of op die waarborgkaart.
You can also visit the official Einhell website for more information and product registration: www.einhell.com
Ask a question about this manual
Ask about setup, troubleshooting, compatibility, parts, safety, or missing instructions. Manuals+ will review the question and use this page’s manual context to help answer it.