1. Inleiding
Dankie vir die aankoopasing the RHYTHM 8RZ166SR03 Fit Wave Smart Alarm Clock. This device is a radio-controlled alarm clock equipped with a thermometer, hygrometer, and calendar display. Its compact design and user-friendly interface make it ideal for various indoor settings. This manual provides detailed instructions to help you set up, operate, and maintain your new alarm clock.
Sleutel kenmerke:
- Atomic Clock Movement: Automatically synchronizes time via radio waves for precise accuracy.
- Temperatuur vertoon: Shows ambient temperature from -9.9 to 50 ℃.
- Humiditeit vertoon: Shows ambient humidity from 20% to 95%.
- Electronic Sound Alarm: Features an alarm with an auto-stop function.
- Sluimer-funksie: Maak die alarm tydelik stil.
- Dial Light: Includes an afterglow function for visibility in low light (5 seconds).
- Kalender vertoon: Shows date and day of the week, including Rokuyoku (Japanese traditional calendar).
- 12/24 Hour Display: Switchable time format.
2. Pakketinhoud
Kontroleer asseblief dat alle items in die pakket teenwoordig is:
- RHYTHM 8RZ166SR03 Fit Wave Smart Alarm Clock
- Instructiehandleiding (hierdie dokument)
Note: 2 x AA manganese batteries are required and sold separately.
3. Produk verbyview
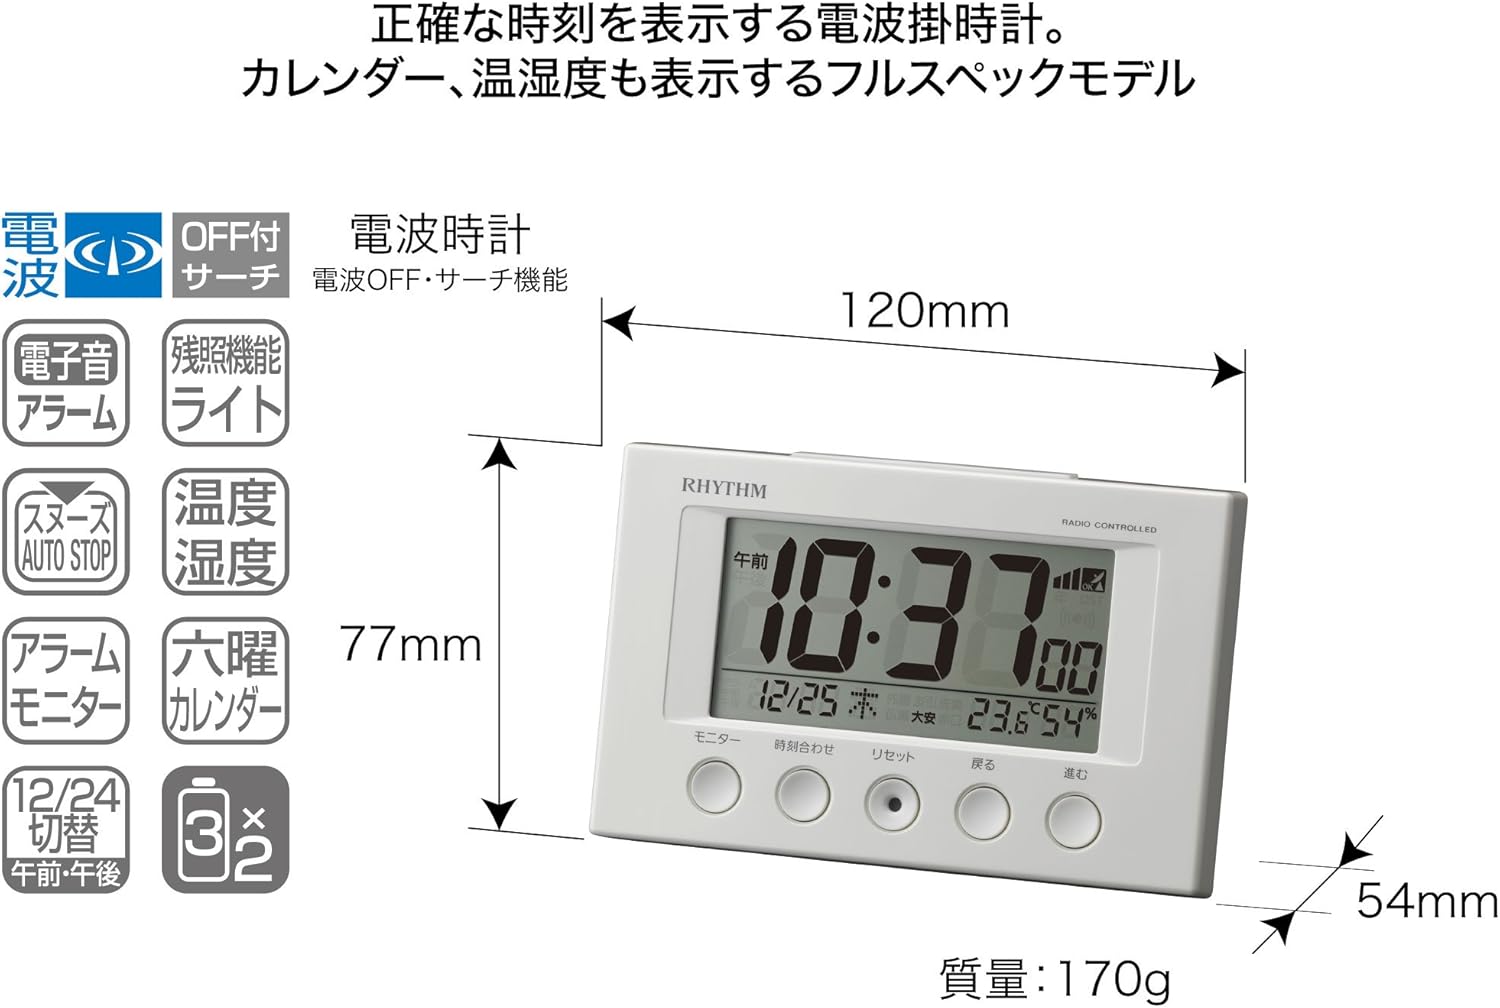
Voorkant View and Display Elements:

This image displays the front of the RHYTHM 8RZ166SR03 alarm clock. It features a large digital LCD screen at the top, showing time, date, temperature, and humidity. Below the screen are five circular control buttons labeled (from left to right): Monitor, Time Adjustment, Reset, Back, and Forward.

This diagram illustrates the various elements of the LCD display:
- Tydvertoning: Shows the current time in 12-hour (AM/PM) or 24-hour format.
- Radio Wave Reception Indicator: Displays the status of radio wave reception.
- Alarm aanwyser: An icon appears when the alarm is activated.
- Temperatuur vertoon: Toon die huidige kamertemperatuur.
- Humiditeit vertoon: Shows the current room humidity.
- Kalender vertoon: Shows the current date and day of the week, including Rokuyoku.
Terug View en kontroles:
The back of the clock features the alarm ON/OFF slide switch on the left side and the battery compartment cover in the center. The model number '8RZ166' and 'MADE IN CHINA' are also visible.
Control Buttons Explained:

This image details the function of each button:
- Monitor-knoppie: Used to check the alarm sound.
- Time Adjustment Button: Used for manual time setting and switching between 12/24 hour display.
- Herstel-knoppie: Resets the clock and also functions as a forced radio wave reception button.
- Back Button (←): Used to decrease values during alarm or time settings.
- Forward Button (→): Used to increase values during alarm or time settings.
- Alarm Switch (on back): Slides up for ON, down for OFF.
- Snooze Button (top): Activates the snooze function and the dial light.
4. Opstelling
4.1 Battery installasie
- Remove the battery compartment cover on the back of the clock.
- Insert two (2) AA manganese batteries, ensuring the correct polarity (+/-) as indicated inside the compartment.
- Plaas die deksel van die batterykompartement terug.
This image shows the open battery compartment with two AA batteries correctly inserted, indicating the positive and negative terminals.
4.2 Initial Power On and Radio Wave Reception
After battery installation, the clock will automatically attempt to receive radio waves to set the correct time. This process may take several minutes. Ensure the clock is placed in an area with good reception, away from electronic devices that may cause interference.

This diagram illustrates how radio-controlled clocks receive standard time signals from two transmission stations (one in Fukushima, 40kHz, and one in Fukuoka/Saga, 60kHz) to automatically correct and display the precise time. The clock will automatically adjust its time based on these signals.
If reception is successful, the time will be set automatically. If not, you may need to manually set the time (refer to Section 5.1).
5. Bedryfsinstruksies
5.1 Handmatige Tyd- en Datuminstelling
In cases where radio wave reception is difficult or for specific time zone adjustments:
- Druk en hou die Tydaanpassing knoppie totdat die tydvertoning begin flikker.
- Gebruik die Back (←) en Forward (→) knoppies om die ure aan te pas.
- Druk die Tydaanpassing button again to move to minutes, then adjust using Back (←) en Forward (→).
- Hou aan druk Tydaanpassing om deur jaar-, maand- en daginstellings te blaai, en elkeen aan te pas met Back (←) en Forward (→).
- Sodra alle instellings korrek is, druk die Tydaanpassing knoppie een laaste keer om te bevestig en die instellingsmodus te verlaat.
5.2 Alarminstellings
- Om die alarmtyd in te stel, druk en hou die Tydaanpassing button until the alarm time starts flashing (this may require cycling past the current time settings if already in manual time setting mode).
- Gebruik die Back (←) en Forward (→) knoppies om die verlangde alarmuur en -minuut in te stel.
- Druk die Tydaanpassing knoppie om die alarmtyd te bevestig.
5.3 Aktivering/Deaktivering van die alarm
Gebruik die Alarm ON/OFF slide switch located on the back of the clock:
- Skuif die skakelaar UP to activate the alarm. An alarm icon will appear on the display.
- Skuif die skakelaar AF to deactivate the alarm. The alarm icon will disappear.
5.4 Snooze Function and Dial Light
Wanneer die alarm afgaan, druk die groot knoppie Sluimer-knoppie located on the top of the clock. This will:
- Temporarily silence the alarm (snooze duration is preset).
- Activate the dial light for approximately 5 seconds, illuminating the display for easy viewin die donker.
The alarm will sound again after the snooze period. To stop the alarm completely, slide the Alarm AAN/UIT skakelaar na AF.
5.5 Display Modes (12/24 Hour Format)
To switch between 12-hour (with AM/PM indicator) and 24-hour time formats, briefly press the Tydaanpassing button outside of setting mode.
5.6 Checking Alarm Sound
Om preview the alarm sound, press the Monitor button on the front of the clock.
6. Onderhoud
6.1 Skoonmaak
To clean the clock, wipe it gently with a soft, dry cloth. Do not use abrasive cleaners, solvents, or chemical sprays, as these can damage the casing of vertoon.
6.2 Batteryvervanging
When the display becomes dim or the clock functions erratically, it is time to replace the batteries. Follow the battery installation steps in Section 4.1. It is recommended to replace both batteries at the same time with new ones.
7. Probleemoplossing
| Probleem | Moontlike oorsaak | Oplossing |
|---|---|---|
| Die horlosie wys niks nie, of die skerm is dof. | Batterye is pap of verkeerd geplaas. | Vervang batterye met nuwe AA-batterye en maak seker dat die polariteit korrek is. |
| Time is incorrect or does not set automatically. | Poor radio wave reception; clock is outside reception area; interference from other electronics. | Move the clock to a different location, away from electronic devices. Try manual time setting (Section 5.1). Press the Reset button to force reception. |
| Die alarm lui nie. | Alarm is nie geaktiveer nie; alarmvolume is te laag (indien verstelbaar); verkeerde alarmtyd gestel. | Ensure the Alarm ON/OFF switch is in the ON position. Verify the alarm time is set correctly. |
| Time drifts by an hour occasionally. | Daylight Saving Time (DST) adjustment issues, especially if the clock is designed for a specific region's DST rules. | Manually adjust the time if the automatic DST adjustment is not suitable for your region. Some radio-controlled clocks are optimized for specific regional signals. |
| Display is difficult to read from certain angles. | LCD displays have optimal viewhoeke. | Pas die viewing angle or the position of the clock for better clarity. |
8. Spesifikasies
| Kenmerk | Spesifikasie |
|---|---|
| Modelnommer | 8RZ166SR03 |
| Handelsmerk | RITME |
| Beweging | Atomic clock (Radio-controlled) |
| Raammateriaal | Plastiek |
| Tipe vertoon | Digitale LCD |
| Kragbron | Battery Powered (2 x AA manganese batteries, sold separately) |
| Item gewig | 0.17 kilogram |
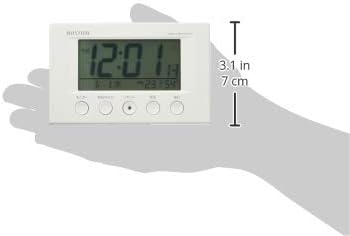
| Produk afmetings | 12W x 7.7H x 5.4D centimetres (approx. 4.7 x 3.0 x 2.1 inches) |
| Temperatuur vertoon reeks | -9.9 ℃ tot 50 ℃ |
| Humiditeit vertoon reeks | 20% tot 95% RH |
| Spesiale kenmerke | Calendar Display, Humidity Display, Snooze, Temperature Display, Dial Light (afterglow function) |
| Soort kamer | Bedroom, General Indoor Use |
9. Waarborg en Ondersteuning
RHYTHM products are manufactured with high-quality standards. For warranty information, please refer to the documentation provided at the time of purchase or contact your retailer. If you encounter any issues or require technical assistance, please contact the RHYTHM customer support or your local distributor. Keep your purchase receipt as proof of purchase.