This manual provides detailed instructions for the installation, operation, and maintenance of the Blue Sea Systems 2305 MiniBus 100 Ampere Common BusBar. This product is designed to consolidate multiple wires or cables to a single connection point, providing a neat and efficient power distribution solution in marine and automotive electrical systems. Please read this manual thoroughly before installation and use to ensure safe and proper operation.
2. Veiligheidsinligting
WAARSKUWING: Electrical systems can be dangerous. Improper installation or use can result in property damage, serious injury, or death. Always disconnect power before working on electrical systems. If you are unsure about any part of the installation or operation, consult a qualified electrician or marine technician.
Always wear appropriate personal protective equipment (PPE), including safety glasses and insulated gloves.
Ensure all connections are tight and secure to prevent arcing and overheating.
Do not exceed the maximum current rating of 100 Amperes.
Install in a dry location, protected from direct water exposure, unless specifically rated for wet environments.
Verify correct polarity before making final connections.
3. Produk verbyview
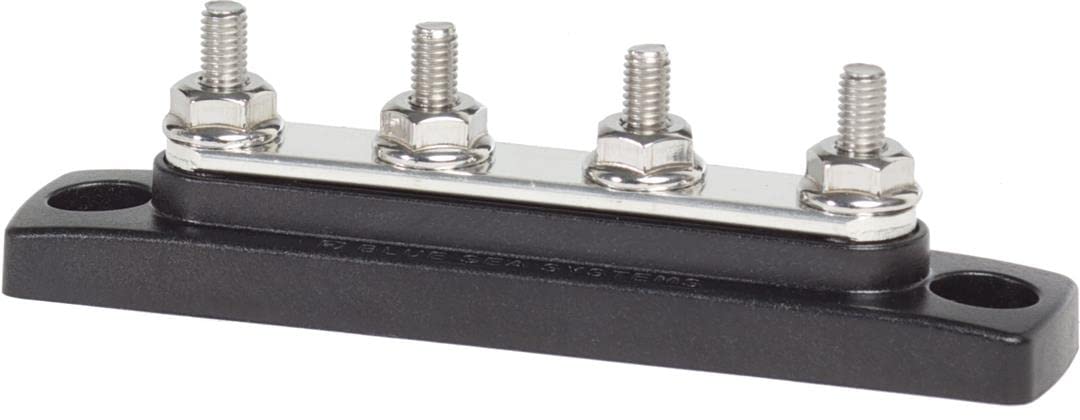
The Blue Sea Systems 2305 MiniBus is a compact common busbar designed for efficient power distribution. It features four #10-32 stud terminals for connecting multiple circuits to a single power source or ground point.
Figure 3.1: Blue Sea 2305 MiniBus 100 Ampere Common BusBar. This image shows the compact design of the busbar with its four stud terminals.
Figuur 3.2: Kant view of the Blue Sea 2305 MiniBus, highlighting the stud terminals and mounting holes.
Sleutel kenmerke:
Huidige gradering: 100 Ampis maksimum.
Terminale: Four #10-32 stainless steel stud terminals.
Montering: Two #10 (M5) screw mounting holes for secure installation.
Materiaal: Copper busbar for excellent conductivity, mounted on a durable black base.
Voltage: Rated for up to 300 Volts.
4. Spesifikasies
Refer to the table below for detailed technical specifications of the Blue Sea Systems 2305 MiniBus.
Kenmerk
Spesifikasie
Huidige gradering
100 Amps
Connector Tipe
Skroef
Number Of Contacts
4
Montage tipe
Surface Mount (via #10 screws)
Materiaal
Copper (busbar), Plastic (base)
Kleur
Swart
Voltage Beoordeling
300 Volt
Aantal Pole
4
Produk afmetings
Approximately 4.20" x 0.90" x 0.01" (L x W x H)
Item gewig
0.16 onse
Modelnommer
2305
Figure 4.1: Dimensional drawing of the Blue Sea 2305 MiniBus, showing key measurements in inches and millimeters for mounting and stud spacing.
5. Installasie
Follow these steps for proper installation of your MiniBus busbar.
5.1 Gereedskap benodig:
Skroewedraaier (Phillips-kop word aanbeveel)
Drill (if mounting surface requires pilot holes)
Draadstroppers/krimpers
Appropriate #10 (M5) mounting screws
Ring terminals for wire connections
5.2 Mounting Location:
Choose a dry, protected location that is easily accessible for wiring and inspection. Ensure the mounting surface is sturdy enough to support the busbar and connected wires. Avoid areas subject to excessive vibration or extreme temperatures.
5.3 Mounting Steps:
Position the busbar in the desired mounting location.
Mark the two mounting hole locations using a pencil or marker. Refer to Figure 4.1 for mounting hole dimensions.
If necessary, drill pilot holes for the #10 (M5) mounting screws.
Secure the busbar to the mounting surface using two #10 (M5) screws. Do not overtighten.
5.4 Bedradingsverbindings:
The MiniBus is a common busbar, meaning all four stud terminals are electrically connected. It is typically used to consolidate multiple positive or multiple negative circuits.
Ontkoppel krag: Ensure all power sources to the system are disconnected before making any electrical connections.
Berei drade voor: Strip the insulation from the ends of the wires to be connected. Crimp appropriate size ring terminals onto the stripped wire ends. Ensure the crimps are secure and the wire strands are fully contained within the terminal.
Koppel drade: Loosen the nuts on the #10-32 stud terminals. Place the ring terminals onto the studs.
Veilige verbindings: Tighten the nuts on the stud terminals. Ensure all connections are firm and secure to prevent loose connections, which can cause resistance, heat, and potential failure.
Verifieer: Double-check all connections for correct polarity and tightness before restoring power.
6. Operasie
The Blue Sea Systems 2305 MiniBus is a passive electrical component. Once properly installed and wired, it functions as a common distribution point for electrical current. There are no operational controls or settings.
Ensure that the total current flowing through the busbar does not exceed its 100 Ampere rating. Overloading the busbar can lead to overheating and damage to the component or connected circuits.
7. Onderhoud
Regular inspection and basic maintenance will ensure the longevity and reliable performance of your MiniBus busbar.
Periodieke inspeksie: Annually, or more frequently in harsh environments, inspect the busbar and all connections.
Kyk vir korrosie: Look for any signs of corrosion on the terminals or busbar material. Clean any light corrosion with a non-abrasive electrical contact cleaner.
Draai verbindings vas: Verify that all stud terminal nuts and mounting screws are tight. Loose connections can generate heat and cause system failures.
Netheid: Keep the busbar free from dirt, dust, and moisture. Use a dry cloth to wipe down the unit.
Skadekontrole: Inspect the plastic base for any cracks or physical damage. Replace the unit if significant damage is found.
8. Probleemoplossing
If you experience issues with your electrical system after installing the MiniBus, consider the following common troubleshooting steps:
No Power to Connected Devices:
Check the main power source to ensure it is active.
Verify all connections to the busbar are secure and properly tightened.
Inspect the wires for breaks or damage.
Ensure the fuse or circuit breaker upstream of the busbar has not tripped or blown.
Overheating Busbar or Connections:
Ontkoppel die krag onmiddellik.
Check if the total current draw exceeds the 100 Ampere rating of the busbar.
Inspect all connections for looseness or corrosion, which can increase resistance and generate heat.
Ensure the wire gauge used for connections is appropriate for the current draw.
Intermitterende krag:
Check for loose connections at the busbar studs and at the other end of the wires.
Inspect for damaged or frayed wires.
If problems persist after troubleshooting, consult a qualified electrician or marine technician.
9. Waarborg en ondersteuning
Blue Sea Systems products are designed for reliability and performance. For specific warranty information, please refer to the official Blue Sea Systems website or contact their customer support directly. General warranty terms typically cover defects in materials and workmanship under normal use.
For technical support, product inquiries, or warranty claims, please visit the Blue Sea Systems official website or contact their customer service department using the information provided on their webwebwerf.
Ask about setup, troubleshooting, compatibility, parts, safety, or missing instructions. Manuals+ will review the question and use this page’s manual context to help answer it.