1. Inleiding
This manual provides essential information for the proper installation, operation, and maintenance of the Mopar Genuine Antenna Base, part number 68169512AA. This component is designed to provide a secure and functional mounting point for your vehicle's radio antenna, ensuring optimal signal reception.
2. Veiligheidsinligting
Always exercise caution when working on vehicles. Disconnect the vehicle's battery before performing any electrical work. Wear appropriate personal protective equipment, such as gloves and eye protection. If you are unsure about any step, consult a qualified automotive technician.
3. Pakketinhoud
Verifieer dat alle items in die pakket teenwoordig is:
- 1 x Mopar Genuine Antenna Base (Part Number: 68169512AA)
4. Spesifikasies
| Eienskap | Detail |
|---|---|
| Handelsmerk | Mopar |
| Modelnommer | 68169512AA |
| Item gewig | 2.01 onse |
| Produkafmetings (algeheel) | 3.4 x 2.15 x 1.5 duim |
| Kleur | Swart |
| Antenna Type Compatibility | Radio |
5. Installasie en Opstelling
The Mopar Genuine Antenna Base 68169512AA is designed for specific vehicle models, often requiring access to the vehicle's interior roof lining for proper installation. The following steps are general guidelines; refer to your vehicle's service manual for specific instructions regarding trim panel removal and antenna access.
5.1 Produk verbyview
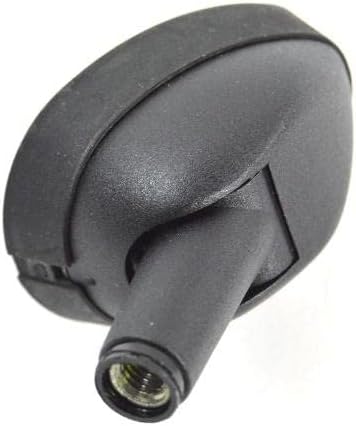
Beeld: Bo view of the Mopar antenna base, showing the external housing where the antenna mast screws in.

Beeld: Syprofile of the Mopar antenna base, illustrating its compact design.
5.2 Gereedskap benodig
- Basic hand tools (e.g., screwdrivers, trim removal tools)
- Wrench or socket set (for antenna nut)
- New Mopar Genuine Antenna Base (68169512AA)
5.3 Installasiestappe
- Berei die voertuig voor: Park the vehicle on a level surface and engage the parking brake. Turn off the ignition and remove the key. For safety, disconnect the negative terminal of the vehicle's battery.
- Access the Existing Antenna Base:
The antenna base is typically mounted on the exterior roof of the vehicle. To access the mounting nut and electrical connection, you will likely need to partially or fully remove interior trim panels and the headliner in the vicinity of the antenna. This process varies significantly by vehicle model.
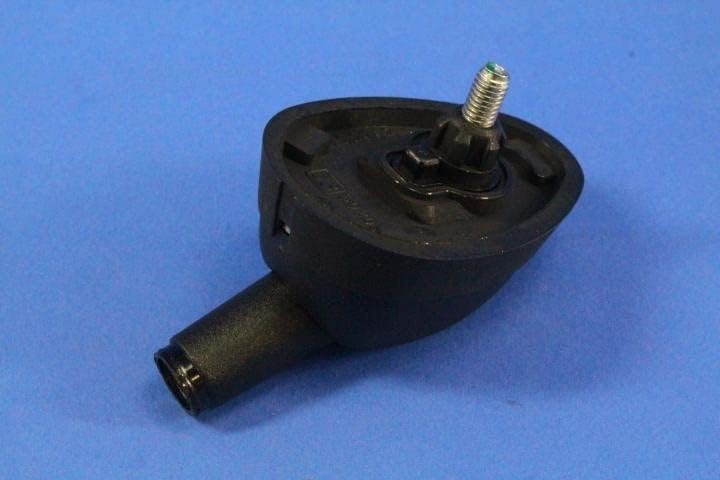
Image: Underside of the antenna base, showing the threaded stud and mounting plate. This part connects to the vehicle's roof from the interior.
- Ontkoppel elektriese verbindings: Once interior access is gained, carefully disconnect the coaxial cable and any other electrical connectors attached to the old antenna base.
- Remove Old Antenna Base: Using an appropriate wrench or socket, loosen and remove the mounting nut that secures the antenna base to the vehicle's roof. Carefully remove the old antenna base from the exterior.
- Inspekteer monteringsarea: Clean the mounting surface on the vehicle's roof. Ensure there is no debris or corrosion that could affect the seal or connection of the new base.
- Install New Antenna Base:
Position the new Mopar Genuine Antenna Base (68169512AA) into the opening on the vehicle's roof from the exterior. Ensure the base is correctly oriented and seated flush against the roof surface. The design of this genuine Mopar part is intended to fit precisely into the vehicle's factory keyhole cut-out.
- Beveilig die basis: From the interior, thread the mounting nut onto the stud of the new antenna base. Tighten the nut securely, but do not overtighten, as this could damage the base or the vehicle's roof.
- Herkoppel elektriese verbindings: Reconnect the coaxial cable and any other electrical connectors to the new antenna base. Ensure connections are firm and secure.
- Toetsfunksionaliteit: Before reassembling interior trim, reconnect the vehicle's battery and test the radio reception to ensure the antenna base is functioning correctly.
- Hermonteer die afwerking: Carefully reassemble all interior trim panels and the headliner that were removed.
6. Operasie
The Mopar Genuine Antenna Base 68169512AA is a passive component that serves as the mounting point and electrical connection for your vehicle's radio antenna mast. Once installed, it operates continuously to facilitate radio signal reception when a compatible antenna mast is attached. No user interaction is required for its operation beyond ensuring the antenna mast is securely screwed into the base.
7. Onderhoud
The antenna base requires minimal maintenance. Periodically inspect the base for any signs of damage, cracks, or loose connections. Keep the exterior of the base clean from dirt and debris using a soft cloth and mild automotive cleaner. Avoid using harsh chemicals or abrasive materials that could damage the finish or seals.
8. Probleemoplossing
| Probleem | Moontlike oorsaak | Oplossing |
|---|---|---|
| Swak radio-ontvangs |
|
|
| Water leakage around base |
|
|
9. Waarborg en Ondersteuning
For warranty information and customer support regarding your Mopar Genuine Antenna Base 68169512AA, please refer to the official Mopar website or contact your authorized Mopar dealer. Keep your purchase receipt as proof of purchase.
Official Mopar Webwebwerf: www.mopar.com