1. Inleiding
This manual provides detailed instructions for the installation, operation, and maintenance of your Advance Darkside 8303B30 Micro ATX PC Case. Please read this manual thoroughly before beginning installation to ensure proper setup and to maximize the performance and longevity of your system components.
The Advance Darkside ATX Mid-Tower PC case features a top panel with a 2.5/3.5 inch SATA HDD docking station, 2 USB 3.0 ports, and 1 USB 2.0 port. It is designed to accommodate Micro ATX motherboards and offers efficient cooling solutions.
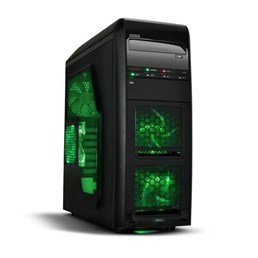
Figuur 1: Voorkant view of the Advance Darkside 8303B30 PC Case, showcasing its design and front panel features.
2. Produkkenmerke
- Model: Advance Darkside 8303B30
- Onderstel materiaal: SGCC Steel
- Kleur: Black (interior and exterior)
- Moederbordversoenbaarheid: Mikro ATX
- Voorpaneelkonnektiwiteit: 2 x USB 3.0, 1 x USB 2.0, Audio Jacks
- Bergingskenmerke: Top panel 2.5/3.5 inch SATA HDD docking station
- Verkoelingstelsel: Five 120mm fans included (two LED fans at the front, one LED fan on the side, one fan at the rear, and one fan at the top). Water cooling ready.
- Graphics Card Support: Designed for King Size graphics cards
- Sypaneel: Plexiglass window
3. Opstelinstruksies
3.1. Voorbereiding van die Saak
- Unpack the PC case carefully and remove all packaging materials.
- Plaas die kas op 'n stabiele, plat oppervlak.
- Remove the side panels by unscrewing the thumbscrews at the rear of the case and sliding the panels backward.
3.2. Installasie van kragtoevoer
- Locate the power supply mounting area at the rear bottom of the case.
- Secure the power supply unit (PSU) using the provided screws. Ensure the PSU fan faces the bottom or top, depending on your PSU and case design for optimal airflow.
3.3. Moederbord Installasie
- Installeer die I/O-skerm in die uitsparing aan die agterkant van die kas.
- Align the motherboard with the standoffs inside the case. Ensure all standoffs match the motherboard's screw holes.
- Bevestig die moederbord met die toepaslike skroewe.
3.4. Installasie van stoorskyf
- For 3.5-inch HDDs, slide the drive into the drive bay trays. The trays are designed to flex slightly to accommodate the drive without screws in some configurations.
- For 2.5-inch SSDs/HDDs, secure them to the designated mounting points or use adapters if necessary.
- Utilize the top panel SATA docking station for quick access to 2.5/3.5 inch SATA drives. Simply insert the drive into the slot until it clicks into place.
3.5. Installasie van grafiese kaart en uitbreidingskaart
- Verwyder die nodige uitbreidingsgleufdeksels aan die agterkant van die kas.
- Insert the graphics card or other expansion cards into the appropriate PCIe slots on the motherboard.
- Secure the cards with screws or retention clips.
3.6. Kabelbestuur
Route all cables (power, SATA, front panel connectors) through the designated cutouts and tie-down points behind the motherboard tray to ensure clean airflow and an organized interior.
4. Bedryfsinstruksies
4.1. Powering On Your System
- Ensure all components are correctly installed and cables are securely connected.
- Koppel die kragkabel aan die PSU en 'n muuraansluiting.
- Press the power button located on the front panel of the case.
4.2. Using Front Panel Ports
- USB 3.0/2.0-poorte: Connect USB devices such as keyboards, mice, external drives, or flash drives.
- Oudio-aansluitings: Connect headphones, microphones, or speakers.
- HDD Docking Station: Insert a 2.5-inch or 3.5-inch SATA HDD/SSD into the top docking slot for quick data access. Ensure the drive is properly seated.
5. Onderhoud
5.1. Cleaning the Case
- Regularly clean the exterior of the case with a soft, damp lap. Vermy skuur skoonmakers.
- Use compressed air to remove dust from fan filters and internal components.
5.2. Onderhoud van waaiers
- Periodically check the case fans for dust buildup. Clean them gently with compressed air or a soft brush.
- Ensure no cables are obstructing fan blades.
6. Probleemoplossing
6.1. Stelsel skakel nie aan nie
- Check if the power cable is securely connected to both the PSU and the wall outlet.
- Maak seker dat die PSU-skakelaar in die 'AAN'-posisie is.
- Verifieer dat die kabel van die voorpaneel se aan/af-knoppie korrek aan die moederbord gekoppel is.
6.2. Oorverhittingsprobleme
- Ensure all case fans are spinning correctly and are not obstructed.
- Check for excessive dust buildup on fans and heatsinks.
- Verify proper cable management to allow for unobstructed airflow.
6.3. Front Panel USB/Audio Not Working
- Confirm that the front panel USB and audio cables are correctly connected to the corresponding headers on the motherboard.
- Check motherboard drivers for USB and audio.
7. Spesifikasies
| Kenmerk | Detail |
|---|---|
| Handelsmerk | Bevorder |
| Modelnommer | 8303B30 |
| Kleur | Swart |
| Onderstel Materiaal | Alloy Steel (SGCC Steel) |
| Moederbordversoenbaarheid | Mikro ATX |
| Afmetings (L x B x H) | 48 x 19.5 x 48.2 cm |
| Produk Gewig | 5.8 kg |
| Voorpaneelpoorte | 2 x USB 3.0, 1 x USB 2.0, Audio Jacks |
| Bergingsdok | Top panel 2.5/3.5 inch SATA HDD docking station |
| Aanhangers ingesluit | 5 x 120mm (2 front LED, 1 side LED, 1 rear, 1 top) |
| Koelondersteuning | Water cooling ready |
| Sypaneel | Plexiglas |
| Aanbevole gebruik | Speletjies |
8. Waarborg en Ondersteuning
8.1. Vervaardigerwaarborg
This product comes with a manufacturer's warranty of 1 year from the date of purchase. Please retain your proof of purchase for warranty claims. The warranty covers defects in materials and workmanship under normal use.
8.2. Kliëntediens
For technical assistance, troubleshooting, or warranty inquiries, please contact Advance customer support. Refer to the official Advance webwebwerf vir die mees onlangse kontakinligting en ondersteuningsbronne.