1. Inleiding en oorview
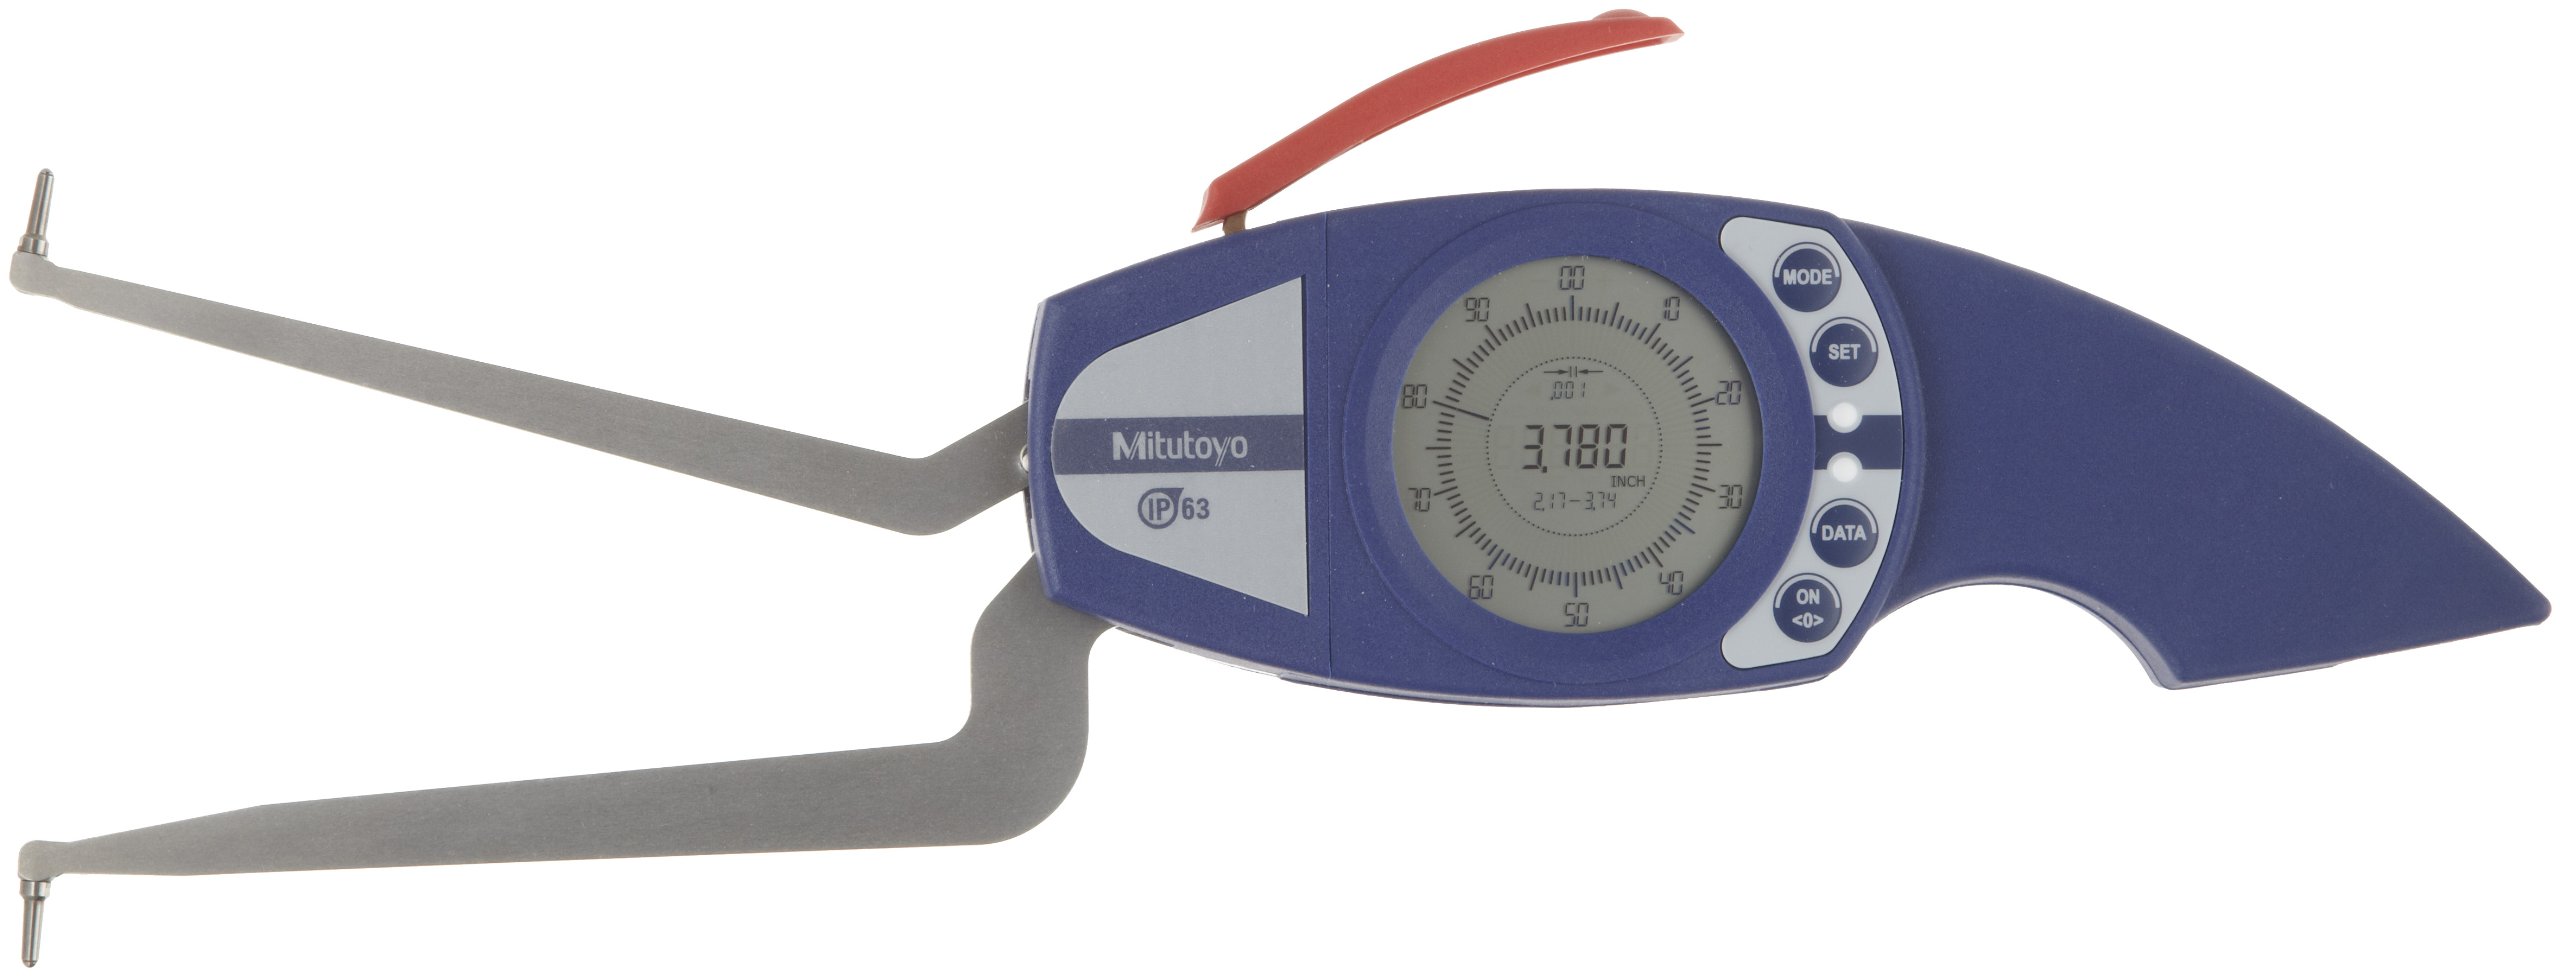
The Mitutoyo 209 series Digimatic internal tube thickness caliper gauge is designed for precise internal dimension (ID) measurements. It features a combination analog/digital LCD display and a large measuring depth, making it suitable for measuring hole diameters, groove thickness, tube thickness, and other hard-to-reach internal dimensions. This model, 209-551, has a measurement range of 0.20-0.59 inches, a resolution of 0.0002 inches, and an accuracy of +/-0.0008 inches. It meets IP67 specifications, indicating resistance to dust and temporary submersion in liquid.
Key features include Statistical Process Control (SPC) data output for transmitting results to a miniprocessor or computer, and an easy-to-read analog/digital LCD readout with selectable inch/metric units. The unit is powered by a single AA battery.
2. Veiligheidsinligting
- Always handle the caliper gauge with care to prevent damage to its precision components.
- Vermy om die instrument te laat val of dit aan harde impakte bloot te stel.
- Do not attempt to disassemble the caliper gauge, as this may void the warranty and cause damage.
- Keep the instrument clean and free from dust, dirt, and corrosive substances.
- Store the caliper gauge in its protective case when not in use, in a dry environment away from direct sunlight or extreme temperatures.
- Ensure the battery compartment is securely closed to maintain IP67 rating.
3. Produkkomponente
The Mitutoyo 209-551 Caliper Gauge consists of the following main parts:
- Pointed Jaws: Designed for internal measurements of holes, grooves, and tubes.
- Hoofliggaam: Houses the electronic components and display.
- LCD-skerm: Shows measurement readings in both analog and digital formats.
- Beheerknoppies:
- AAN/UIT: Skakel die eenheid aan of af.
- WYSE: Switches between measurement modes or functions.
- STEL: Used for setting parameters or presetting values.
- data: Activates data output for SPC.
- Inch/Metric: Toggles between inch and metric measurement units.
- Battery kompartement: Located on the back, for a single AA battery.
4. Opstelling
4.1 Battery installasie
- Locate the battery compartment cover on the rear of the caliper gauge.
- Verwyder die deksel versigtig.
- Insert one AA battery, ensuring correct polarity (+/-) as indicated inside the compartment.
- Replace the battery compartment cover securely to maintain the IP67 rating.
4.2 Aanvanklike skoonmaak
Before first use, gently wipe the measuring surfaces and the main body with a clean, dry, lint-free cloth. Avoid using solvents or abrasive cleaners.
4.3 Power On and Zero Setting
- Druk die AAN/AF button to power on the caliper gauge.
- Ensure the measuring jaws are fully closed and clean.
- Druk die NUL button (often integrated with ON/OFF or a separate button) to set the display to zero. This establishes the reference point for all subsequent measurements.
5. Bedryfsinstruksies
5.1 Krag aan/af
- Druk op die om aan te skakel AAN/AF knoppie.
- Om af te skakel, druk en hou die AAN/AF button for a few seconds, or the unit will automatically power off after a period of inactivity to conserve battery life.
5.2 Inch/Metric Conversion
Druk die Duim/metriek button to switch between imperial (inches) and metric (millimeters) measurement units. The selected unit will be displayed on the LCD.
5.3 Taking an Internal Measurement
- Ensure the caliper is zeroed correctly.
- Carefully insert the pointed jaws into the feature to be measured (e.g., a hole, groove, or tube).
- Open the jaws until they make firm, but not excessive, contact with the internal surfaces.
- Read the measurement directly from the LCD display. The analog scale provides a quick visual reference, while the digital display offers precise numerical values.
- For consistent results, take multiple readings and average them, especially for critical dimensions.
5.4 Data Output (SPC)
The caliper gauge is equipped with a data output port. To transmit measurement data for Statistical Process Control (SPC), connect an appropriate interface cable (sold separately) to the port and to a Mitutoyo miniprocessor or computer. Press the DATA button to send the current reading.
6. Onderhoud
6.1 Skoonmaak
- After each use, wipe down the entire instrument, especially the measuring surfaces, with a clean, dry, lint-free cloth.
- Do not use harsh chemicals, solvents, or abrasive materials, as these can damage the finish or electronic components.
- For stubborn dirt, a cloth lightly dampened with isopropyl alcohol may be used, followed by a dry wipe.
6.2 Berging
- Always store the caliper gauge in its original protective case when not in use.
- Store in a clean, dry environment, away from direct sunlight, high humidity, and extreme temperature fluctuations.
- Ensure the jaws are slightly open (not fully closed) to prevent stress on the measuring surfaces during long-term storage.
6.3 Batteryvervanging
When the battery indicator appears on the LCD, replace the AA battery as described in Section 4.1. Prompt replacement ensures continuous accurate operation.
6.4 Kalibrasie
For maintaining optimal accuracy, periodic professional calibration by an authorized Mitutoyo service center or a certified calibration laboratory is recommended. The frequency of calibration depends on usage and environmental conditions.
7. Probleemoplossing
| Probleem | Moontlike oorsaak | Oplossing |
|---|---|---|
| Vertoning skakel nie aan nie. | Dooie of verkeerd geïnstalleerde battery. | Vervang die battery en maak seker dat die polariteit korrek is. |
| Onakkurate of teenstrydige lesings. |
|
|
| Display shows "Low Battery" indicator. | Battery raak min. | Replace the AA battery immediately. |
8. Spesifikasies
| Kenmerk | Detail |
|---|---|
| Modelnommer | 209-551 |
| Meetreeks | 0.20 - 0.59 duim |
| Resolusie | 0.0002 duim |
| Meting Akkuraatheid | +/-0.0008 duim |
| Meetstelsel | Duim/metriek |
| IP-gradering | IP67 (Dust and temporary submersion resistant) |
| Kragbron | 1 x AA-battery |
| Materiaal | Vlekvrye staal |
| Spesiale kenmerke | Data Output (SPC) |
| Item gewig | 454 g |
| Pakkie Dimensies | 20.32 x 17.02 x 8.13 cm |
9. Waarborg en Ondersteuning
For warranty information, technical support, or service inquiries regarding your Mitutoyo 209-551 Digimatic Caliper Gauge, please contact your authorized Mitutoyo dealer or visit the official Mitutoyo website. Please have your model number and purchase details available when seeking support.