REED PPR300
REED PPR300 3-Inch Plastic Pipe Fitting Reamer Instruction Manual
Model: PPR300
1. Inleiding
This manual provides essential instructions for the safe and effective use of the REED PPR300 3-Inch Plastic Pipe Fitting Reamer. This tool is designed to remove broken or excess plastic pipe material from fittings, allowing for reuse of the fitting.
2. Veiligheidsinligting
Always prioritize safety when operating any power tool. Failure to follow these instructions may result in injury or damage to the tool or property.
- Dra gepaste persoonlike beskermende toerusting, insluitend veiligheidsbril en handskoene.
- Maak seker dat die werkstuk veilig is clampvasgehou of vasgehou om beweging tydens operasie te voorkom.
- Hou hande en los klere weg van roterende dele.
- Use the reamer only with compatible drills (standard, cordless, or impact drills).
- WAARSKUWING: PPR Fitting Reamers are NIE recommended for use on pressurized systems.
- Do not force the tool. Allow the reamer to cut at its own pace.
- Disconnect the drill from its power source before changing accessories or performing maintenance.
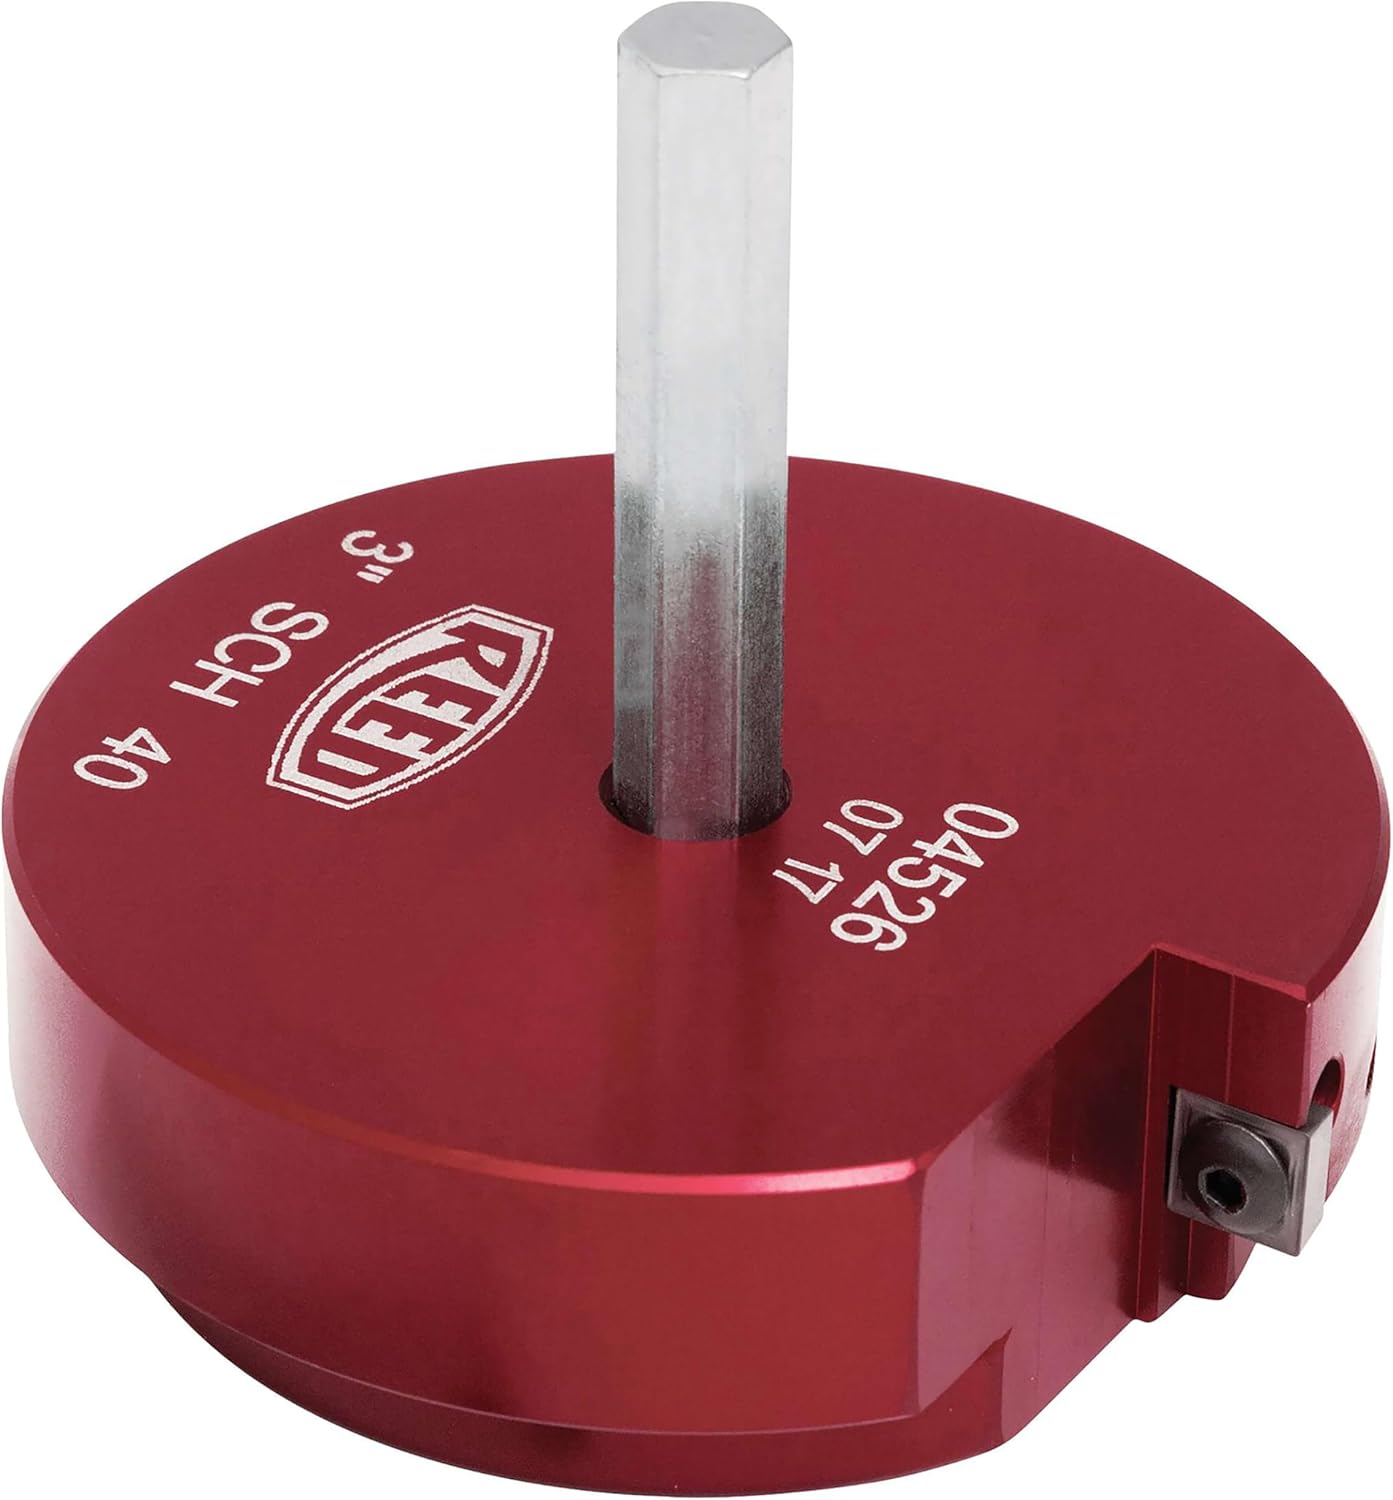
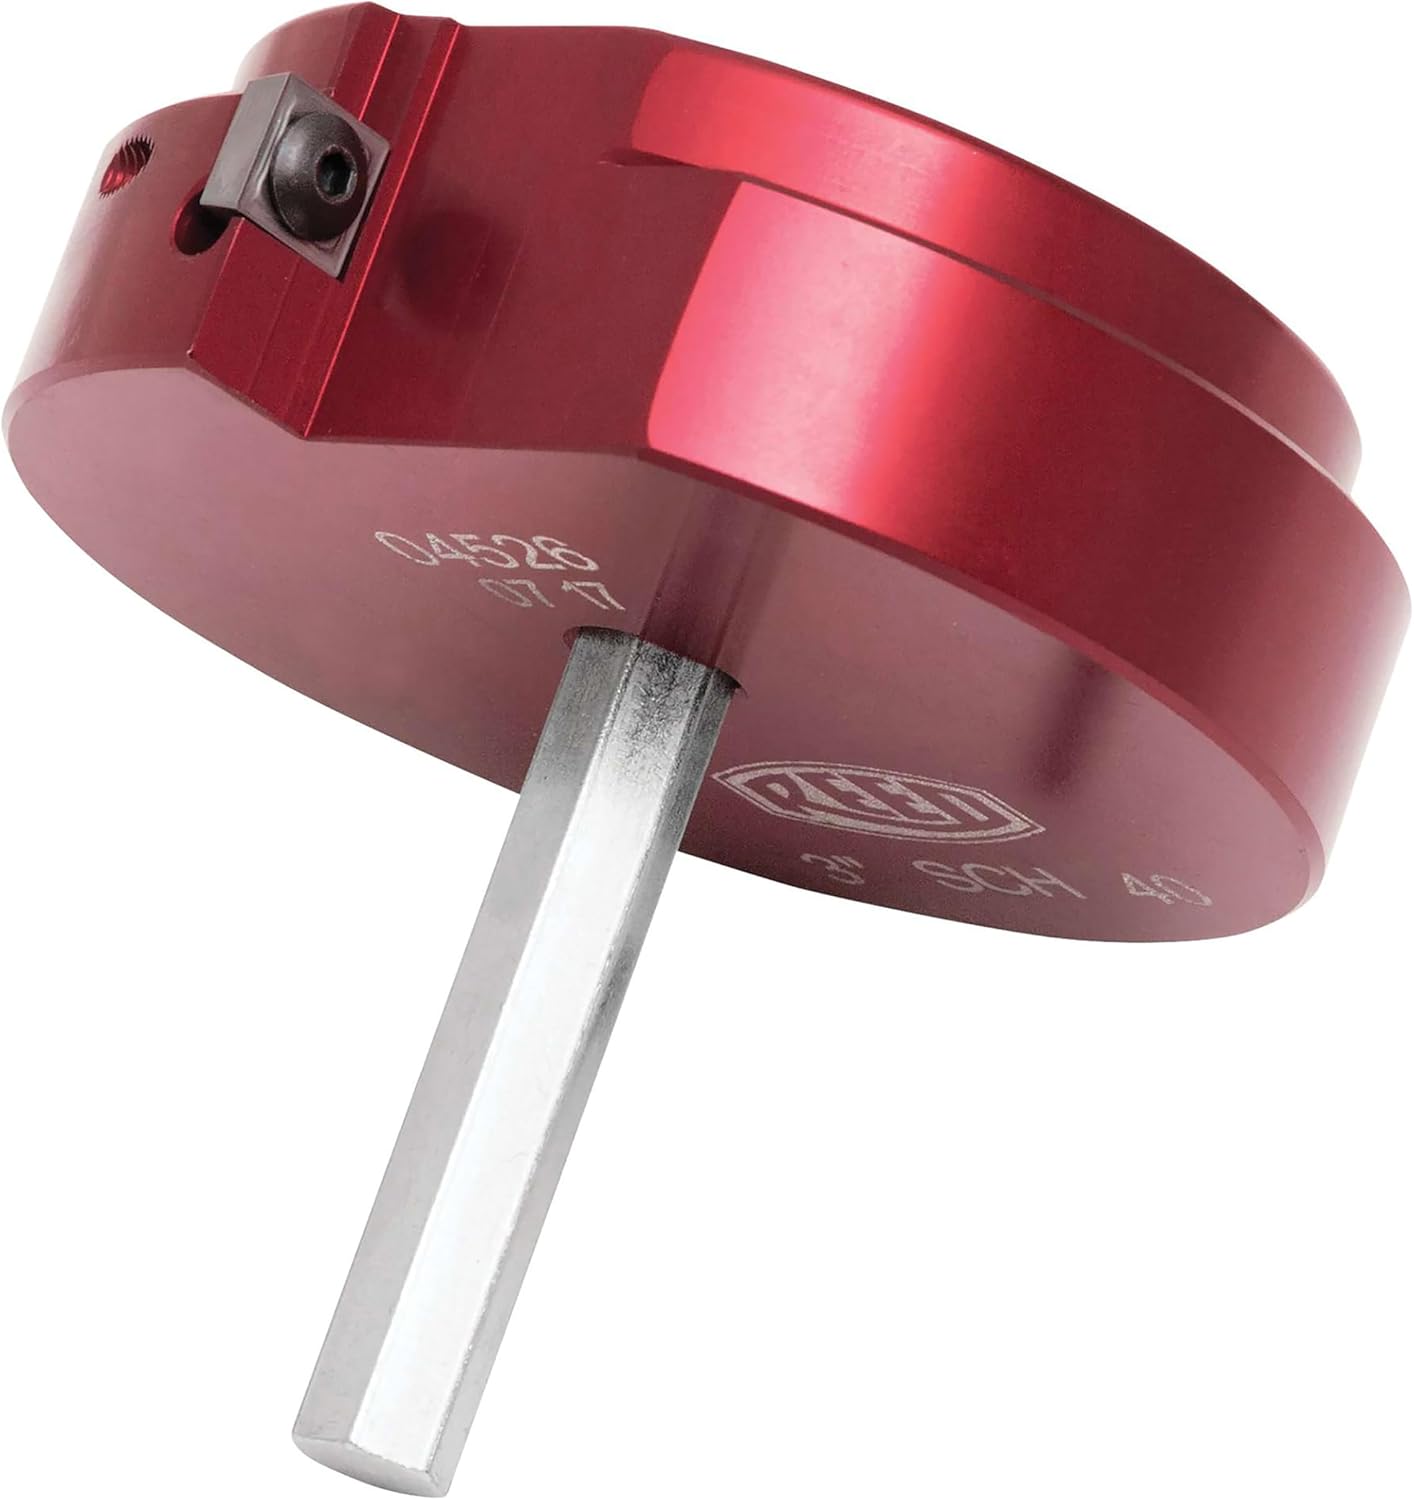
3. Produkkenmerke
- Reams 3-Inch Schedule 40 PVC, CPVC, and ABS fittings.
- Compatible with standard drills, cordless drills, and impact drills.
- Effective for vent lines, drain lines, and water lines (non-pressurized).
- Features a 4-sided carbide insert for extended cutting life.
4. Opstelling
- Berei die pyp voor: Before reaming, cut the broken pipe flush with the fitting. A hacksaw or battery grinder with a metal cutting blade can be used for this. Ensure the cut is as flat as possible.
- Voeg in boor in: Securely insert the reamer's hexagonal shank into the chuck of your drill. Ensure the chuck is tightened firmly to prevent slippage. A 1/2-inch drill is recommended for better grip, though a 3/8-inch drill may also work.
- Secure the Fitting: If possible, secure the fitting to prevent it from moving during the reaming process. For vertical pipes, ensure stability.
5. Bedryfsinstruksies
- Aanvanklike plasing: Carefully center the reamer over the pipe stub inside the fitting.
- Drill Speed and Pressure: Set your drill to a low speed. Apply light, consistent pressure. Avoid excessive force, as this can cause the tool to jump or melt the plastic instead of cutting.
- Smering: To prevent the plastic from melting and to ensure a clean cut, lubricate the reamer with cold water periodically during operation. Dribble cold water onto the cutting head.
- Clear Shavings: Frequently lift the reamer in and out of the fitting to clear plastic shavings. For vertical pipes, use a shop vacuum to remove shavings and prevent them from falling into the drain system.
- Monitor Depth: Do not ream all the way through the fitting. Leave approximately 1/8 to 3/16 of an inch of the original socket at the bottom. This provides a stop for the new pipe and helps maintain the integrity of the connection.
- Gladde afwerking: The reamer is designed to leave a smooth surface. After reaming, inspect the fitting for any rough edges.
6. Onderhoud
- Carbide Insert Rotation: The PPR300 features a 4-sided carbide insert. If the cutting edge becomes dull, rotate the insert 180 degrees to expose a fresh cutting edge. Use the provided hex key for this procedure.
- Skoonmaak: After each use, clean the reamer to remove any plastic residue. This helps maintain its cutting efficiency and extends its lifespan.
- Berging: Store the reamer in a dry place to prevent corrosion and damage.

7. Probleemoplossing
| Probleem | Moontlike oorsaak | Oplossing |
|---|---|---|
| Reamer not cutting effectively or melting plastic. | Dull cutting edge, insufficient lubrication, excessive speed. | Rotate carbide insert to a fresh edge. Apply cold water lubrication. Reduce drill speed. |
| Tool jumps or vibrates excessively. | Loose in drill chuck, uneven pressure, unsecured workpiece. | Ensure reamer is tightly secured in drill chuck. Apply even, light pressure. Secure the fitting. |
| Plastic shavings accumulate and hinder cutting. | Normal operation, but not clearing debris. | Periodically lift the reamer to clear shavings. Use a shop vacuum for vertical applications. |
8. Spesifikasies
| Model | PPR300 |
| Reaming Capacity | 3-Inch Schedule 40 PVC, CPVC, ABS Fittings |
| Materiaal | Plastic (body), Carbide (insert) |
| Kleur | Rooi |
| Afmetings (L x B x H) | 3 x 3 x 3 duim |
| Item gewig | 1.1 pond |
| Vervaardiger | Standaard Loodgietersvoorraad |
| UPC | 757033045262 |
9. Waarborg en Ondersteuning
The REED PPR300 Reamer is designed for durability and performance. It is guaranteed for 1,000 reams under normal operating conditions.
For technical support or inquiries, please refer to the official REED website or contact your authorized dealer. Contact information is not provided in this manual.
Ask a question about this manual
Ask about setup, troubleshooting, compatibility, parts, safety, or missing instructions. Manuals+ will review the question and use this page’s manual context to help answer it.