Inleiding
This manual provides essential information for the safe and effective operation of your Laserliner SoundTest-Master 082.070A Noise Level Meter. Please read these instructions carefully before using the device and keep them for future reference. The SoundTest-Master 082.070A is designed for precise measurement of noise levels, featuring integrated long-term memory and PC connectivity for comprehensive documentation.
Veiligheidsinstruksies
- Always operate the device within its specified environmental conditions.
- Moenie die toestel aan uiterste temperature, humiditeit of direkte sonlig blootstel nie.
- Vermy om die toestel te laat val of om dit aan sterk impakte te onderwerp.
- Do not attempt to open or modify the device. Repairs should only be performed by authorized personnel.
- Hou die toestel weg van sterk magnetiese velde.
- Ensure the microphone is clean and free from obstructions for accurate measurements.
Produk verbyview
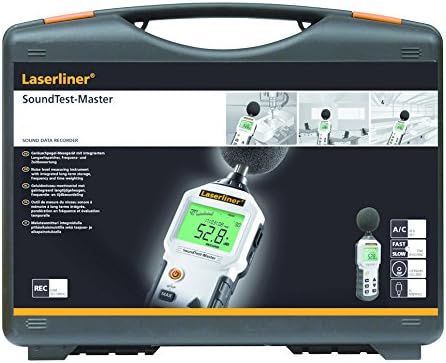
The Laserliner SoundTest-Master 082.070A is a handheld noise level meter equipped with a sensitive electret condenser microphone and a clear, illuminated display. It features various controls for measurement settings and data management.

Figuur 1: Voorkant view of the SoundTest-Master 082.070A, showing the display, microphone with windshield, and control buttons.
Sleutelkomponente:
- Electret Condenser Microphone: For capturing sound. Includes a removable windshield.
- Verligte skerm: Shows measurement values, settings, and status.
- Beheerknoppies: Power, Setup, Max, Record, A/C weighting, Fast/Slow time weighting, Level adjustment, Data send.
- Analoog uitsette: DC and AC outputs for external connections.
- RS232-koppelvlak: Optoisolated port for PC connection and data transfer.
Opstelling
1. Battery Installasie
The device requires batteries for operation. Ensure correct polarity when inserting batteries into the compartment, typically located on the rear of the unit.
2. Aanvanklike Aanskakeling
Druk die Krag button to turn on the device. The display will illuminate and show initial readings.
3. Windshield Attachment
Attach the removable windshield to the microphone to minimize wind noise interference during outdoor measurements.
Bedryfsinstruksies
1. Basiese Meting
- Skakel die toestel aan met behulp van die Krag knoppie.
- Point the microphone towards the sound source.
- The current noise level will be displayed in decibels (dB).
2. Frequency Weighting (dB(A), dB(C))
Gebruik die A/C button to switch between frequency weighting curves:
- dB (A): Simuleer die menslike oor se reaksie op klank, wat algemeen gebruik word vir omgewingsgeraasmetings.
- dB(C): Provides a flatter response, suitable for measuring peak sound pressure levels or low-frequency noise.
3. Time Weighting (Fast/Slow)
Druk die VINNIG/STADIG button to select the desired time weighting:
- FAST (125 ms): For measuring rapidly changing noise levels.
- SLOW (1 second): For measuring average noise levels over a longer period, suitable for stable noise sources.
4. Data Logging and PC Connection
The device features a long-term recording function with 16,000 memory points and real-time logging capabilities when connected to a PC.
- Internal Data Logging: Druk die REKORD button to start/stop internal data recording. The device can store up to 16,000 measurement points.
- PC-verbinding: Connect the device to a computer using the provided RS232 cable.
- Sagteware: Install the provided software on your PC. This software allows for real-time data display, analysis, and download of recorded data.
- Stuur data: Gebruik die STUUR DATA button to initiate data transfer to the connected PC.
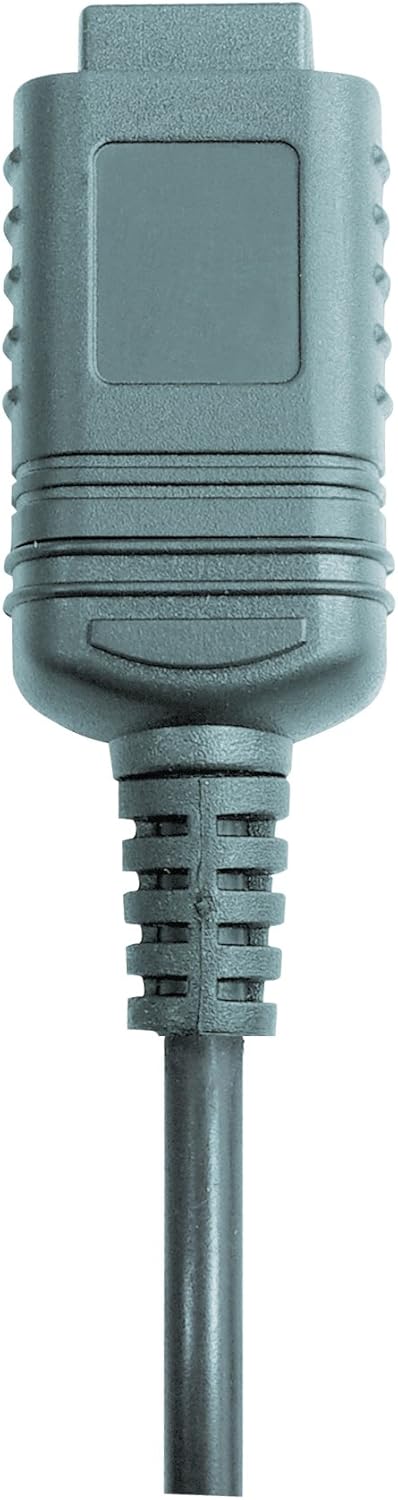

Figuur 2: RS232 cable connectors used for connecting the SoundTest-Master to a PC.
5. Kalibrasie
The device can be calibrated and adjusted using a standard noise level calibrator (94 dB / 1 kHz). Refer to the calibrator's instructions for the specific calibration procedure.
Onderhoud
1. Skoonmaak
- Vee die toestel c afasing met 'n sagte, droë lap.
- Moenie skuur skoonmaakmiddels of oplosmiddels gebruik nie.
- Ensure the microphone is kept clean and free of dust or debris.
2. Berging
When not in use, store the SoundTest-Master in its protective case in a cool, dry place, away from direct sunlight and extreme temperatures. Remove batteries if storing for extended periods.
Figuur 3: The SoundTest-Master 082.070A stored in its protective carrying case.
Probleemoplossing
| Probleem | Moontlike oorsaak | Oplossing |
|---|---|---|
| Toestel skakel nie aan nie. | Dooie of verkeerd geïnstalleerde batterye. | Vervang batterye en maak seker dat die polariteit korrek is. |
| Onakkurate lesings. | Microphone obstructed or dirty; device needs calibration. | Clean microphone; perform calibration with a standard calibrator. |
| No data transfer to PC. | Incorrect cable connection; software not installed or configured. | Check RS232 cable connection; ensure PC software is correctly installed and running. |
| Die skerm is dof of onleesbaar. | Low battery power; display backlight off. | Replace batteries; check device settings for backlight control. |
Spesifikasies
| Kenmerk | Detail |
|---|---|
| Model Naam | SoundTest-Master |
| Deelnommer | 082.070A |
| Vervaardiger | Umarex |
| Handelsmerk | laserliner |
| Frekwensie-gewig | dB(A), dB(C) |
| Tydgewig | FAST (125 ms), SLOW (1 second) |
| Data geheue | 16,000 XNUMX meetpunte |
| Koppelvlak | Optoisolated RS232 |
| Analoog uitsette | DC en AC |
| Kalibrasie | Adjustable with 94 dB / 1 kHz standard calibrator |
| Mikrofoon | Sensitive electret condenser with removable windshield |
| Vertoon | Illuminated, clear display |
| Item gewig | 1.18 kilogram (2.6 pond) |
| Produk afmetings | 10.33 x 5.51 x 13.78 duim |
| Materiaal | Metal (Frame, Barrel) |
| Kleur | Swart en Grys |
| Batterye benodig | Yes (not included, type not specified in data) |
Waarborg en Ondersteuning
For warranty information and technical support, please refer to the documentation included with your purchase or visit the official Laserliner webwebwerf.