1. Inleiding
This manual provides essential information for the installation, operation, and maintenance of the Pentair 190059 Rear Mount Pressure Gauge. This gauge is designed as a replacement part for various Pentair pool and spa filter systems, providing accurate pressure readings to help monitor filter performance.
Understanding your filter system's pressure is crucial for efficient operation and timely maintenance. This gauge helps indicate when your filter requires cleaning or backwashing.
2. Produkversoenbaarheid
The Pentair 190059 Rear Mount Pressure Gauge is compatible with a range of Pentair pool and spa filter systems, including:
- Pentair Star Polymeric, FNS, SM & SMBW 4000/2000 Series, Nautilus, Nautilus Plus, and Star pool and spa D. E. filters.
- Pentair Meteor, Sand Dollar, Meteor Top Mount, Tagelus, Tagelus II pool and spa sand filters.
- Pentair Sta-Rite Cristal-Flo II high-rate sand filters.
- Pentair Triton C-3 pool and spa commercial filter models TR100C, TR140C and Six-way 1-1/2-inch HiFlow valves.
Always verify your specific filter model against this compatibility list before installation.
3. Installasie-instruksies
Proper installation is critical for accurate readings and product longevity. If you are unsure about any step, consult a qualified pool technician.
- Veiligheid eerste: Before beginning any work, ensure the pool or spa pump system is turned off and disconnected from its power source to prevent accidental startup.
- Verlig druk: Open the air relief valve on your filter to release any trapped air and pressure from the system. Wait until all pressure is relieved.
- Verwyder ou meter: Carefully unscrew the old pressure gauge from its port. An open-ended wrench may be required. Be prepared for a small amount of water to escape.
- Berei nuwe meter voor: Apply thread sealant, such as Teflon tape, to the threaded connection of the new Pentair 190059 pressure gauge. Wrap the tape clockwise around the threads for a secure, watertight seal.
- Install New Gauge: Hand-tighten the new gauge into the port. Once hand-tight, use a wrench to gently tighten it further, ensuring it is snug but not overtightened. Overtightening can damage the gauge or the filter housing.
- Restore System: Close the air relief valve. Reconnect the pump to its power source and turn the system back on. Check for any leaks around the newly installed gauge.
Beeld: Agter view of the Pentair 190059 pressure gauge, highlighting the threaded brass connection point for secure installation into the filter system.
4. Operation and Reading the Gauge
The pressure gauge provides a visual indication of the pressure within your filter system, measured in PSI (pounds per square inch) and Bar. The needle on the gauge will move to indicate the current pressure.
- Initial Pressure: After a thorough cleaning or backwashing of your filter, note the pressure reading. This is your 'clean filter' operating pressure.
- Moniteringsdruk: As your filter collects debris, the pressure inside the system will gradually increase. Regularly check the gauge to monitor this increase.
- Filter Maintenance Indication: When the pressure reading rises 8-10 PSI (or approximately 0.5-0.7 Bar) above your 'clean filter' pressure, it indicates that your filter needs cleaning or backwashing. Refer to your filter system's manual for specific maintenance procedures.

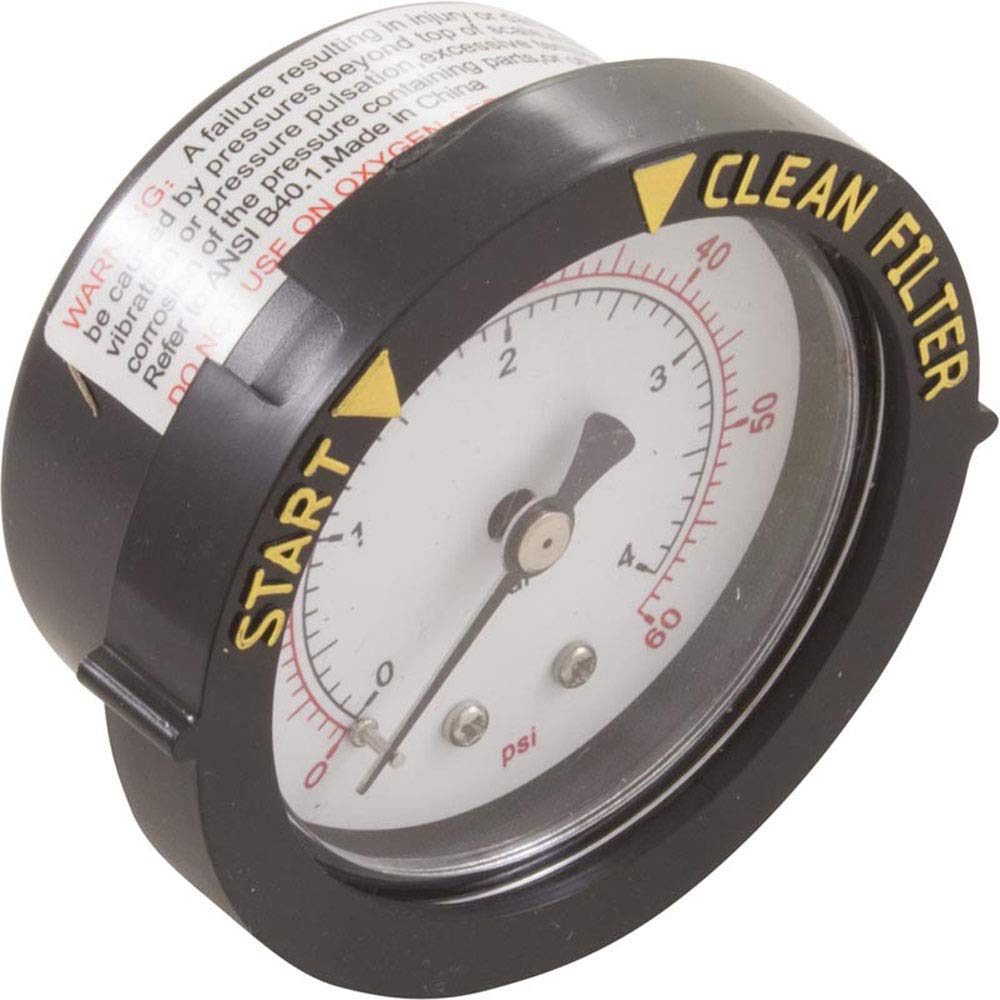
Image: Front face of the Pentair 190059 pressure gauge, displaying the PSI and Bar measurement scales. Markings for 'START' and 'CLEAN FILTER' are visible, aiding in quick assessment of filter status.
5. Onderhoud en versorging
The Pentair 190059 pressure gauge is designed for durability, but proper care can extend its lifespan and ensure continued accuracy.
- Gereelde inspeksie: Periodically inspect the gauge for any visible damage, cracks in the casing, or signs of moisture intrusion.
- Netheid: Keep the gauge face clean from dirt, dust, and chemical residue to ensure clear readability. Use a soft, damp lap vir skoonmaak. Vermy skuurmiddels.
- Omgewingsfaktore: While designed for outdoor use, extreme weather conditions can affect any equipment. Ensure the gauge is not subjected to direct, prolonged exposure to harsh chemicals or physical impact.
6. Probleemoplossing
If you encounter issues with your pressure gauge, consider the following:
- Onakkurate lesings: If the gauge consistently shows incorrect pressure (e.g., zero when the pump is running, or a fixed reading regardless of filter condition), the gauge may be faulty and require replacement.
- Condensation Inside Gauge: The presence of condensation or water droplets inside the gauge face can occur over time, especially in humid environments or due to temperature fluctuations. While some gauges may continue to function, significant condensation can impair readability and may indicate a compromised seal, potentially leading to premature failure. If condensation persists or affects readability, consider replacing the gauge.
- No Pressure Reading: Ensure the pump is running and the filter system is properly primed. If there's still no reading, check for blockages in the pressure port or a completely failed gauge.
7. Spesifikasies
| Spesifikasie | Detail |
|---|---|
| Handelsmerk | Pentair |
| Modelnommer | 190059 |
| Montage tipe | Agterste berg |
| Materiaal | Duursame materiale |
| Itemafmetings (L x B x H) | 9 x 7 x 2.5 duim |
| Item gewig | 9.07 g |
| UPC | 788379704353 |
8. Veiligheidsinligting
Proposisie 65 Waarskuwing: Hierdie produk mag chemikalieë bevat wat volgens die staat Kalifornië kanker, geboortedefekte of ander reproduktiewe skade kan veroorsaak. Vir meer inligting, besoek www.P65Warnings.ca.gov.
Always exercise caution when working with pool and spa equipment. Ensure all power is disconnected before performing any maintenance or installation. Follow all local codes and safety guidelines.
9. Ondersteuning en waarborg
For technical assistance, troubleshooting beyond this manual, or warranty inquiries, please contact Pentair customer support directly. Refer to the official Pentair webwebwerf of produkverpakking vir die mees onlangse kontakinligting.
Keep your purchase receipt and any product registration information for warranty purposes.