1. Opstelling
1.1 Uitpak en Aanvanklike Inspeksie
Carefully remove your ASUS K52F-A2B laptop from its packaging. Inspect the laptop and all accessories for any signs of damage. The package should contain the laptop, AC adapter, power cord, and documentation.
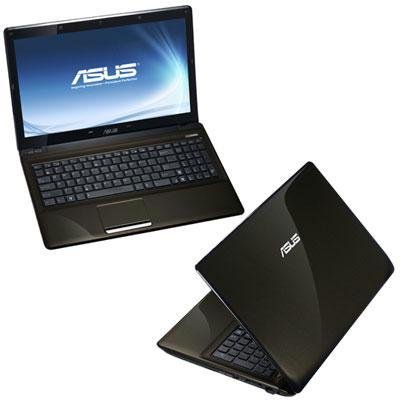
Image 1.1: The ASUS K52F-A2B laptop. This image shows the closed laptop from an angle, highlighting its dark brown finish and sleek design.
1.2 Koppel die AC-adapter
Before initial use, connect the AC adapter to the laptop and a power outlet. This ensures the battery is charged and provides stable power for setup.
- Steek die wisselstroomadapter in die kragaansluiting aan die kant van jou skootrekenaar.
- Steek die kragkabel in die WS-adapter.
- Steek die ander kant van die kragkabel in 'n geaarde elektriese aansluiting.
1.3 Aanvanklike aanskakeling
Once the AC adapter is connected, open the laptop lid and press the power button. The laptop will begin its initial boot sequence. Follow the on-screen instructions to complete the operating system setup (Windows 7 Professional 64-bit).
2. Operating Your ASUS K52F-A2B Laptop
2.1 Aan/Af en Slaapmodus
- Krag aan: Druk die aan/af-knoppie wat bo die sleutelbord geleë is.
- Skakel af: Click the Start button, then select 'Shut down'.
- Slaap stelling: Close the laptop lid or select 'Sleep' from the Start menu. Press the power button or any key to wake the laptop.
2.2 Gebruik van die sleutelbord en raakvlak
The ASUS K52F-A2B features a full-sized keyboard and a multi-touch touchpad.
- Sleutelbord: Standard QWERTY layout with function keys (Fn) for brightness, volume, and other system controls.
- Raakblad: Supports multi-touch gestures for scrolling, zooming, and navigation. Refer to the operating system's help for detailed gesture information.
2.3 Eksterne Toestelle Koppel
Your laptop provides various ports for connecting external devices:
- USB-poorte: Vir die koppeling van USB-toestelle soos muise, sleutelborde en eksterne berging.
- HDMI-poort: Connects to external displays or TVs for high-definition video and audio output.
- VGA-poort: Connects to older external monitors or projectors.
- Oudio-aansluitings: Vir oorfone en mikrofone.
- Ethernet-poort: Vir bedrade netwerkverbindings.
2.4 Using the Optical Disk Drive
The laptop includes a Super Multi Optical Disk Drive for reading and writing CDs and DVDs.
- Druk die uitwerpknoppie op die skyf om die skinkbord oop te maak.
- Plaas 'n CD of DVD op die laai met die etiketkant na bo.
- Gently push the tray back into the laptop until it clicks shut.
3. Onderhoud
3.1 Maak jou skootrekenaar skoon
Gereelde skoonmaak help om die skootrekenaar se voorkoms en funksionaliteit te behou.
- Skerm: Gebruik 'n sagte, pluisvrye lap liggies dampmet water of 'n skermreiniger afgespoel. Moenie vloeistof direk op die skerm spuit nie.
- Sleutelbord en Casing: Gebruik 'n sagte, droë lap. Vir hardnekkige vuiligheid, vee 'n lap liggies af.ampened with mild soap and water can be used. Ensure the laptop is powered off and unplugged before cleaning.
- Ventilasies: Use compressed air to clear dust from the cooling vents to prevent overheating.
3.2 Batterysorg
Om batterylewe en werkverrigting te maksimeer:
- Vermy om die battery gereeld heeltemal te ontlaai.
- Bêre die skootrekenaar op 'n koel, droë plek wanneer dit nie vir lang tye gebruik word nie.
- As dit vir 'n lang tyd gestoor word, laai die battery tot ongeveer 50% voor berging.
3.3 Sagteware-opdaterings
Dateer jou bedryfstelsel en drywers gereeld op om optimale werkverrigting en sekuriteit te verseker. Gaan die ASUS-ondersteuning na. website for the latest drivers for your K52F-A2B model.
4. Probleemoplossing
This section addresses common issues you might encounter with your ASUS K52F-A2B laptop.
4.1 Kragprobleme
- Skootrekenaar skakel nie aan nie: Ensure the AC adapter is securely connected to both the laptop and a working power outlet. Check if the power outlet is functional. If the battery is completely drained, allow it to charge for a few minutes before attempting to power on.
- Laptop shuts down unexpectedly: This could indicate overheating. Ensure cooling vents are clear and the laptop is on a hard, flat surface.
4.2 Vertoonprobleme
- Geen vertoon op die skerm nie: Connect an external monitor to the VGA or HDMI port to check if the issue is with the laptop's internal display. Press Fn+F8 to toggle display output modes.
- Dowwe skerm: Adjust screen brightness using the Fn+F5 (dim) and Fn+F6 (bright) function keys.
4.3 Konnektiwiteitsprobleme
- Wi-Fi verbind nie: Ensure Wi-Fi is enabled (often via a function key, e.g., Fn+F2). Check network settings in Windows.
- USB-toestel nie herken nie: Try connecting the device to a different USB port. Ensure device drivers are installed.
4.4 Operating System Recovery
The ASUS K52F-A2B comes with Windows 7 Professional. For system recovery or reinstallation, it is recommended to use the recovery partition or create recovery media as instructed by ASUS. Note that official support for downgrading to Windows XP Pro may be limited, and recovery media for Windows 7 Pro might need to be created by the user.
5. Tegniese spesifikasies
| Kenmerk | Spesifikasie |
|---|---|
| Modelnommer | K52F-A2B |
| Verwerker | Intel Core i3-350M (2.26 GHz) |
| Bedryfstelsel | Windows 7 Professional 64-bis |
| Vertoon | 15.6-inch HD (1366x768) LED |
| Grafika | Intel GMA HD (Integrated) |
| RAM geheue | 3 GB DDR3 1066MHz (Max 8GB) |
| Berging | 320 GB Hard Drive (5400 RPM) |
| Optiese aandrywing | DVD SuperMulti |
| Draadlose konneksie | 802.11bgn |
| Hawens | HDMI, VGA, USB, Audio Jacks |
| Webnok | 0.3 MP |
| Gewig | 5.8 pond |
6. Waarborg en Ondersteuning
6.1 Waarborginligting
Your ASUS K52F-A2B laptop comes with the following warranty coverage:
- 2-jaar globale waarborg
- 1-Year Accidental Damage Warranty
- 30-Day Zero Bright Dot Guarantee
- 2-way FREE shipping for repairs
6.2 Tegniese Ondersteuning
Vir tegniese bystand, dryweraflaaie of verdere inligting, besoek asseblief die amptelike ASUS-ondersteuning website. 24/7 technical support is available as part of your warranty.
For the most up-to-date support contact information, please refer to the documentation included with your product or visit www.asus.com/support.